
Getting Started
Learn to create and run your first solution in Rider.
This guide is for folks looking to explore the possibility of adopting Rider as their primary development environment.
In this first step on your journey, migrating from Visual Studio to Rider, we'll walk through creating a new Console Application solution and running it in Rider. We'll explain elements along the way and compare them to what you may be familiar with as a Visual Studio user.
We understand that you've likely spent most of your .NET development career working with Visual Studio and ReSharper. For the adventurous, start by opening existing solutions, looking through menus, and finding the Rider UI elements that feel familiar. Rider is compatible with most solutions, meaning it takes very little to no effort to get started.
All developers can benefit from reading this quick start guide, and if you have used ReSharper before, you'll be at home quickly; as you'll see, there are many similarities. This guide covers common topics from a high-level perspective. For detailed information about any particular subject, we suggest going to the official JetBrains documentation for more in-depth details.
Let's get started!
Download and Install Rider and the .NET SDK
To get started, you will need a couple of things first: Rider itself, and the .NET SDK.
You can download and install Rider from our website, or use the Toolbox App that makes it more convenient to update the IDE or install multiple versions side-by-side.
Note: To work with .NET 6, you will need the Rider 2021.3 Early Access Preview (EAP).
Next, download the .NET SDK. You will find downloads for Windows, macOS and Linux. Make sure to install the SDK, not just the runtime - the SDK contains all the compiler and build tools to develop in .NET.
Import Settings From Existing Environments
A New Import Settings feature is included with the JetBrains Rider 2021.2 release. As a first-time Rider user, you will have the option to import settings from other development tools, such as Visual Studio, Visual Studio for Mac, and Visual Studio Code. In addition, the Rider import process will recognize settings from your current installation of ReSharper.
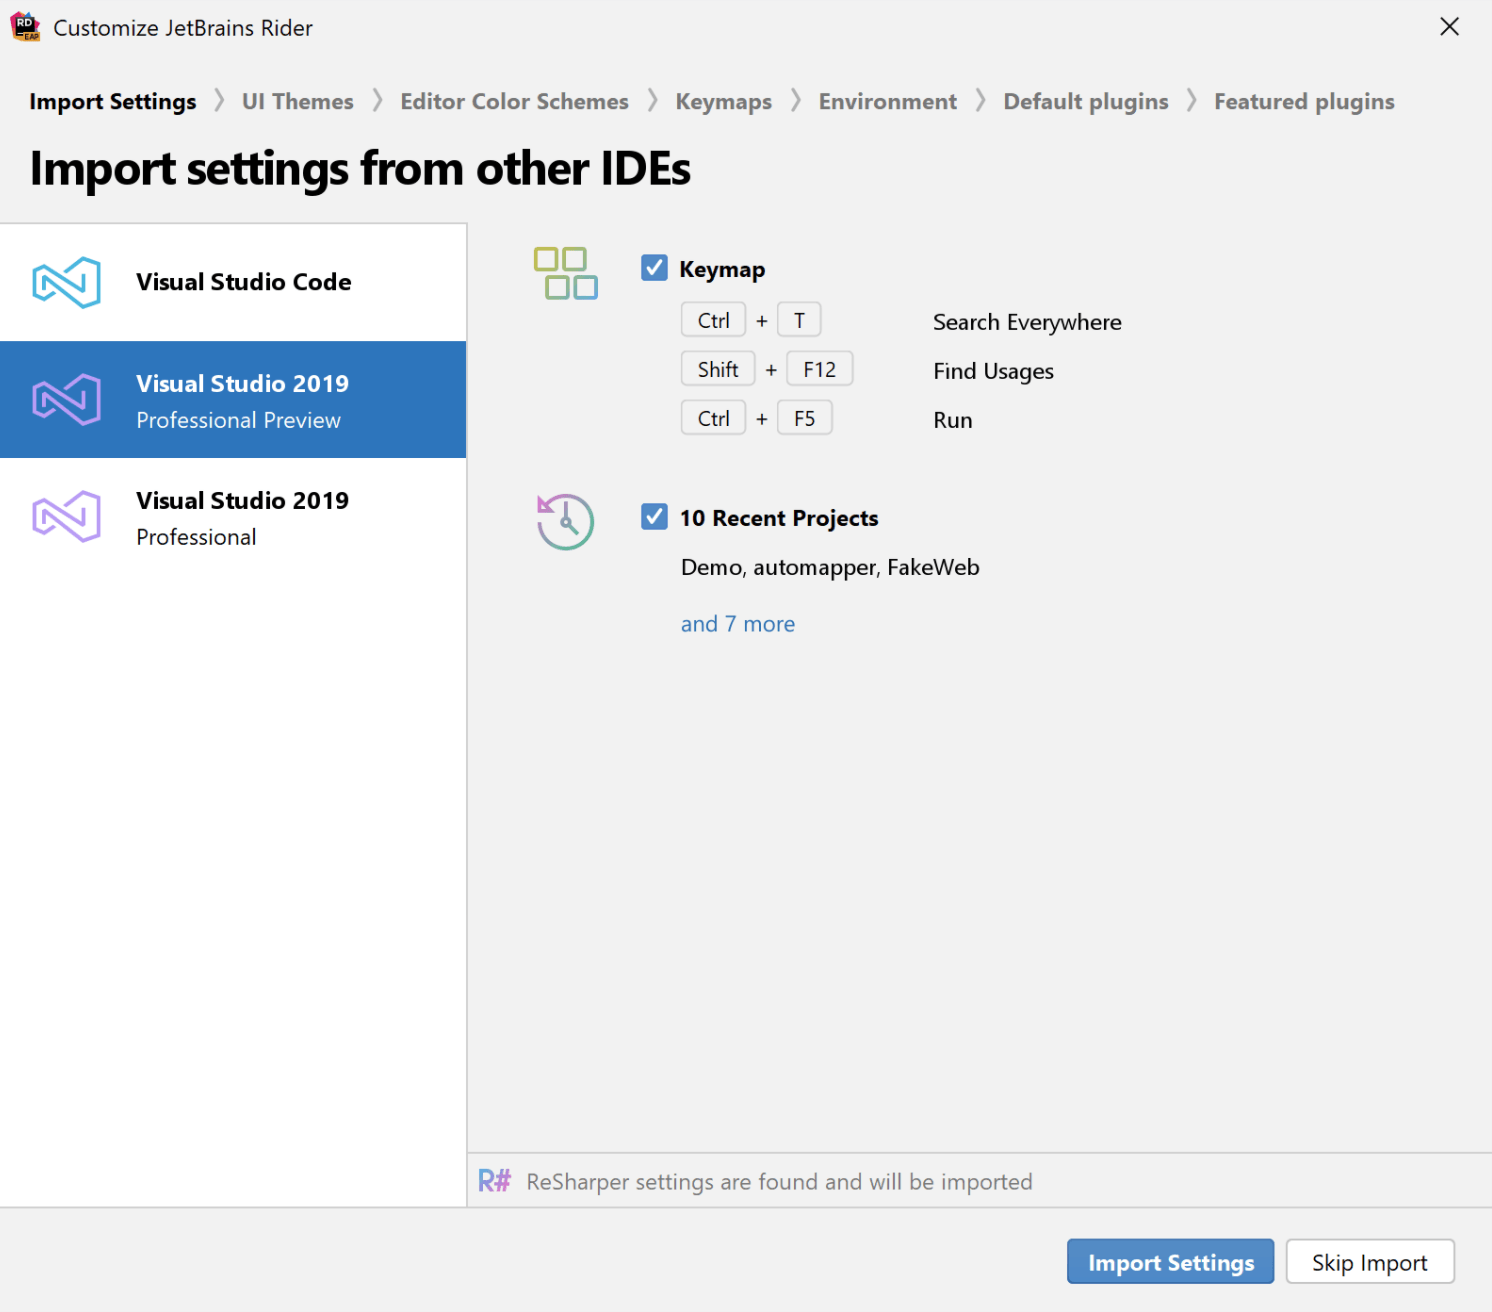
Using the import settings feature, you can expect to import existing keymaps and keyboard shortcuts, recently used solutions, and current theme preferences (dark mode or light mode). Rider will also find the best plugins that match the existing functionality you're used to using. JetBrains continually evaluates the plugin recommendations based on the best options from the JetBrains Plugins Marketplace.
If you'd prefer to start with a fresh installation, continue reading the following sections.
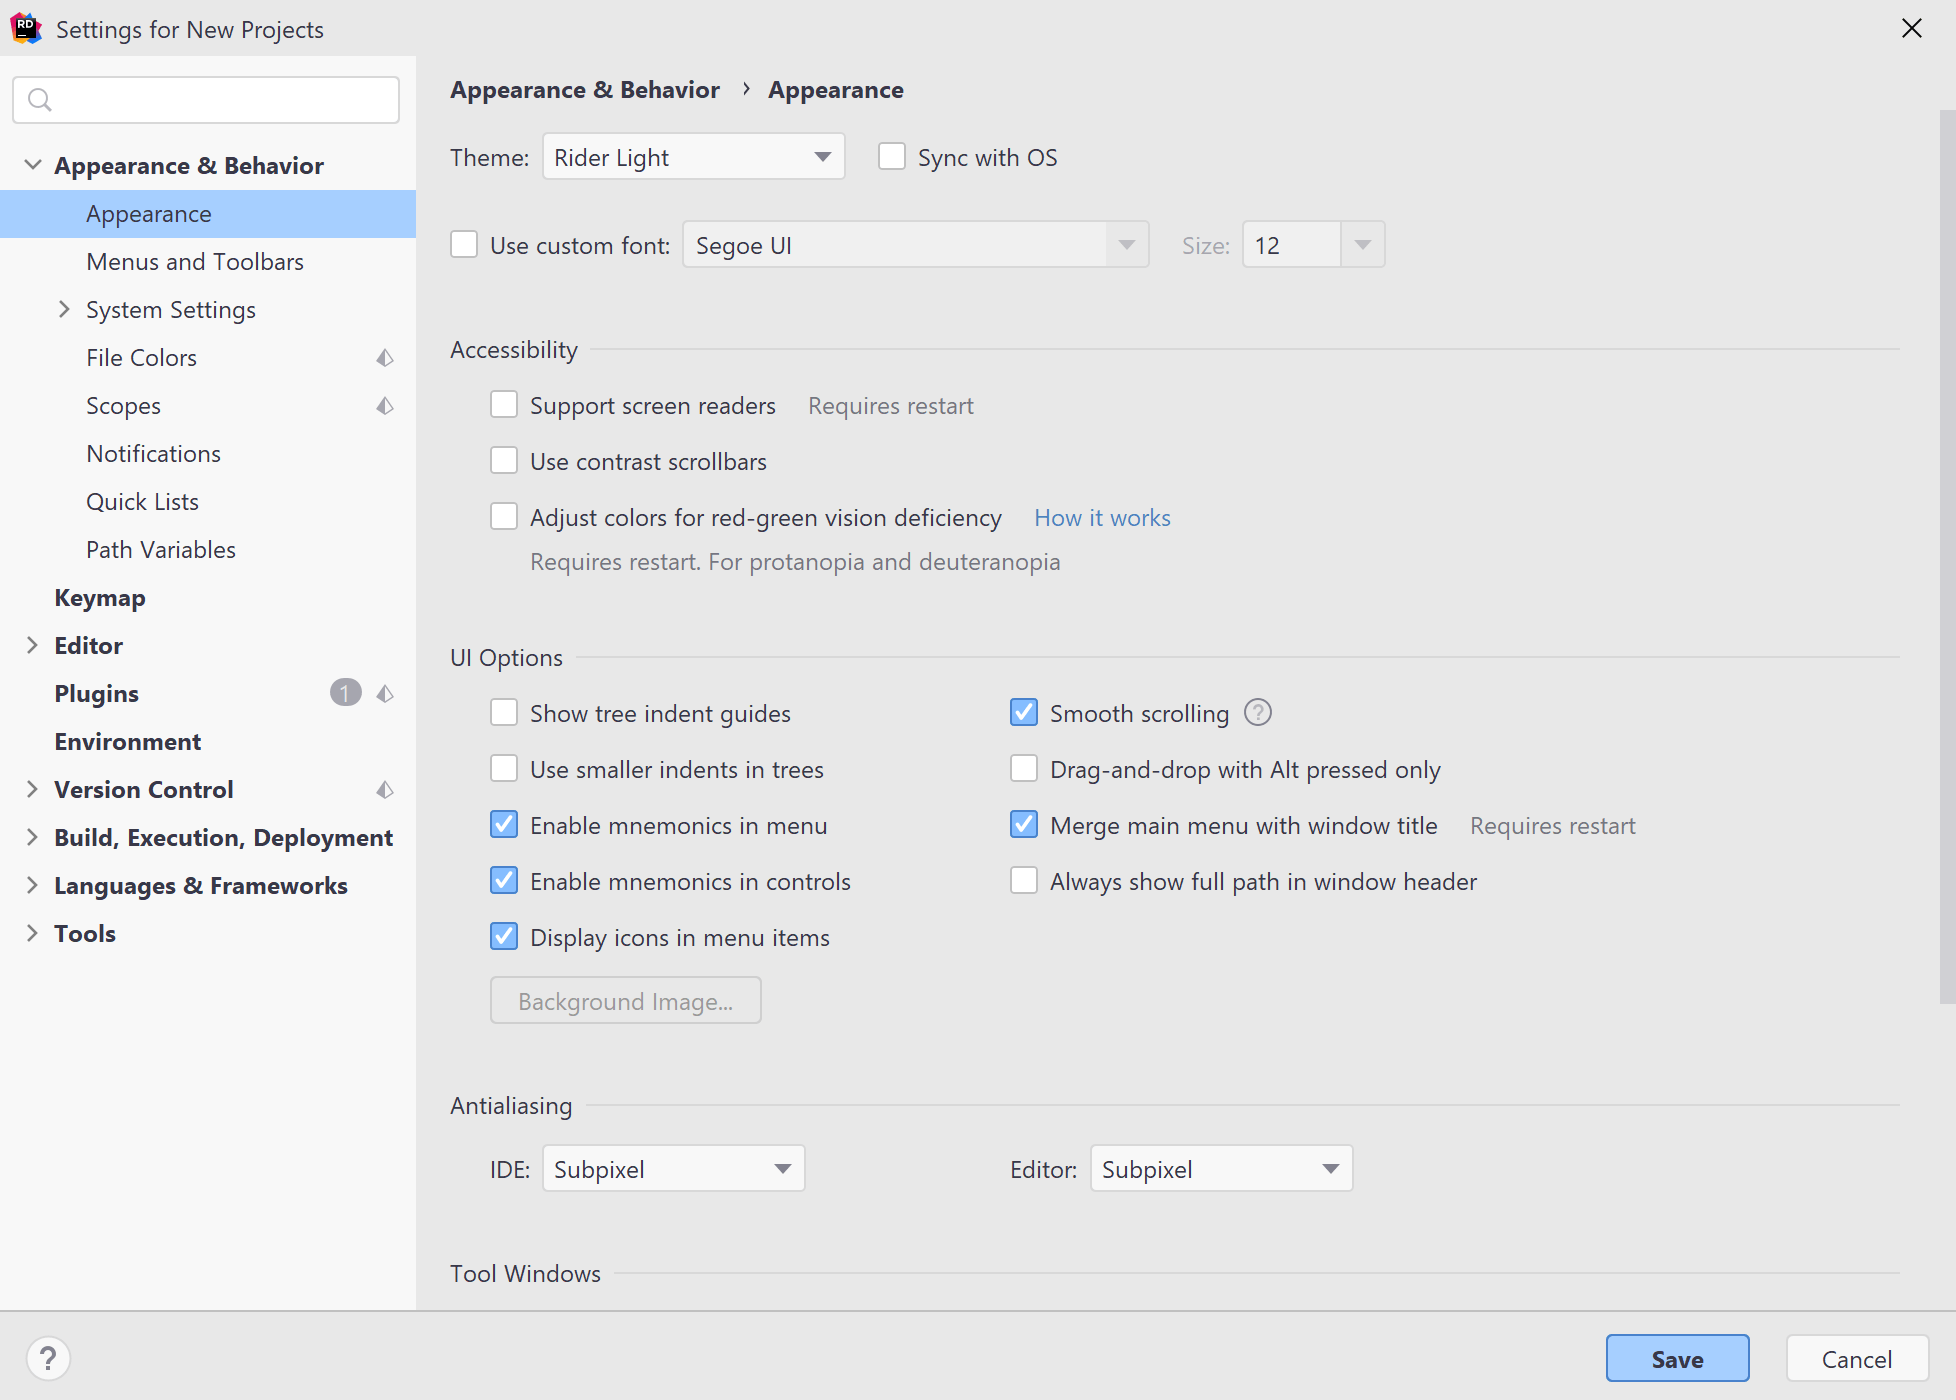
Settings And Personalization
Your development environment says a lot about your personality. Choose between a zen-like and clutter-free experience, a data-rich user experience with quickly accessible data, or any experience in-between.
When setting up your development environment, Rider will ask you to choose between two different themes: Dark and Light. You can decide to change your preference at any time after the
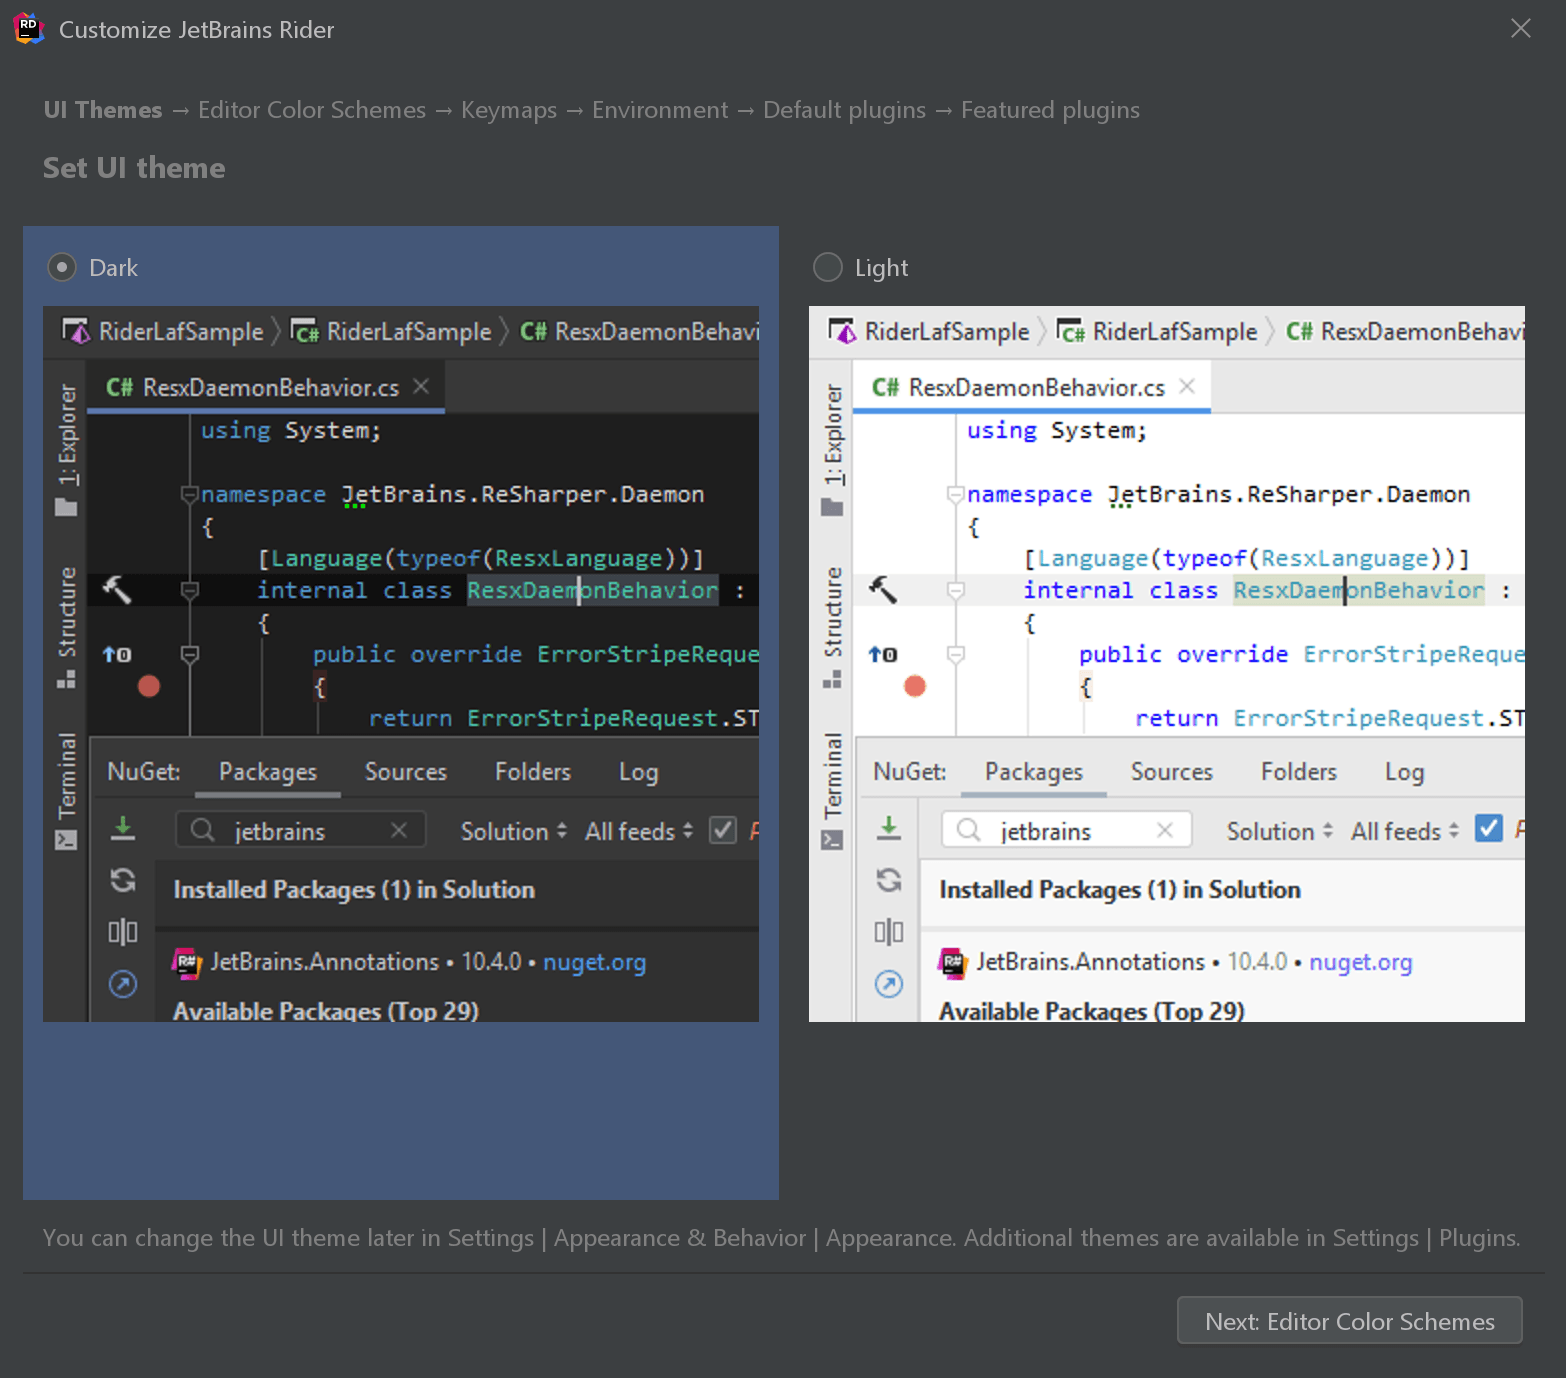
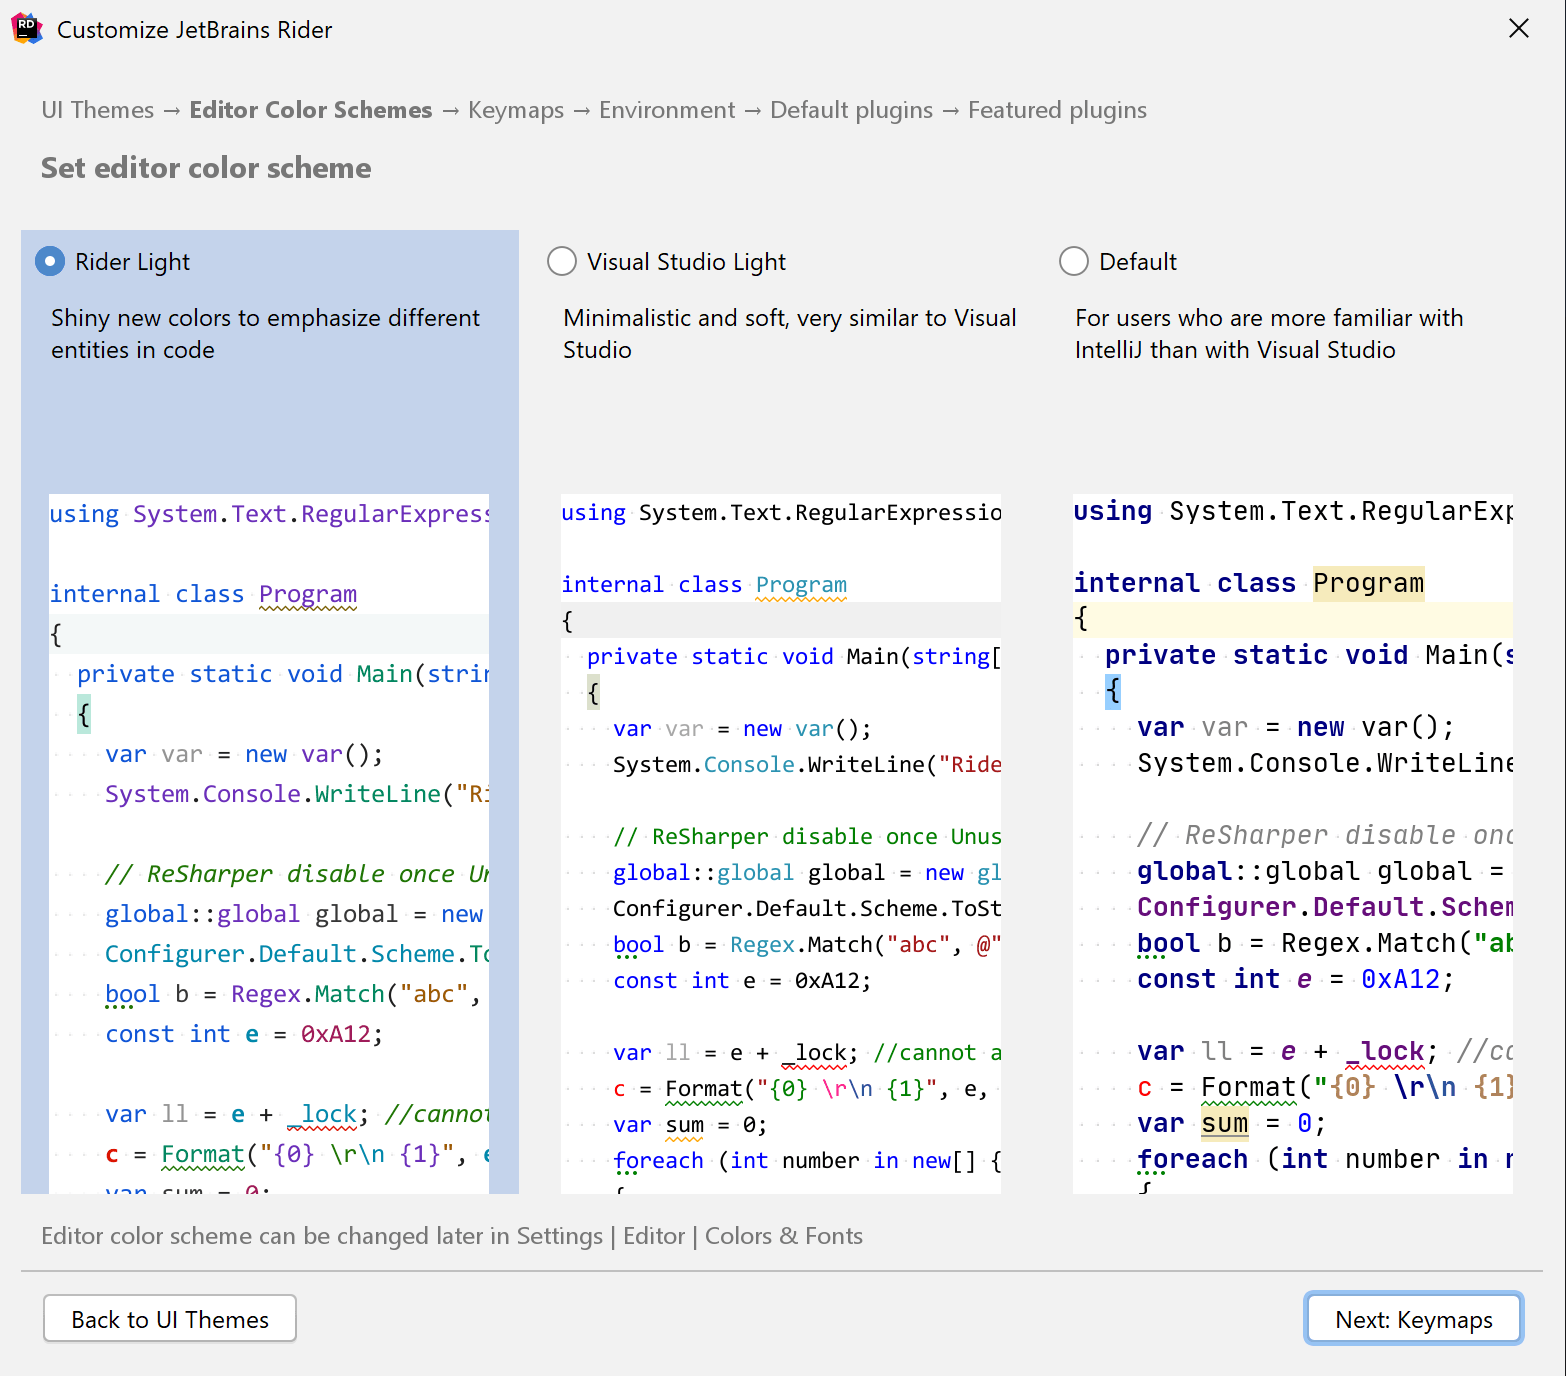
Rider will display the themes that fit into the category of your choosing. For example, choosing Light will show the themes of Rider Light, Visual Studio Light, and Default.
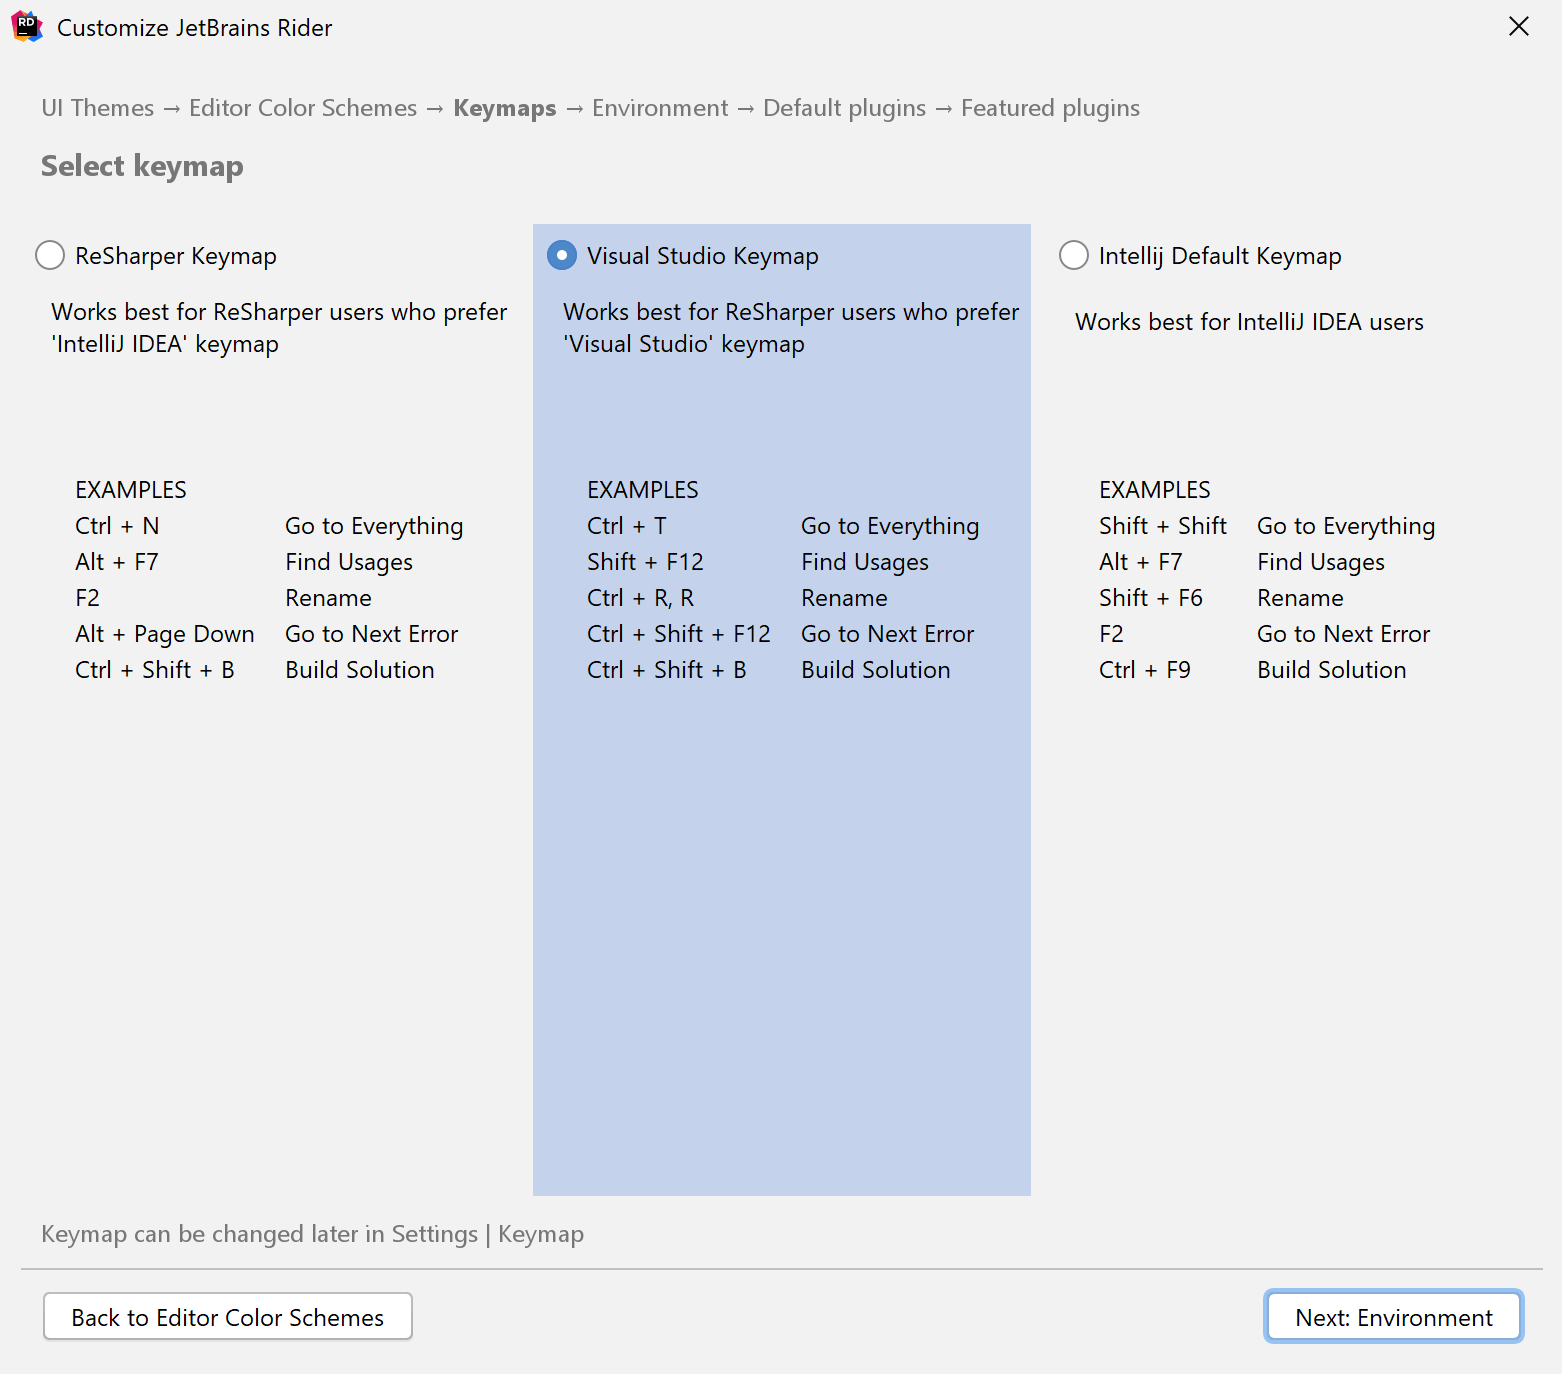
The next part of the setup allows you to choose your keymap. ReSharper users will be most familiar with the Visual Studio keymap, but take the time to review the shortcuts and pick the right one for you. Similar to the themes, you can change keymaps at any time.
If you would like to change your preferences at any point, use the Settings dialog to change values for fonts, menus and toolbars, editor UI, and much more. You also can Restore Default settings and go through the setup process again.
Welcome Screens
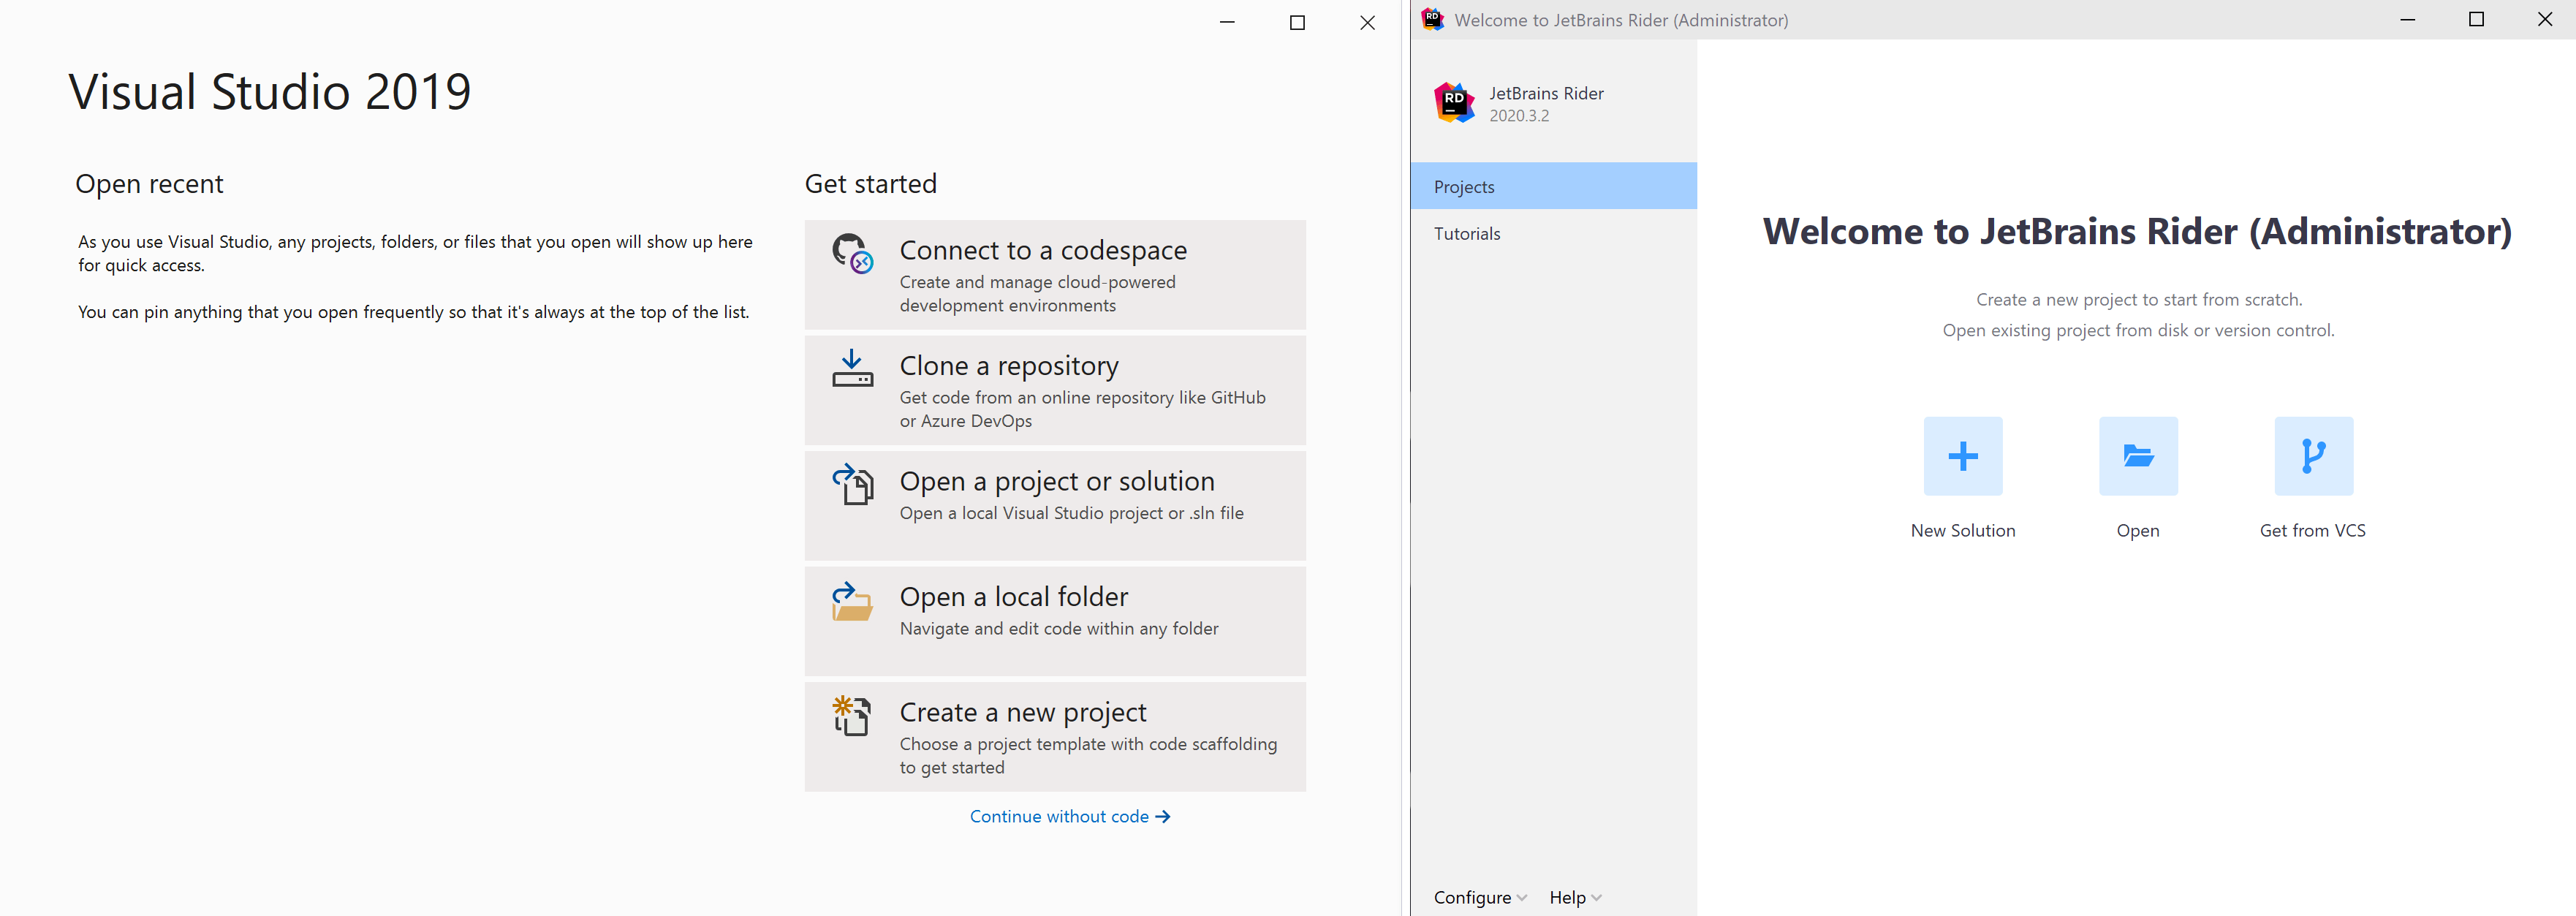
The welcome screen is the first thing all Rider users will see. Many of the same functions are available that a developer might see on the Visual Studio welcome screen, including:
- Starting a new project or solution
- Opening an existing solution
- Cloning a current solution from a source control system: GitHub, BitBucket, or GitLab.
- New Rider users can explore Tutorials from the welcome screen. Tutorials cover scenarios from Editor Essentials, Run Configurations, and Debugging Basics.
New Solutions
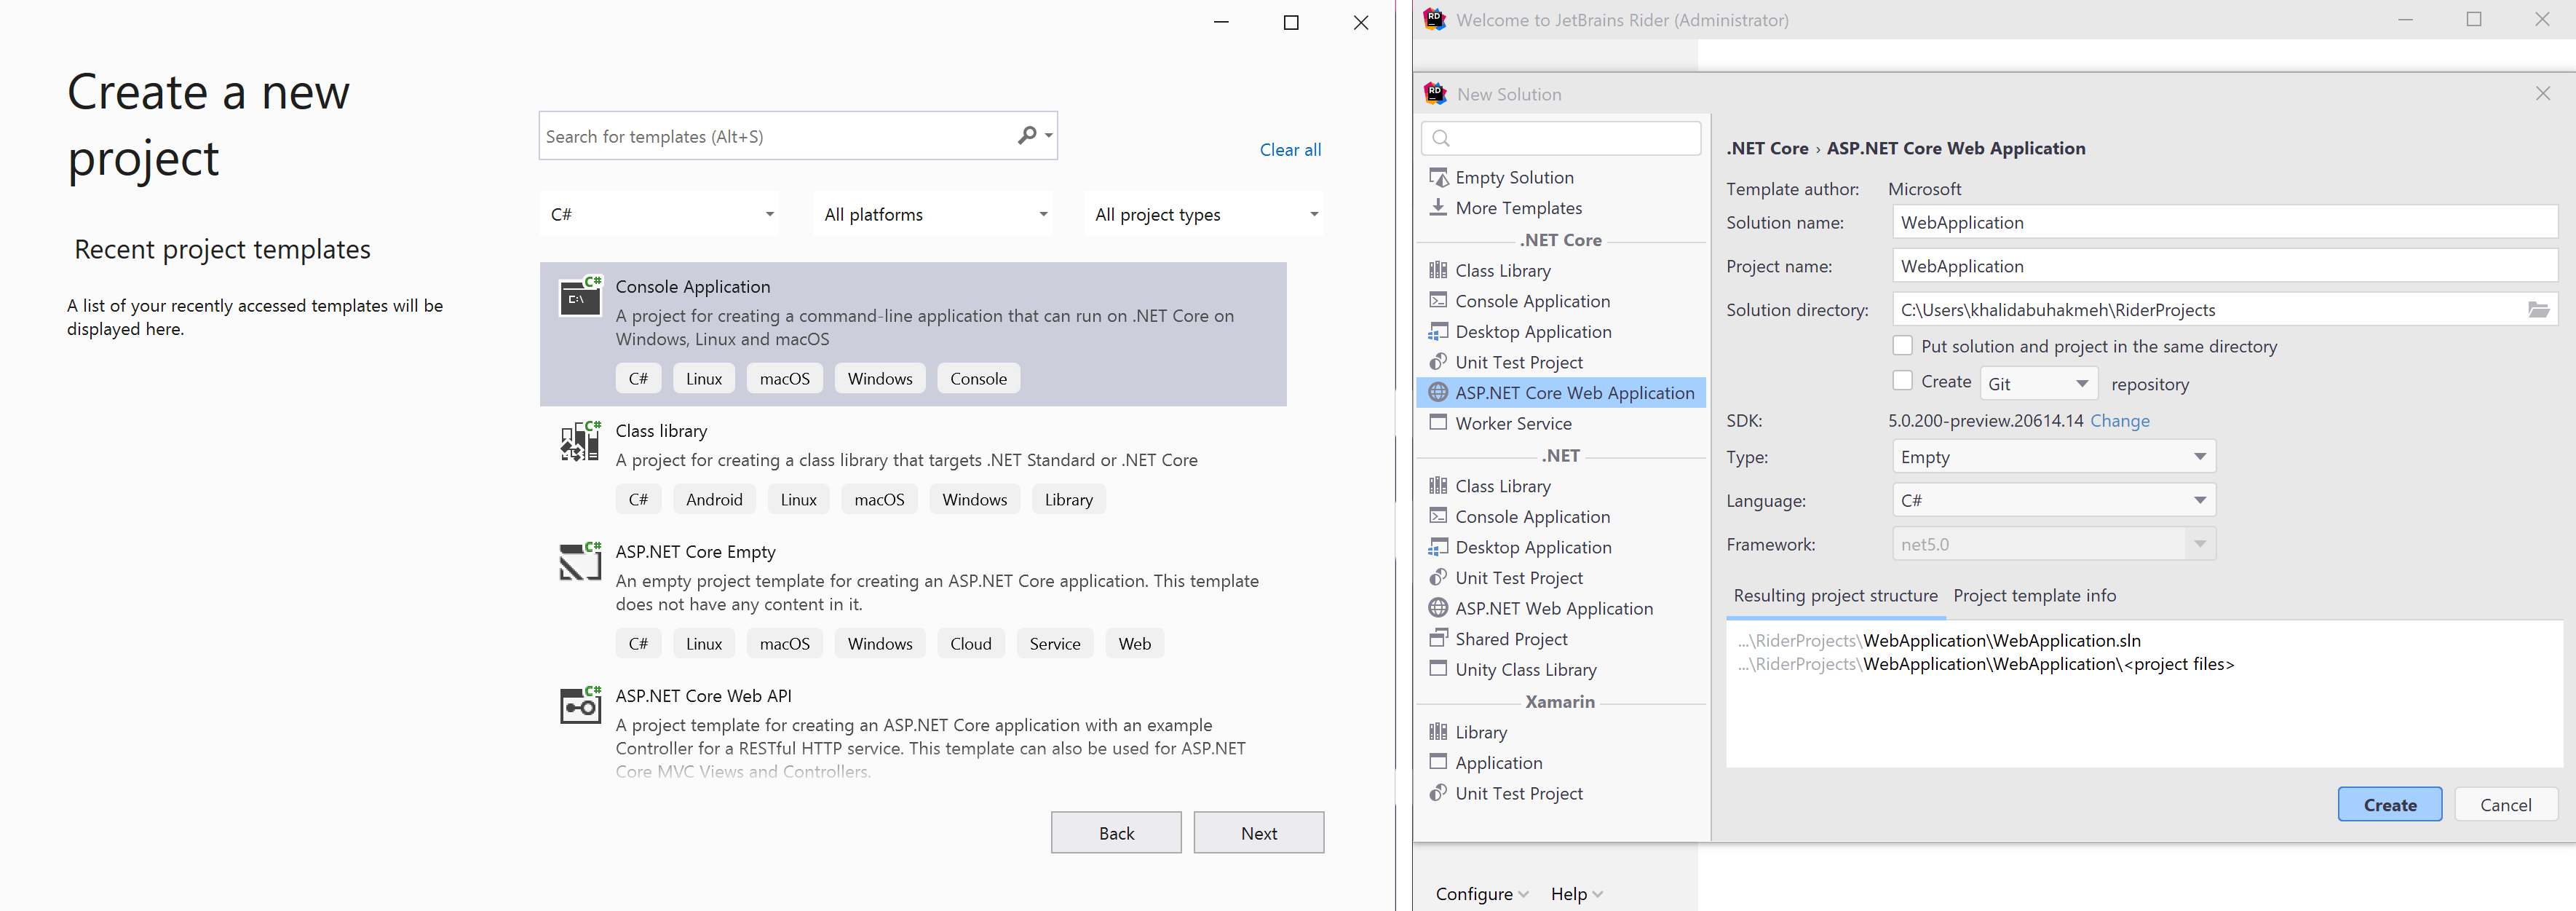
Starting a new solution can be an exciting time for developers. Rider scans the development environment for available templates. Templates included items shipped with the .NET SDK. Additionally, Rider will display any community templates or display custom templates in the New Solution dialog. Note, for .NET Core and later SDKs, the templates displayed on the left-hand side will only be relevant to the SDK version picked by the user.
Developers can choose where Rider will create a new solution, along with several other configuration options:
- Source Control options
- .NET SDK version
- .NET programming language (C# or F#)
- Enabling Docker support
- Other relevant options for the template
Let's start by creating a "Hello, World!" Console Application.
Main UI Elements
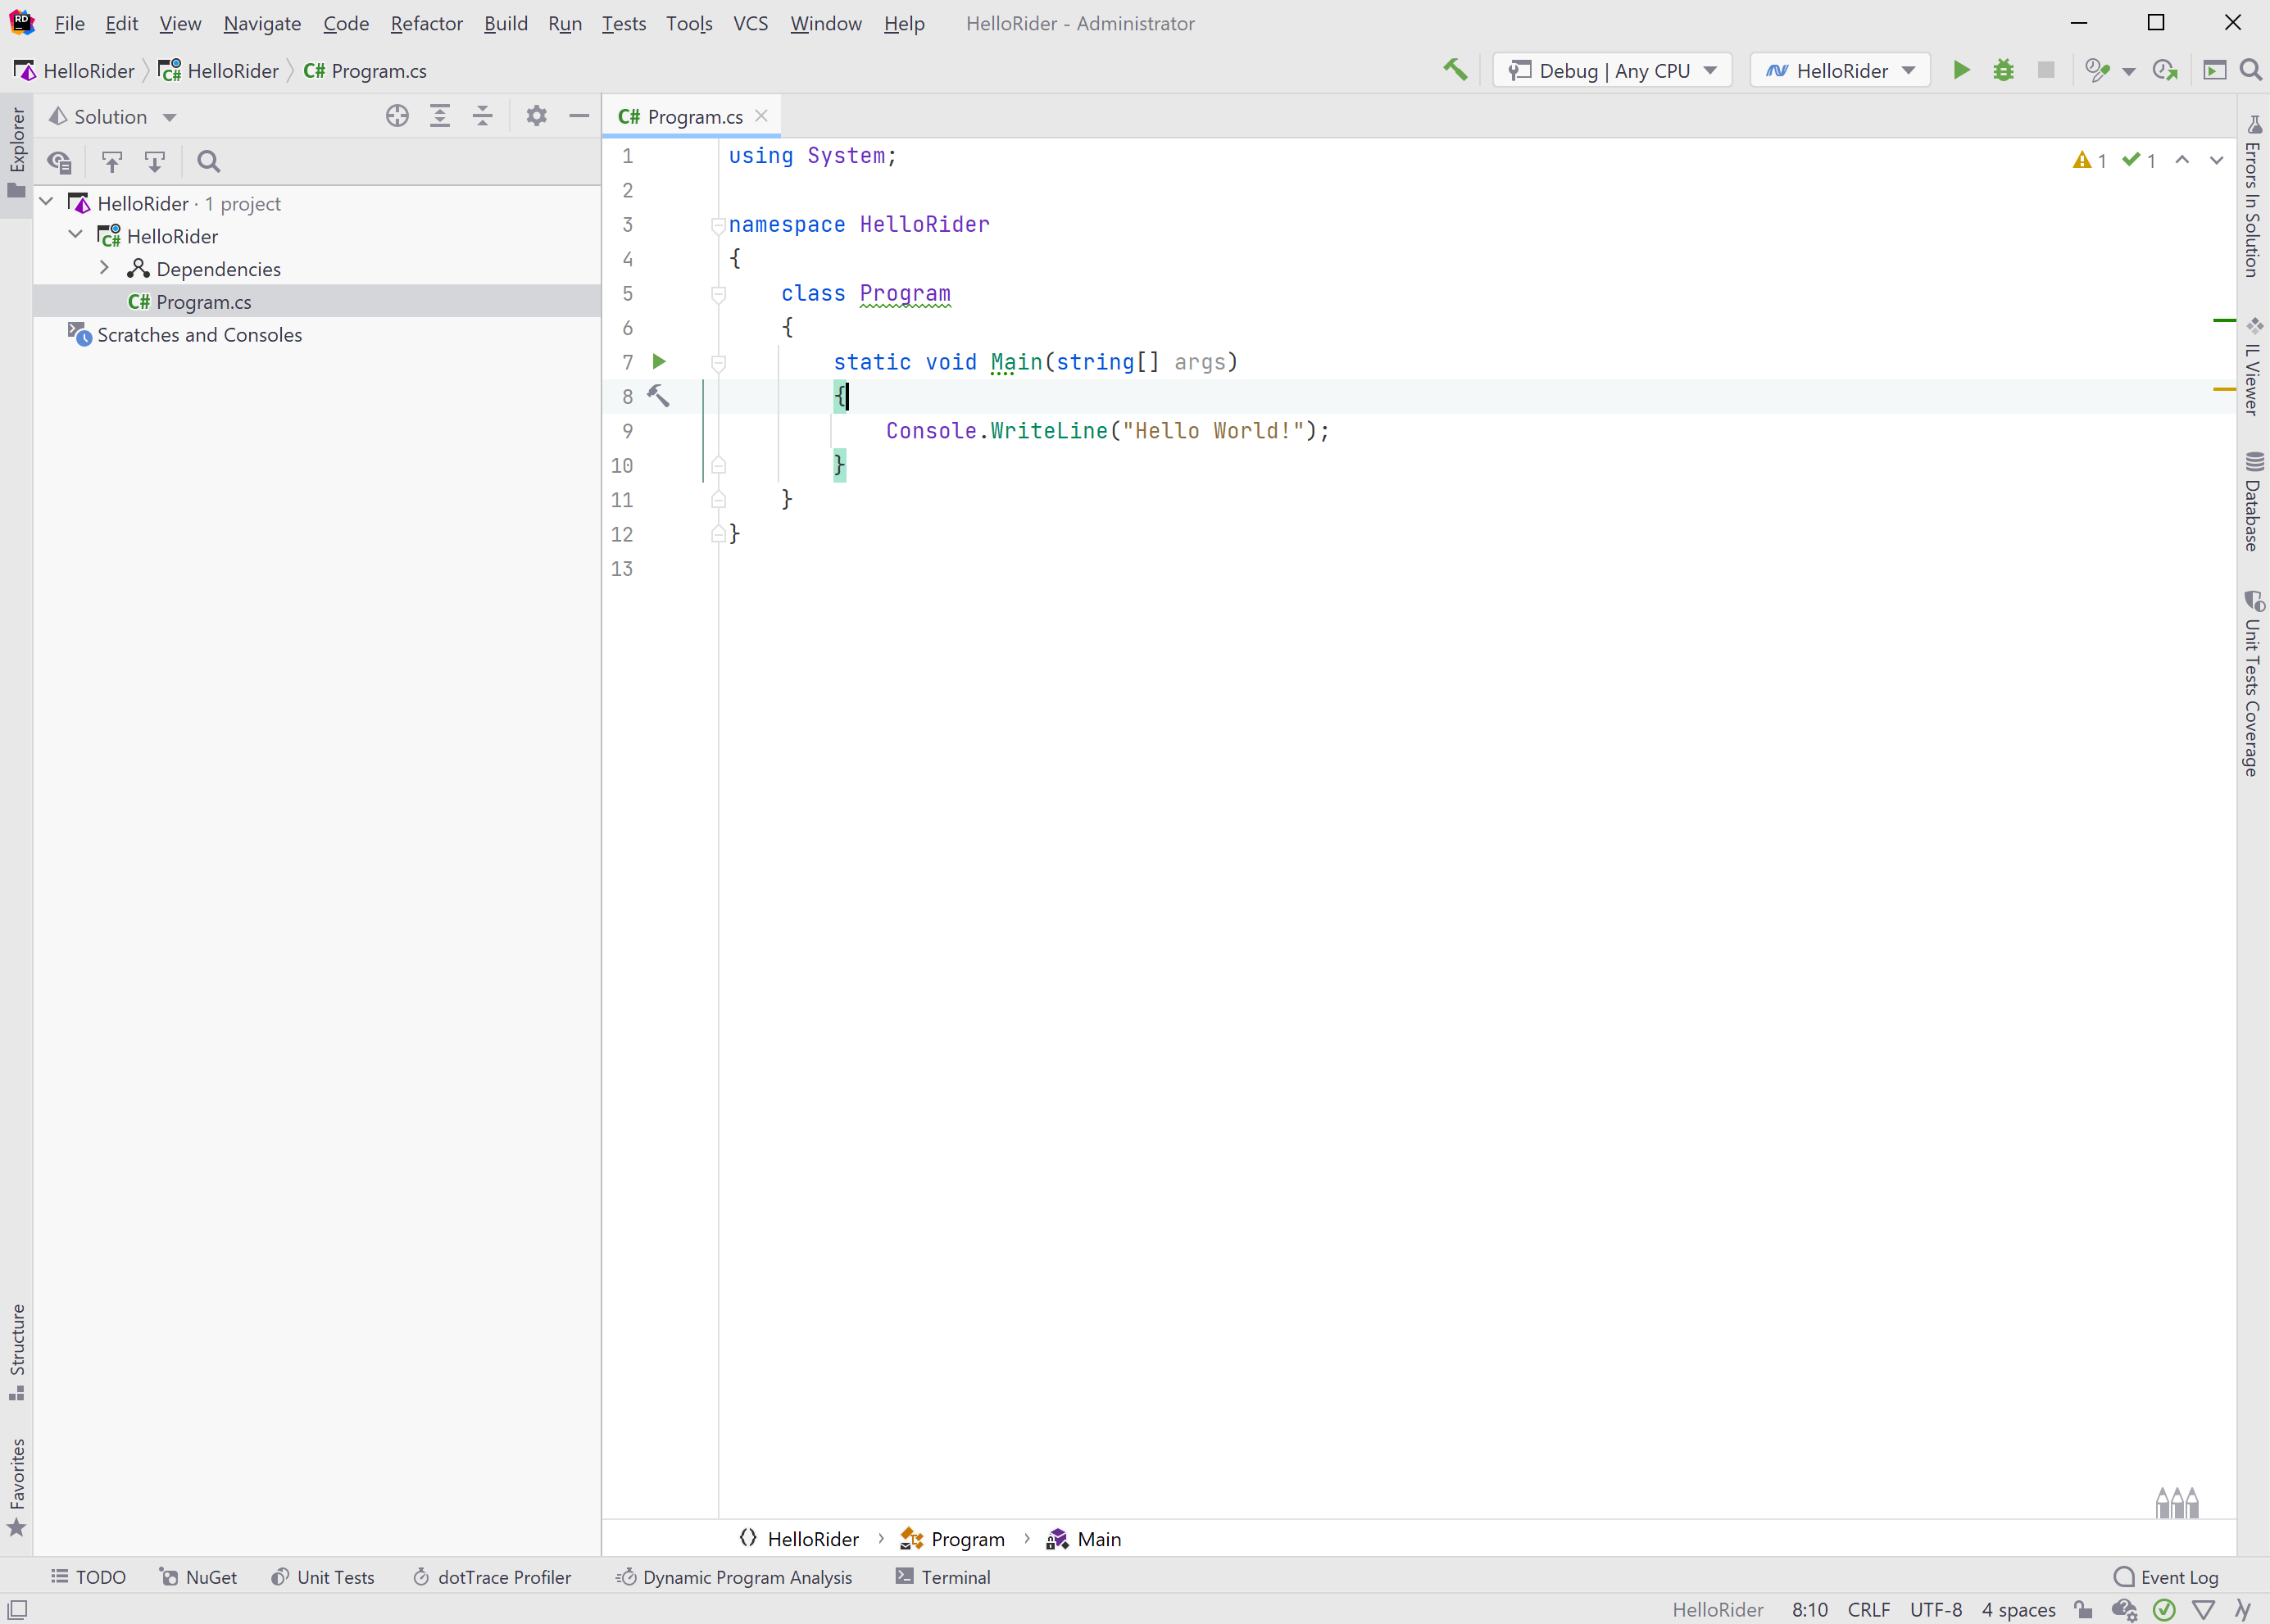
Essential elements developers will want to focus on in the Rider UI include the Solution Explorer, the Editor tab, and the Main Toolbar.
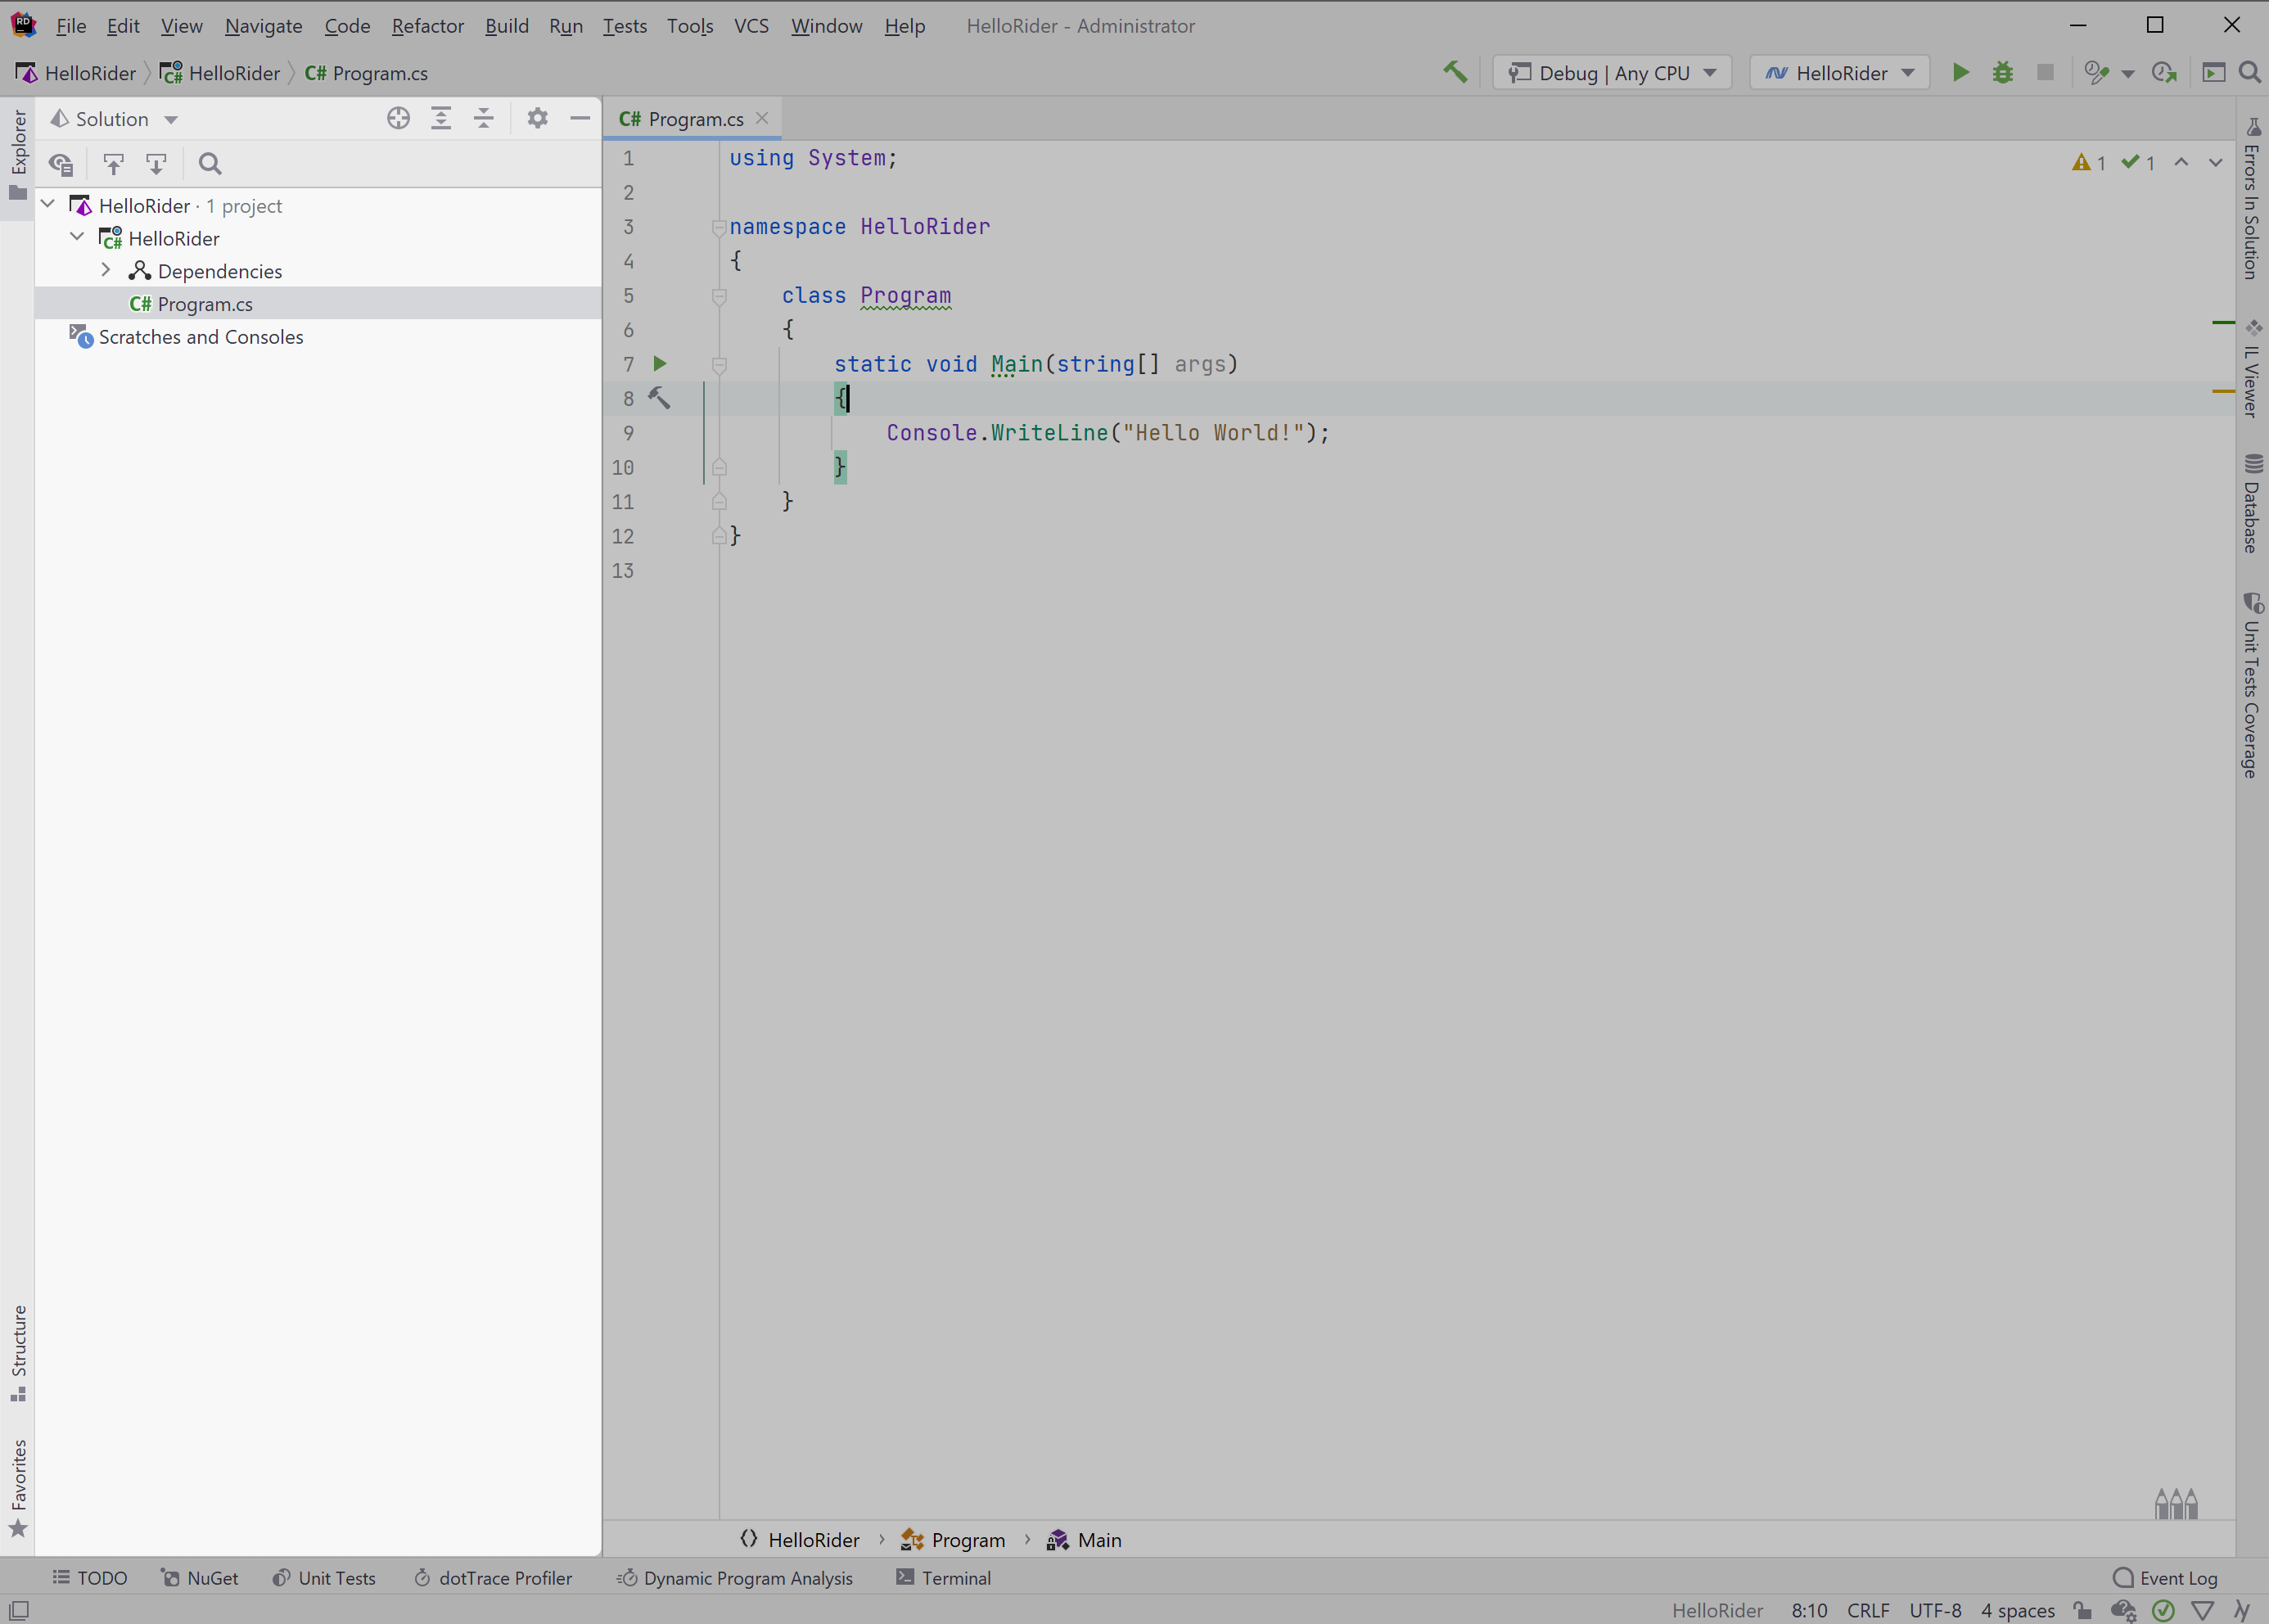
By default, we find the Solution Explorer on the left of the Rider instance. Here we get a familiar view of our solution, projects, and dependencies. Visual Studio users will find the navigation experience friendly.
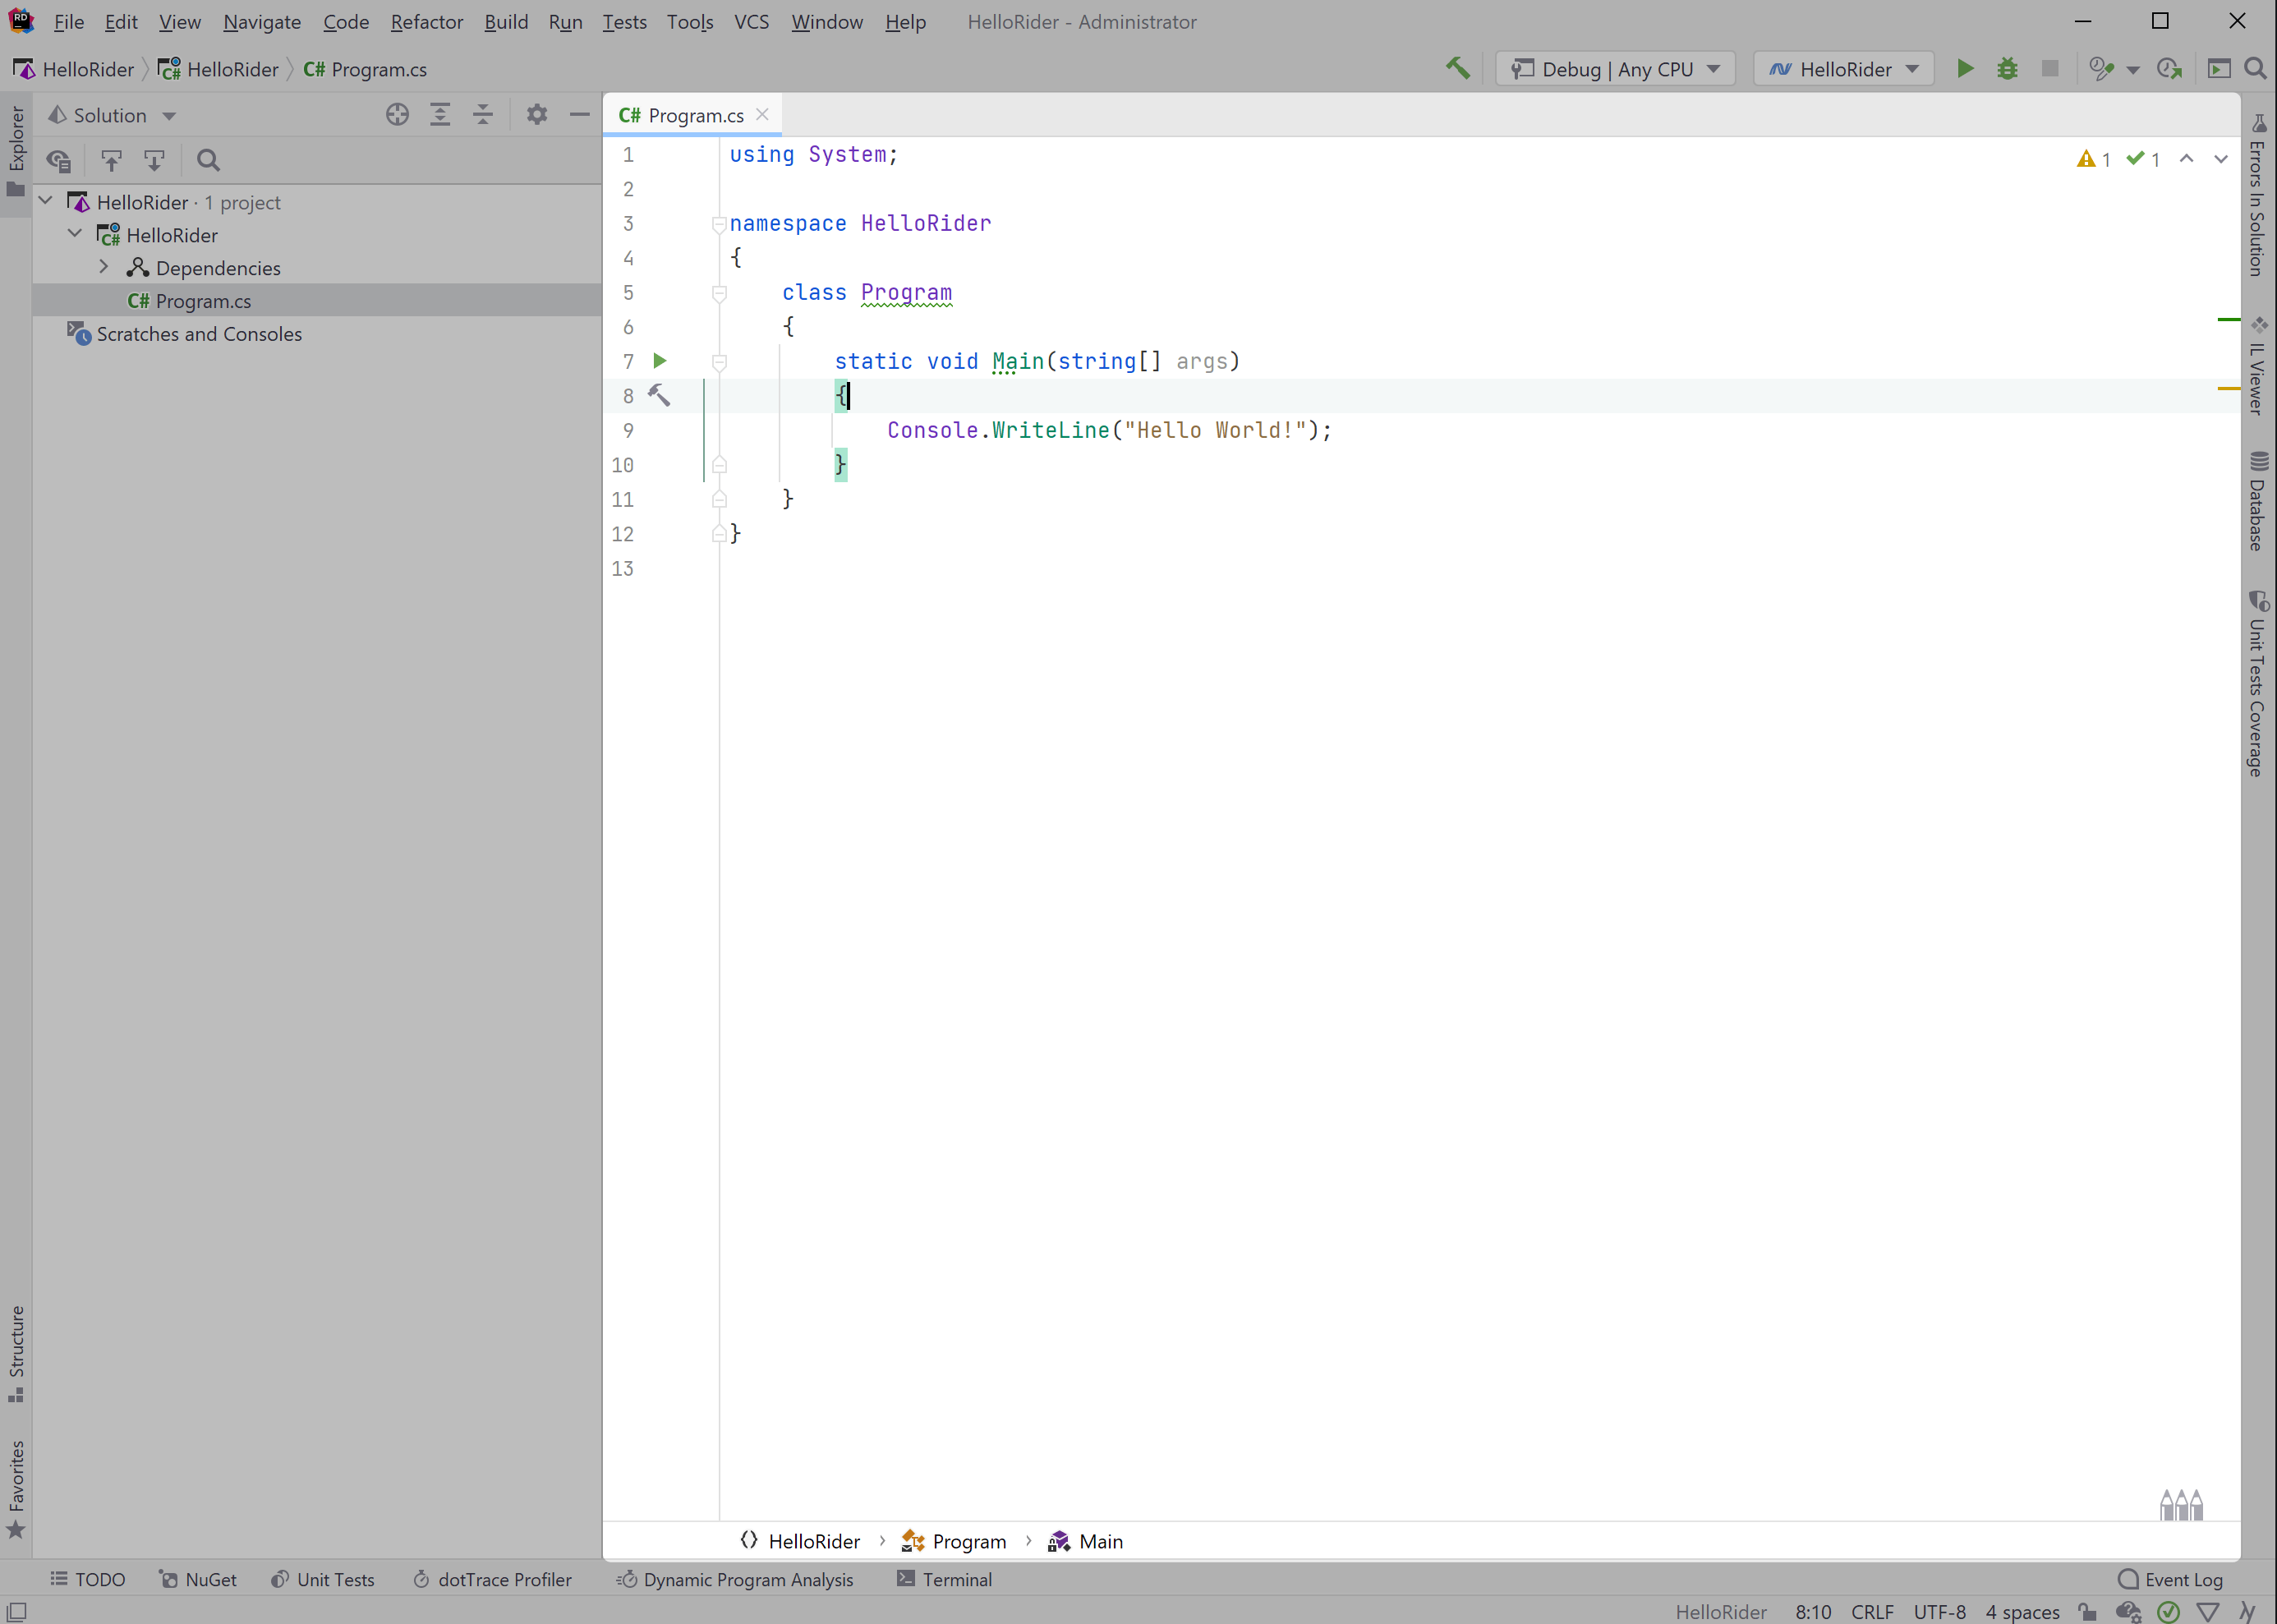
The editor tab is where we can edit our code files. ReSharper users will find the experience of editing code very familiar because the ReSharper engine powers Rider's editing experience.
The name Rider comes from a mash-up of the words ReSharper and IDE.
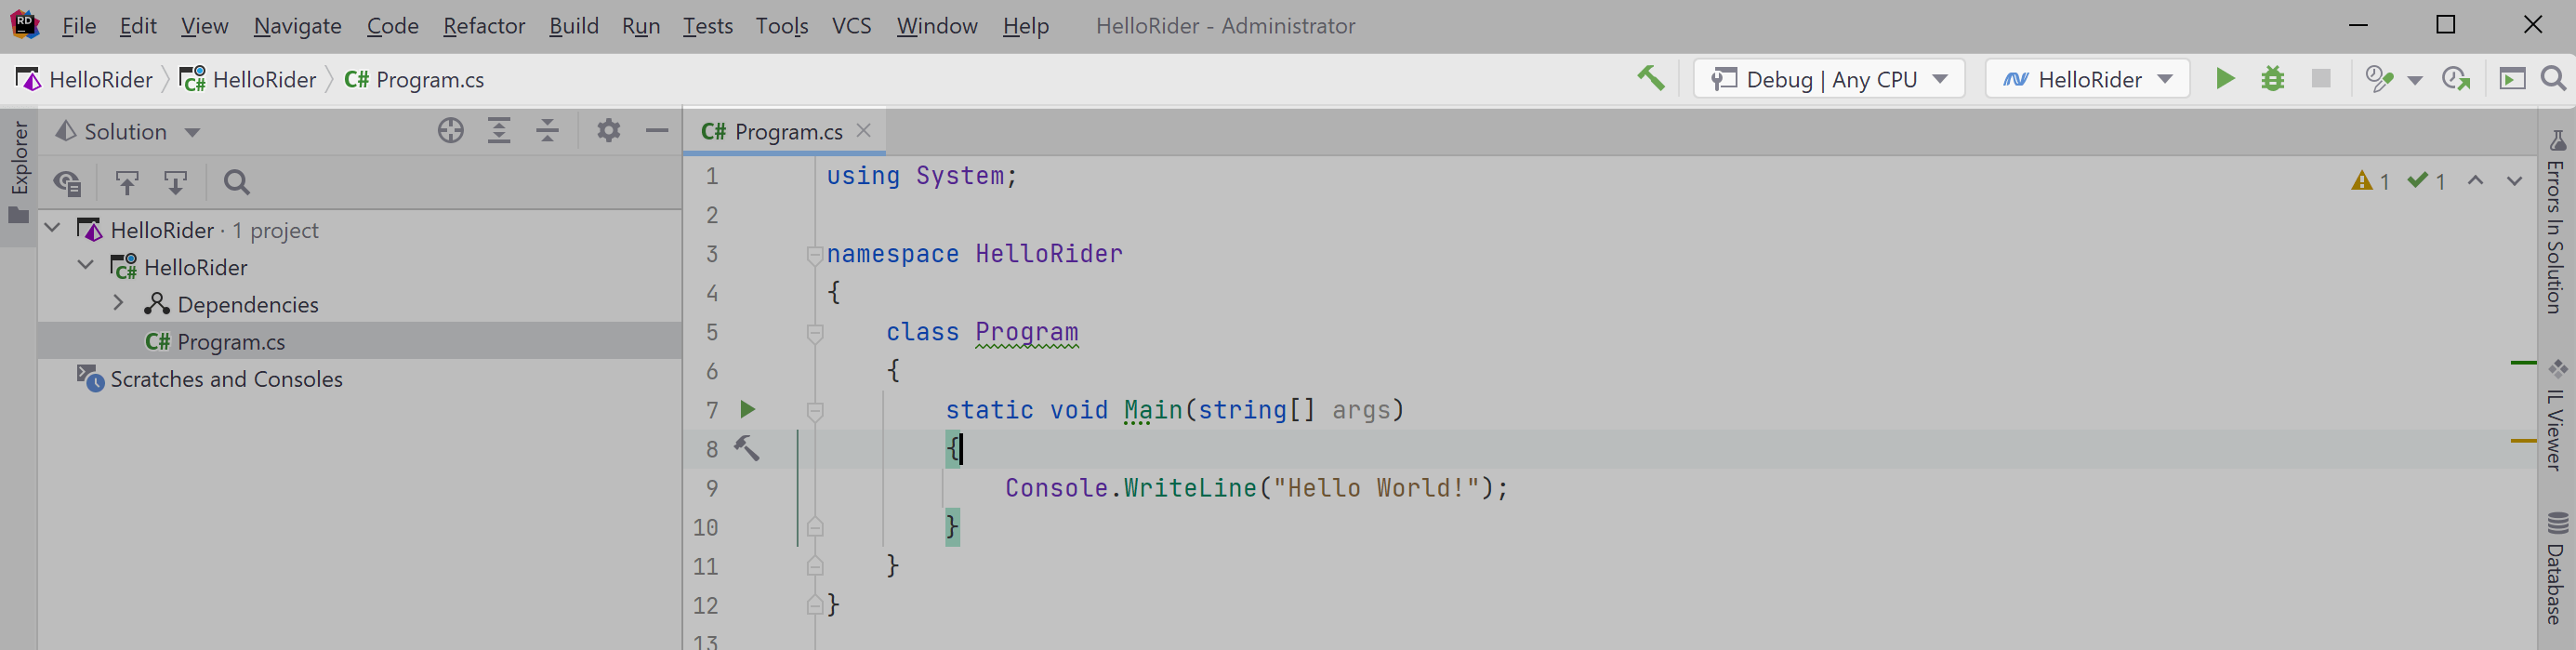
Finally, the toolbar is where things take a different approach than Visual Studio. The Rider toolbar separates the concepts of Build, Run, and Debug, allowing the developer to decide what action they'd prefer to take. The hammer icon will build the current solution. The green rectangle, or play button, will build and run the solution. Finally, the green bug will build, run, and attach the necessary debugger.
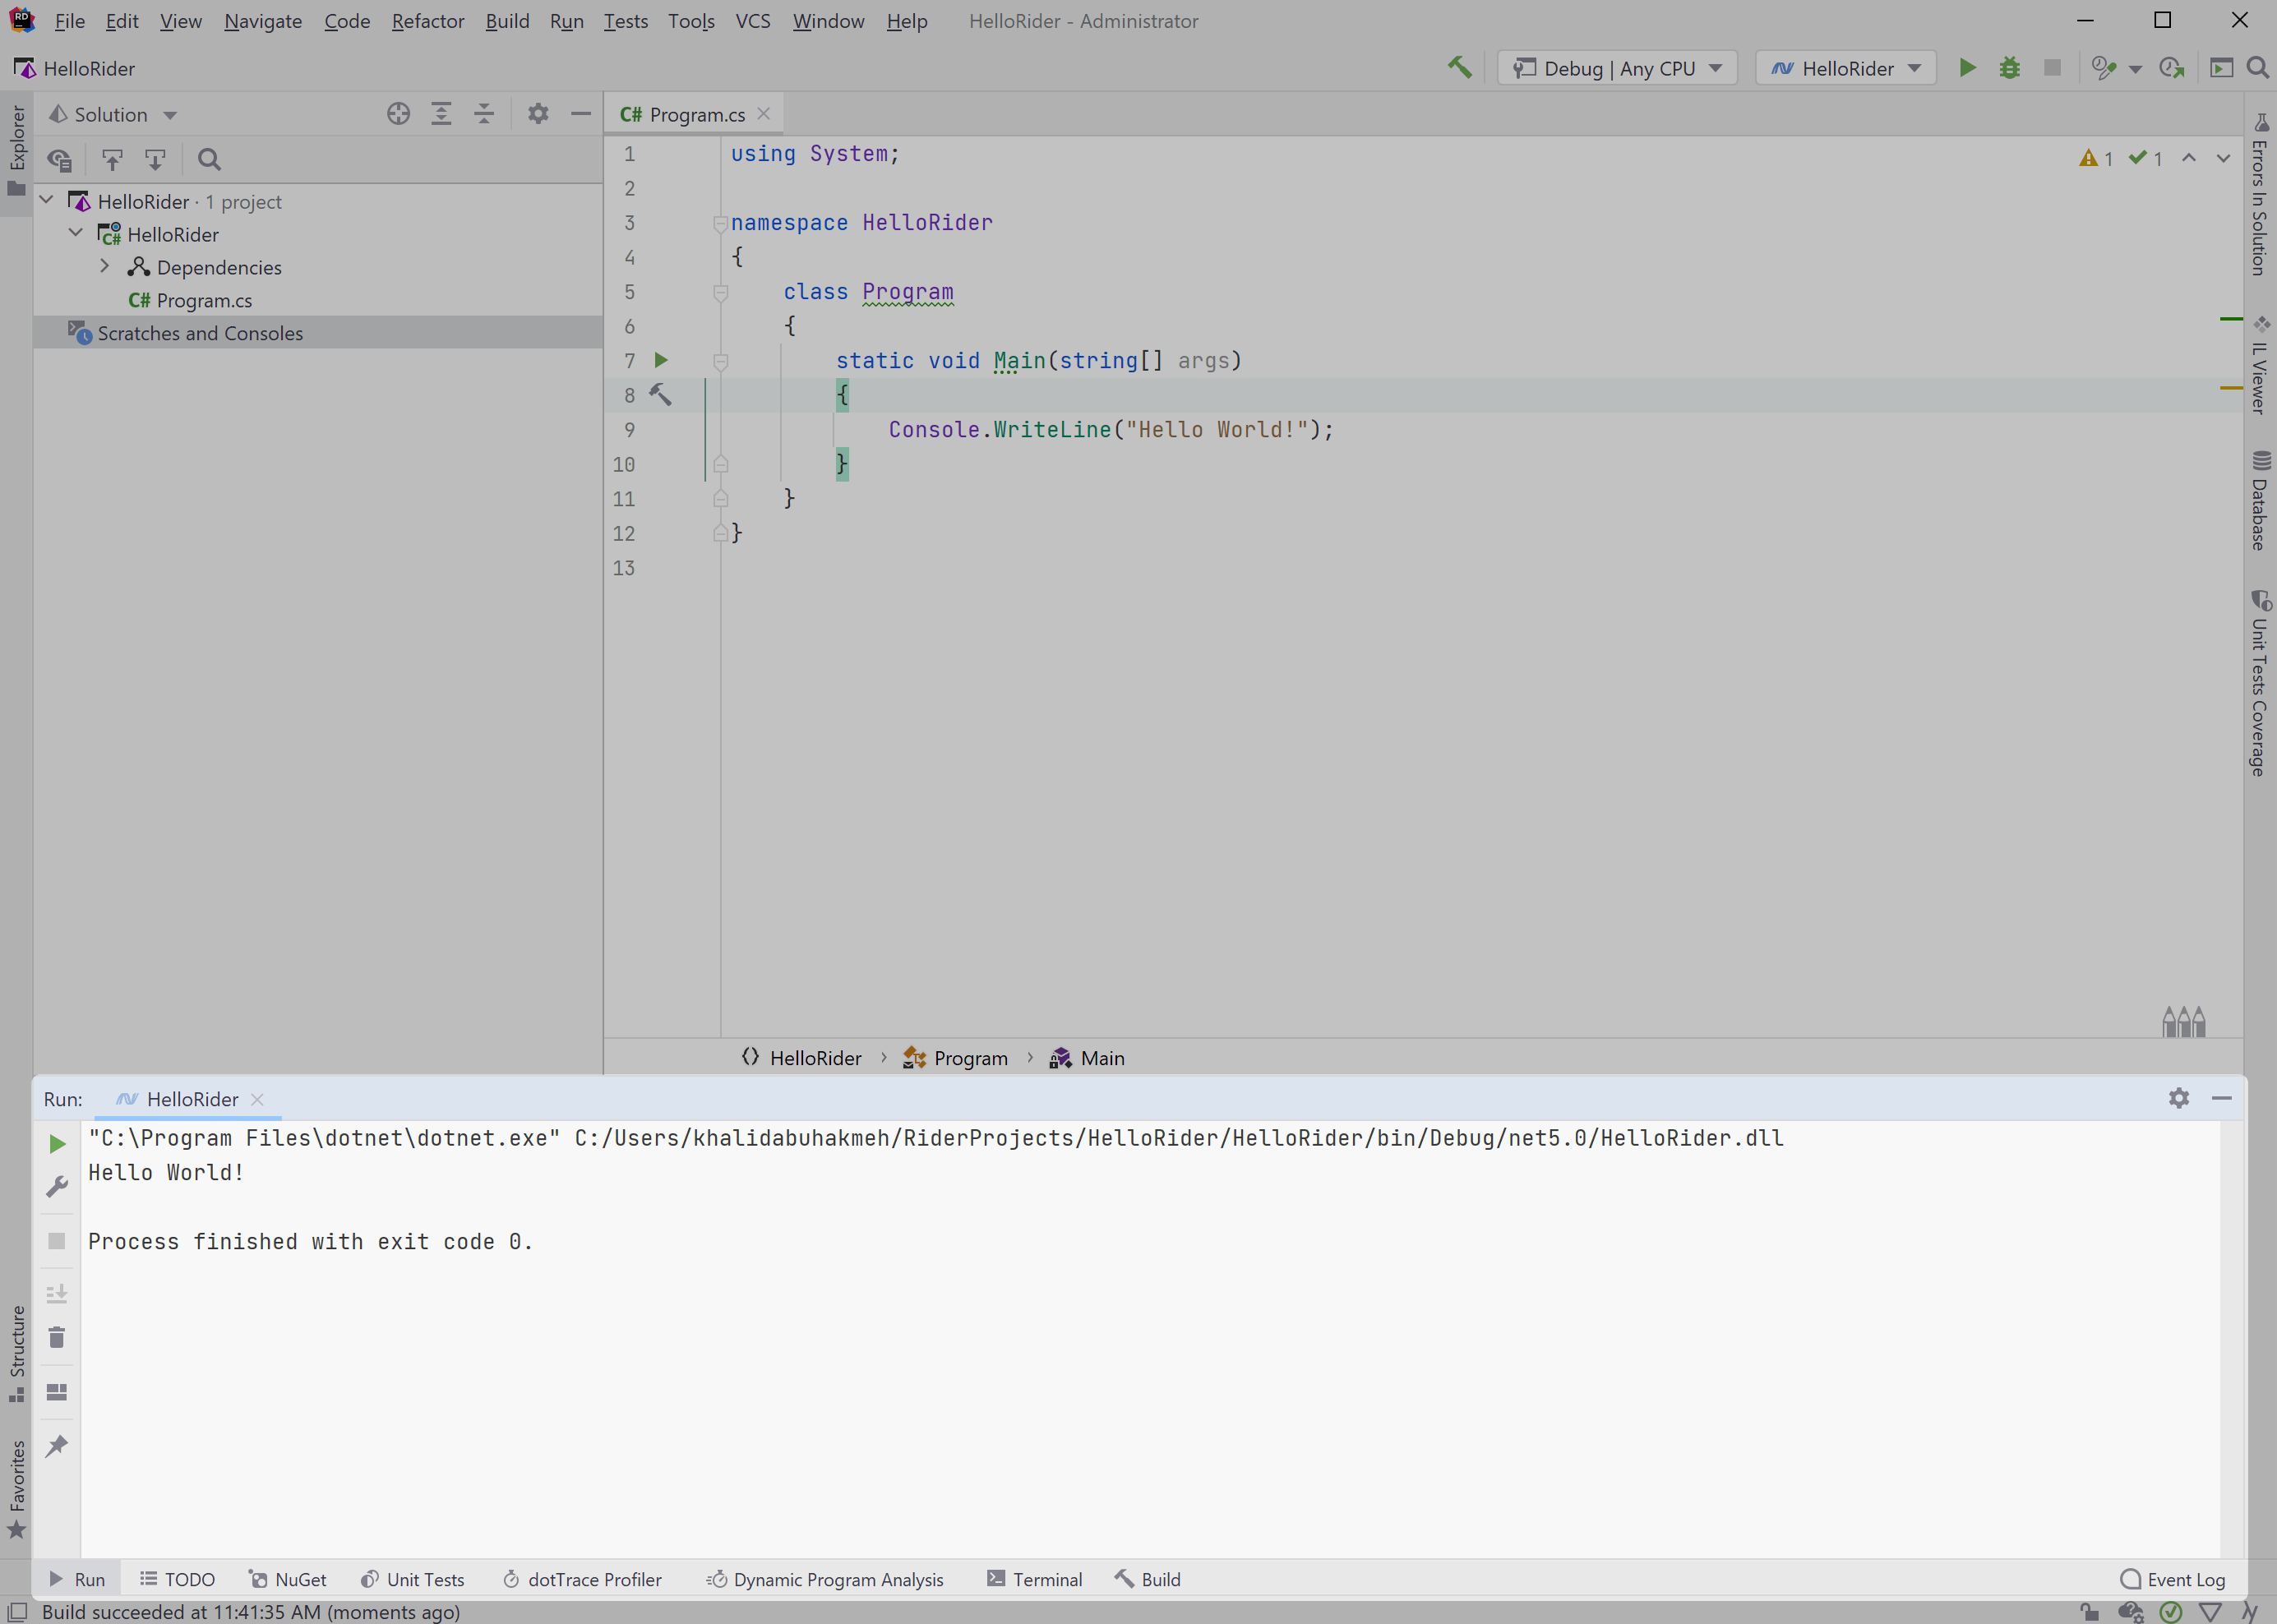
Let's run our first .NET solution within Rider. We'll start by hitting the Run button (a green play icon). Rider will compile and execute our console application, with the IDE displaying execution results at the bottom within a Run window. Run windows also have this Run button, allowing us to rerun the same run configuration. We'll discuss Run windows in a later step, but Rider isn't limited to running one project at a time. There can be multiple Run windows for each service running within our solution.
Congratulations! You've successfully navigated through your initial Rider experience. While Rider has moved elements of the development experience around, they're straightforward to find. Like most JetBrains tools, we designed Rider to allow you to make the experience your own. We encourage you to explore, drag, right-click, and generally play around in the IDE.
In the next step, we'll explore Rider's debugging experience, as it's slightly different from what you may expect coming from Visual Studio.