Project Setup
Make a PyCharm project and virtual environment with dependencies, and configure PyCharm to use pytest.
Python has projects and PyCharm does as well. In this tutorial step, let's make both, with a virtual environment, and set the project up to use pytest.
New Project
We'll let the IDE guide us through the process. First, we use File -> New Project to make a new project, in a directory:

Make sure Project Interpreter is set up to configure a new virtual environment. Expand the triangle if needed to set this up.
After clicking Create, tell PyCharm to open the project in a new window.
Create a pyproject.toml
A pyproject.toml is a configuration file you can us to tell Python (and PyCharm) information about your package. We'll populate ours with:
[project]
name = "laxleague"
version = "2024.0.0"
dependencies = [
"pytest"
]
We can then use ⌥F12 (macOS) / Alt+F12 (Windows/Linux) to open the terminal and run pip install -e . so that others know how the package is built, what Python version it uses and what the dependencies are (pytest in our case).
As an alternative - a requirements file
You can use a requirements.txt file instead of a pyproject.toml file to manage your dependencies if you prefer. PyCharm will give you code suggestions and completions for both file types.
Test directory
In your Project Structure tool window ⌘1 (macOS) / Alt+1 (Windows/Linux), right-click and select New > Directory and call it tests. When done, your directory structure should look like this:

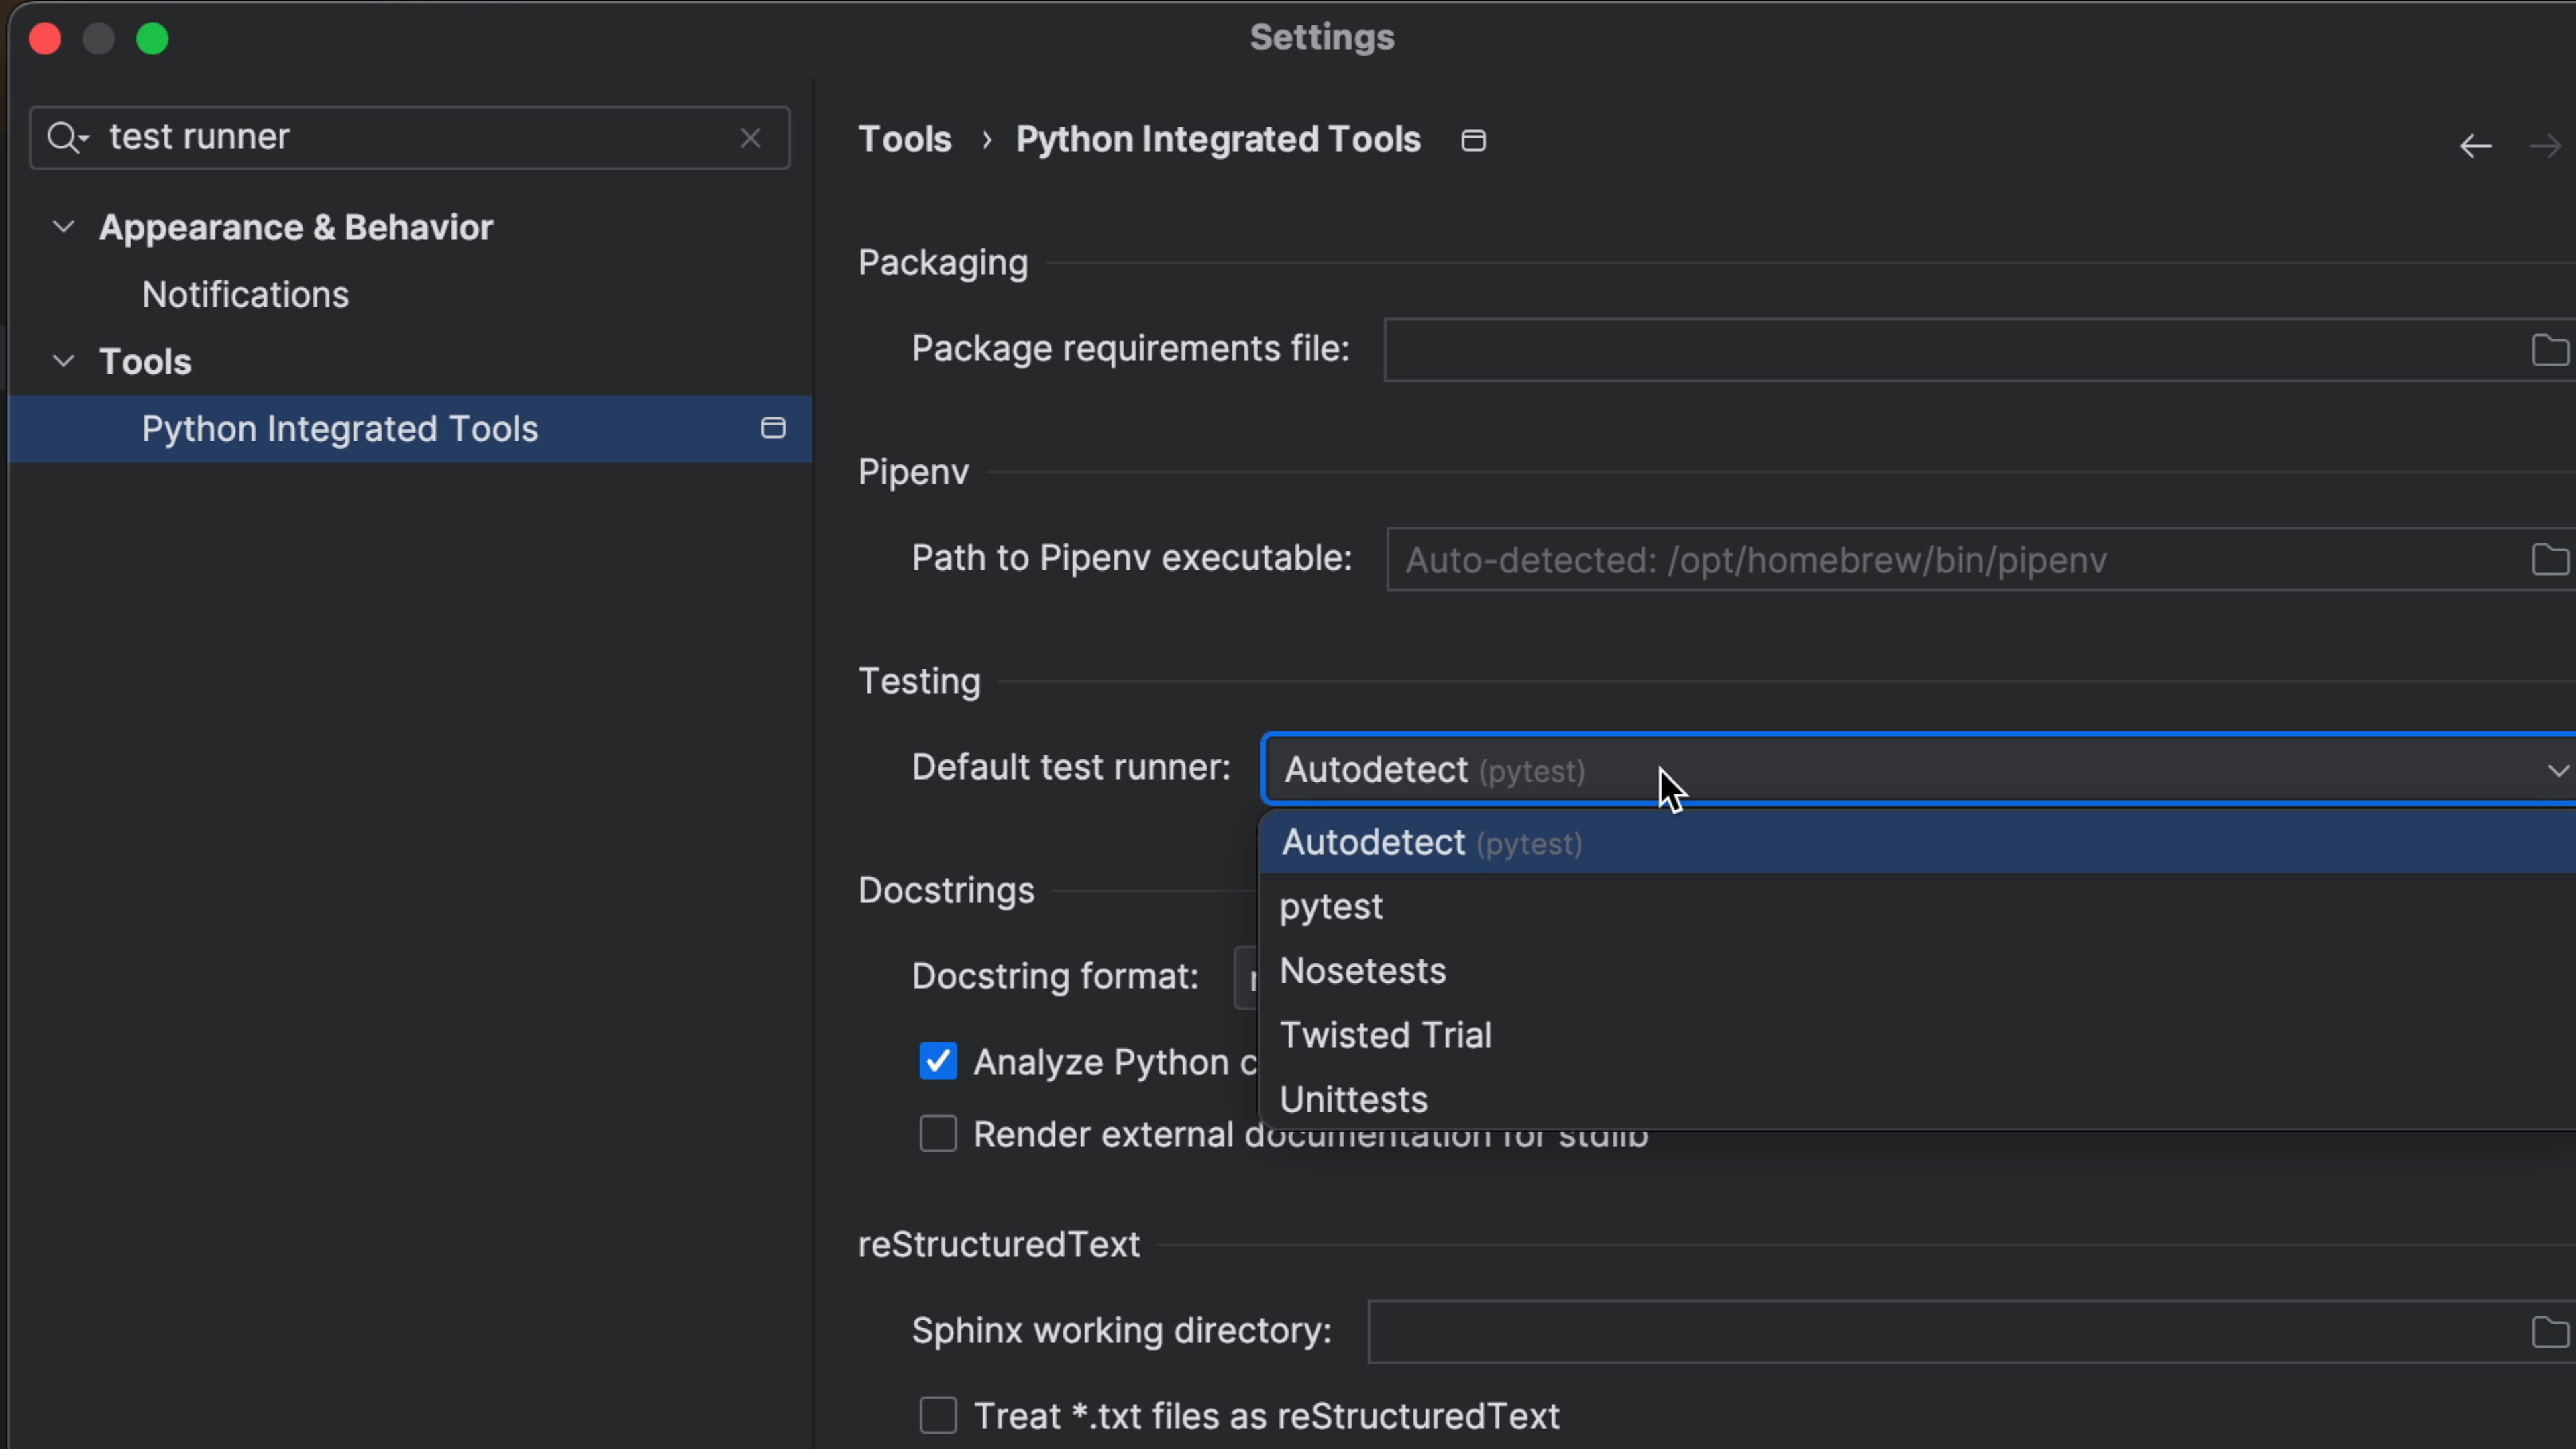
Check PyCharm's Test Runner
PyCharm knows that we're using pytest as our test runner because we added it as a dependency, however, if you ever want to check what test runner PyCharm is using, you can do so in the Settings ⌘, (macOS) / Ctrl+Alt+S (Windows/Linux) and search for "test runner" to check the settings.