
Secure REST APIs with JWT
Using Simple JWT authentication plugin for the Django REST Framework.
Hello everyone, welcome to the Django tutorial series. In this tutorial, we are going to protect our endpoints by integrating JWT also known as JSON Web Token.
According to Wikipedia, JWT is an Internet proposed standard for creating data with optional signature and/or optional encryption whose payload holds JSON that asserts some number of claims. The tokens are signed either using a private secret or a public/private key.
To know more about JWT please visit the website jwt.io
Installing JWT Package
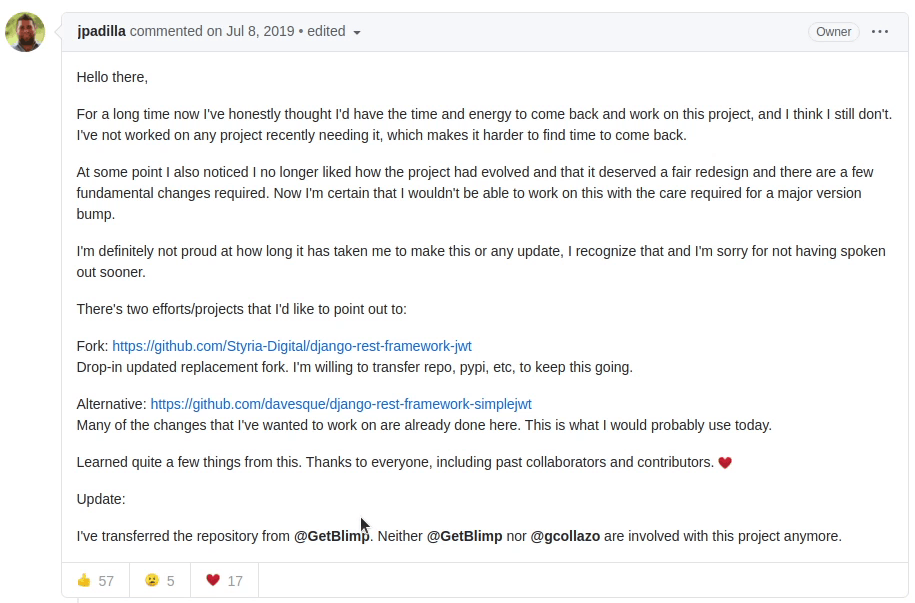
There are lots of JWT packages available in the pypi repository. Previously I used to work with djangorestframework-jwt. This project is not being maintained. So, I am going to look for alternative options.
According to José Padilla, maintainer of djangorestframework-jwt.
He is suggesting two alternative packages. We will move ahead with django-rest-framework-simplewt
Before moving forward I would like to thank all the contributors, collaborators who are involved in the open source community helping each other by creating these wonderful packages which indirectly make our life easier. I would recommend everyone who is watching this video right now, try contributing and share your support in these open-source projects. The more you give to the community the more you are going to get back.
We will follow two installation approaches
-
Directly running the command in the terminal
pip install djangorestframework-simplejwt -
Installing through Jetbrains IDE
- I will click on File | Settings | Project: SampleDemo | Python Interpreter.
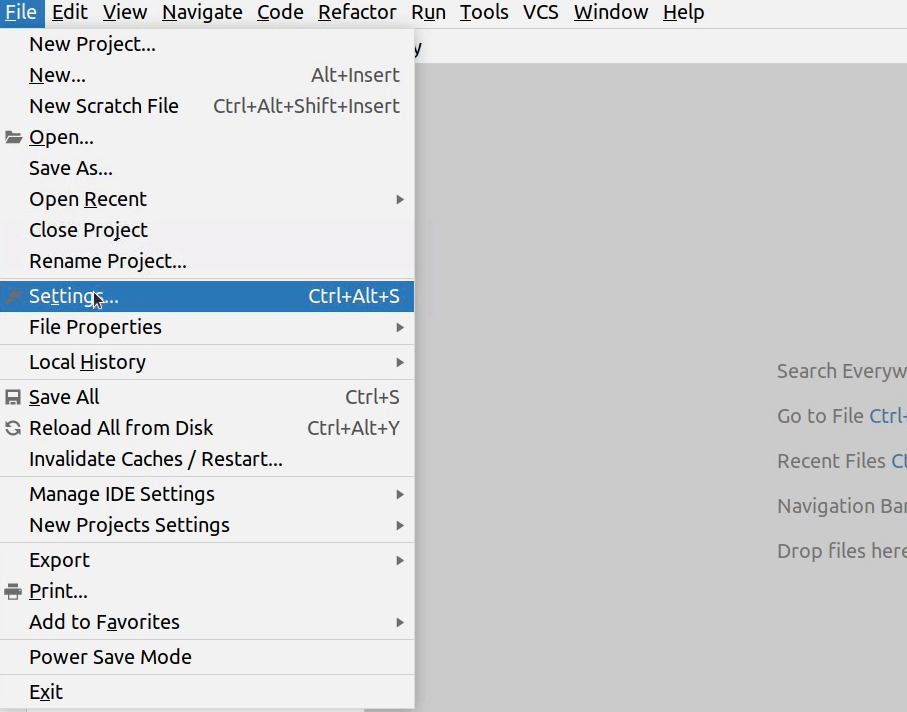
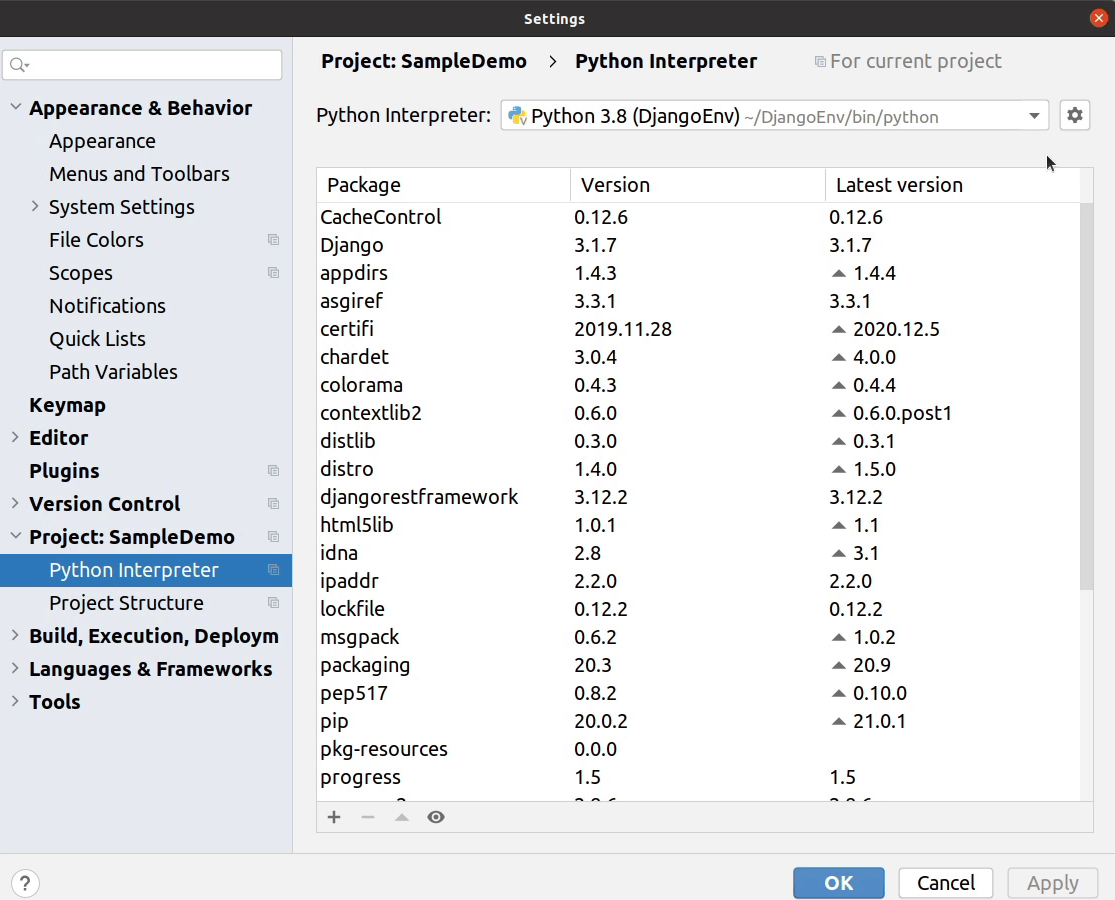
I will click on the (+ plus).
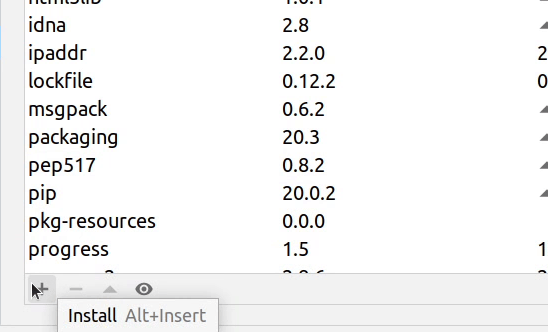
Finally, I will click on Install Package.
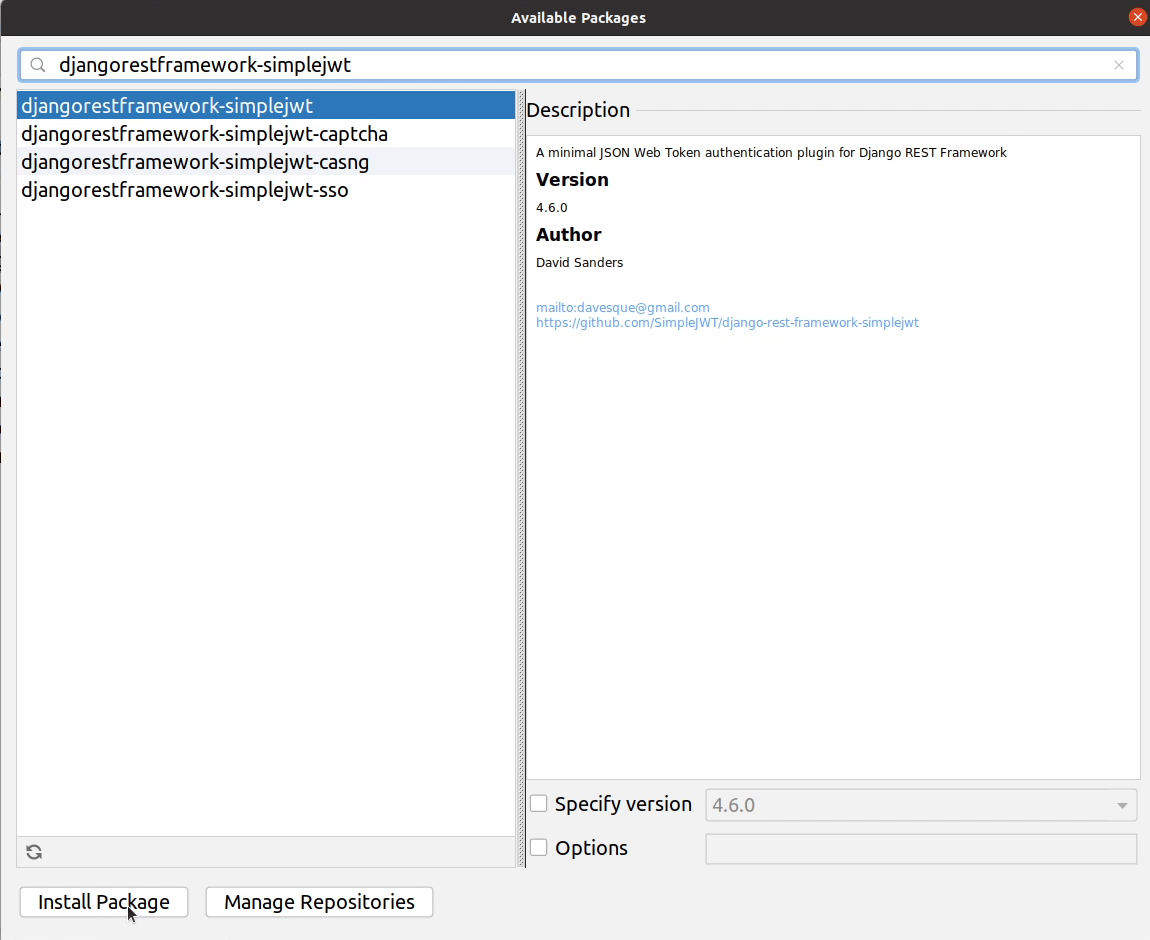
Okay, the installation is successfully done. Let’s update our requirements.txt file.

In settings.py, add rest_framework_simplejwt.authentication.JWTAuthentication to the list of authentication classes:
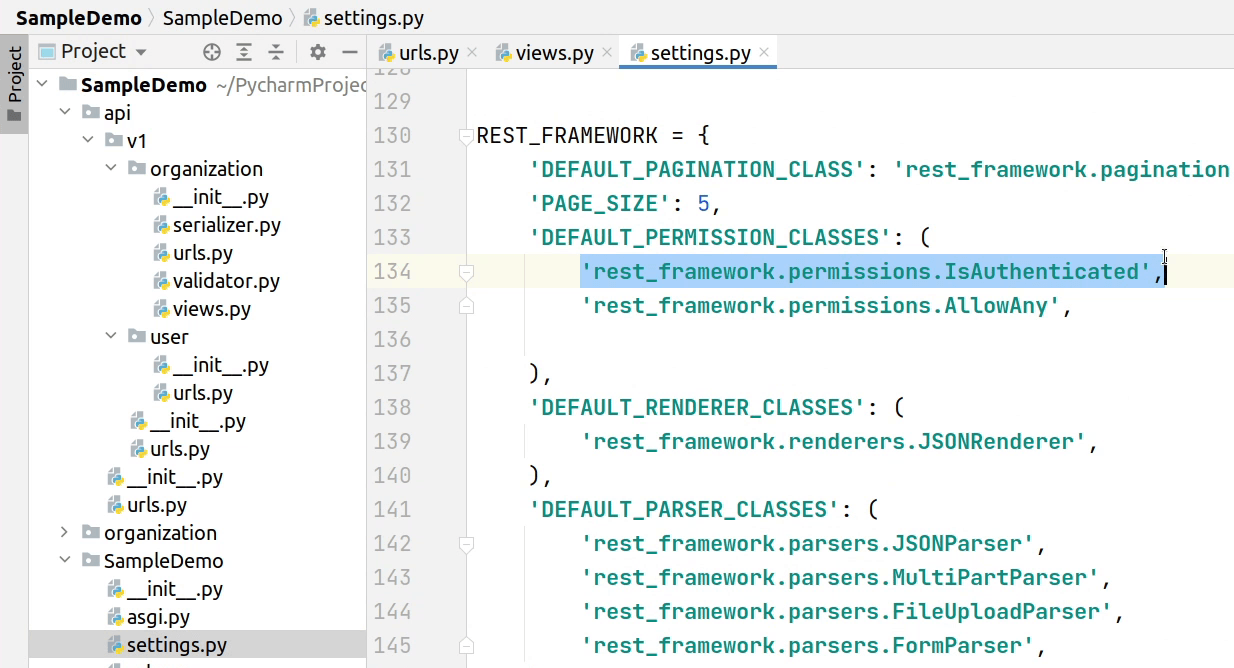
You can see the below image, we have added JWT Authentication in our default authentication classes. The authentication schemes are always defined as a list of classes. The REST framework will attempt to authenticate with each class in the list, and will set request.user and request.auth using the return value of the first class that successfully authenticates.
If no class authenticates, request.user will be set to an instance of
AnonymousUser, and request.auth will be set to None.
REST_FRAMEWORK = {
    'DEFAULT_PAGINATION_CLASS': 'rest_framework.pagination.PageNumberPagination',
    'PAGE_SIZE': 5,
    'DEFAULT_PERMISSION_CLASSES': (
        'rest_framework.permissions.IsAuthenticated',
        'rest_framework.permissions.AllowAny',

    ),
    'DEFAULT_RENDERER_CLASSES': (
        'rest_framework.renderers.JSONRenderer',
    ),
    'DEFAULT_PARSER_CLASSES': (
        'rest_framework.parsers.JSONParser',
        'rest_framework.parsers.MultiPartParser',
        'rest_framework.parsers.FileUploadParser',
        'rest_framework.parsers.FormParser',
    ),
    'DEFAULT_AUTHENTICATION_CLASSES': (
        'rest_framework_simplejwt.authentication.JWTAuthentication',
        'rest_framework.authentication.SessionAuthentication',
        'rest_framework.authentication.BasicAuthentication',
    ),
    'DEFAULT_FILTER_BACKENDS': ('django_filters.rest_framework.DjangoFilterBackend',),
    'DEFAULT_VERSIONING_CLASS': 'rest_framework.versioning.NamespaceVersioning',
}
There are lots of other classes I have added like pagination, renderer & parser classes. I don’t want to get into more detail because we are not covering those scenarios. If you are interested to know more about this, please visit the below reference.
The entire source code is available on GitHub, you can access it from here.
Next, I will be copying the JWT settings from django-rest-framework-simplejwt and paste it in our settings.py file. I am going to use the default settings as per provided in the documentation.
SIMPLE_JWT = {
    'ACCESS_TOKEN_LIFETIME': timedelta(minutes=5),
    'REFRESH_TOKEN_LIFETIME': timedelta(days=1),
    'ROTATE_REFRESH_TOKENS': False,
    'BLACKLIST_AFTER_ROTATION': True,
    'UPDATE_LAST_LOGIN': False,

    'ALGORITHM': 'HS256',
    'SIGNING_KEY': SECRET_KEY,
    'VERIFYING_KEY': None,
    'AUDIENCE': None,
    'ISSUER': None,

    'AUTH_HEADER_TYPES': ('Bearer',),
    'AUTH_HEADER_NAME': 'HTTP_AUTHORIZATION',
    'USER_ID_FIELD': 'id',
    'USER_ID_CLAIM': 'user_id',

    'AUTH_TOKEN_CLASSES': ('rest_framework_simplejwt.tokens.AccessToken',),
    'TOKEN_TYPE_CLAIM': 'token_type',

    'JTI_CLAIM': 'jti',

    'SLIDING_TOKEN_REFRESH_EXP_CLAIM': 'refresh_exp',
    'SLIDING_TOKEN_LIFETIME': timedelta(minutes=5),
    'SLIDING_TOKEN_REFRESH_LIFETIME': timedelta(days=1),
}
Next, I am going to copy the default url routes provided by the simple jwt. This will be used to authenticate our user credentials and in return it will provide us with access token and refresh token.
from rest_framework_simplejwt.views import (
    TokenObtainPairView,
    TokenRefreshView,
)

urlpatterns = [
    path('api/token/', TokenObtainPairView.as_view(), name='token_obtain_pair'),
    path('api/token/refresh/', TokenRefreshView.as_view(), name='token_refresh'),
    path('api/token/verify/', TokenVerifyView.as_view(), name='token_verify'),

]
We will place the URL routes under api/v1/user/urls.py
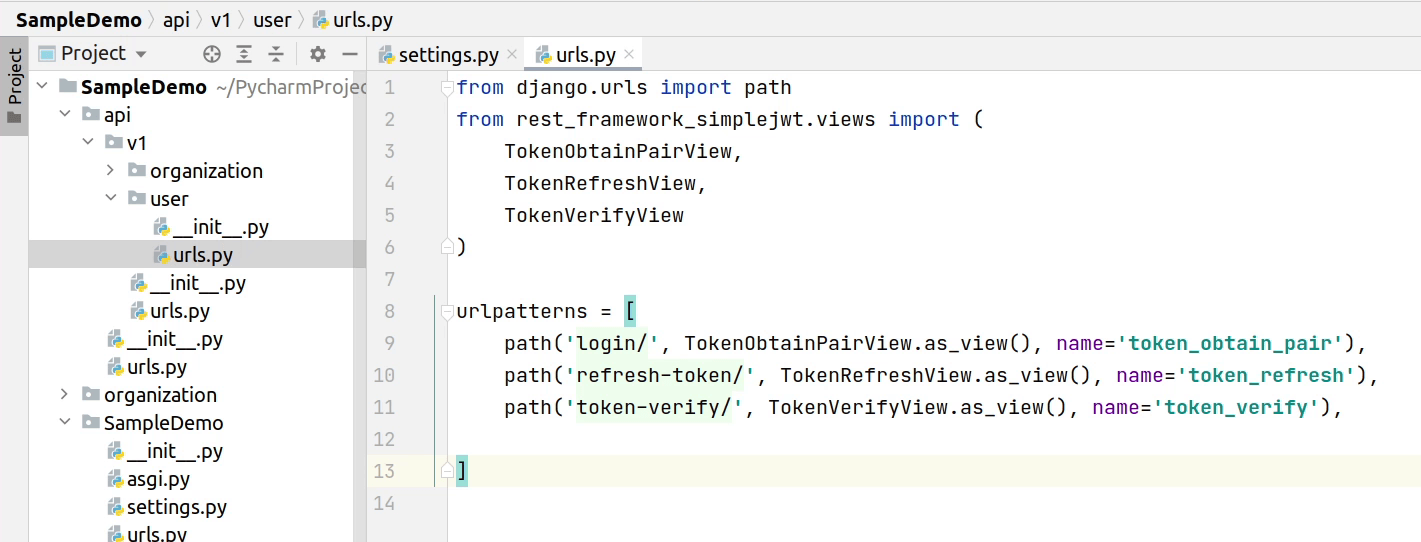
The login api will provide you with access & refresh tokens. The access token is only valid for 5minutes, you can override it in the JWT settings. Refresh tokens are used to generate new tokens before your access token expires. If expired then you need to re-login again.
TokenVerify will be used to check whether the token is still valid or not. You are going to play with these APIs when you are trying to integrate with modern frontend applications.
Make sure to install django-filter, as we have included it in the default filter backends in our rest framework settings.
This is one of the common packages widely used which allows users to declaratively add dynamic QuerySet filtering from URL parameters.
pip install django-filter==2.4.0
As we don’t have any users in our system, I will create a superuser in our account.
I will go back to PyCharm, and then I will click on Tools | Run manage.py Task

I will type createsuperuser and press ⏎ (macOS) / Enter (Windows/Linux).

I am going to provide a username and password, and will skip providing an email address.
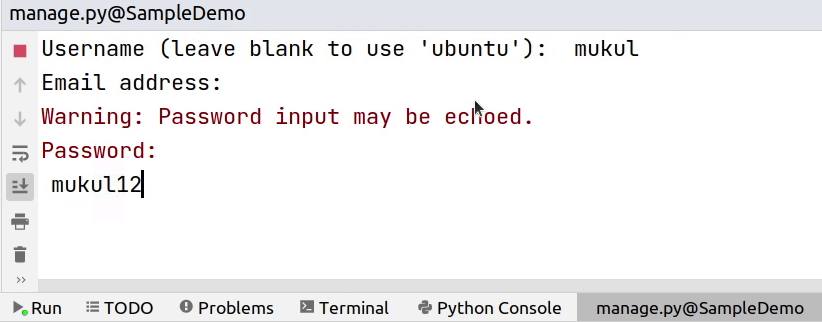
I am going to bypass password validation. The password is quite weak but that’s okay for the tutorial but not recommended while your application is running in production.
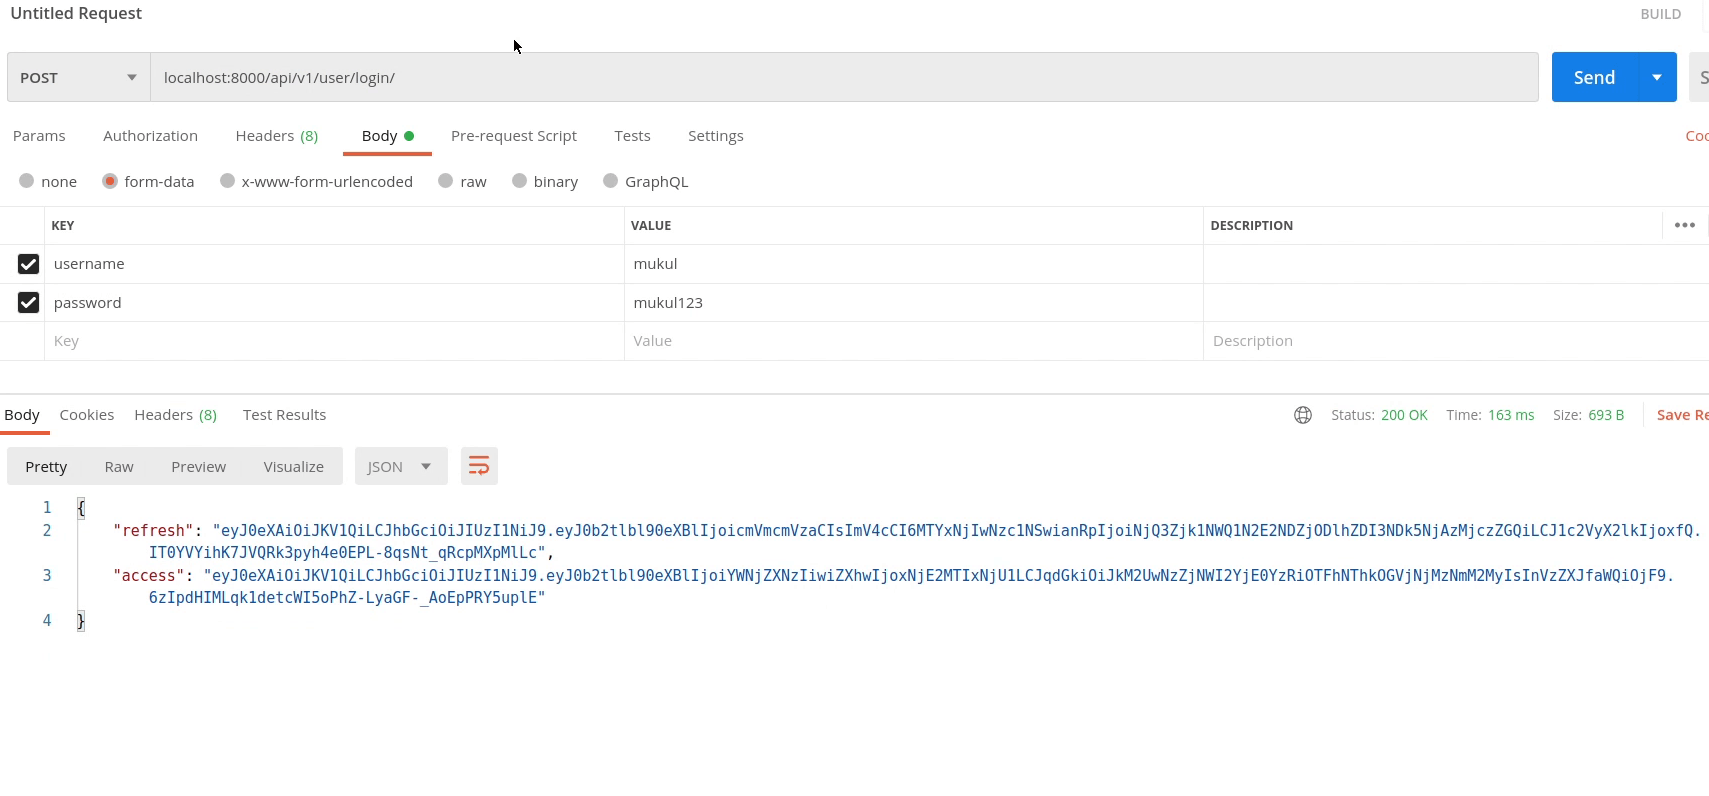
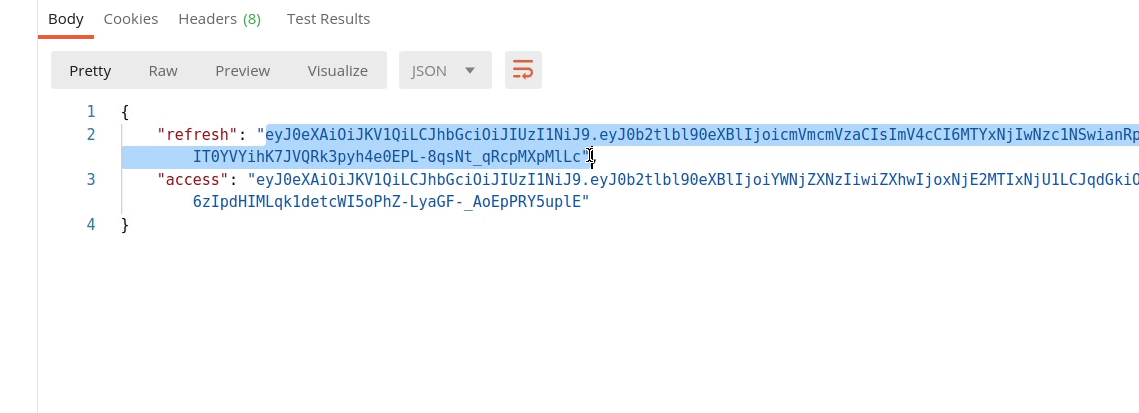
Okay, our superuser has been successfully created. Let’s go back to the postman and provide our new generated user credentials.
You can observe the below image, we are successfully authenticated with our new credentials and in response we are receiveing access and refresh tokens.
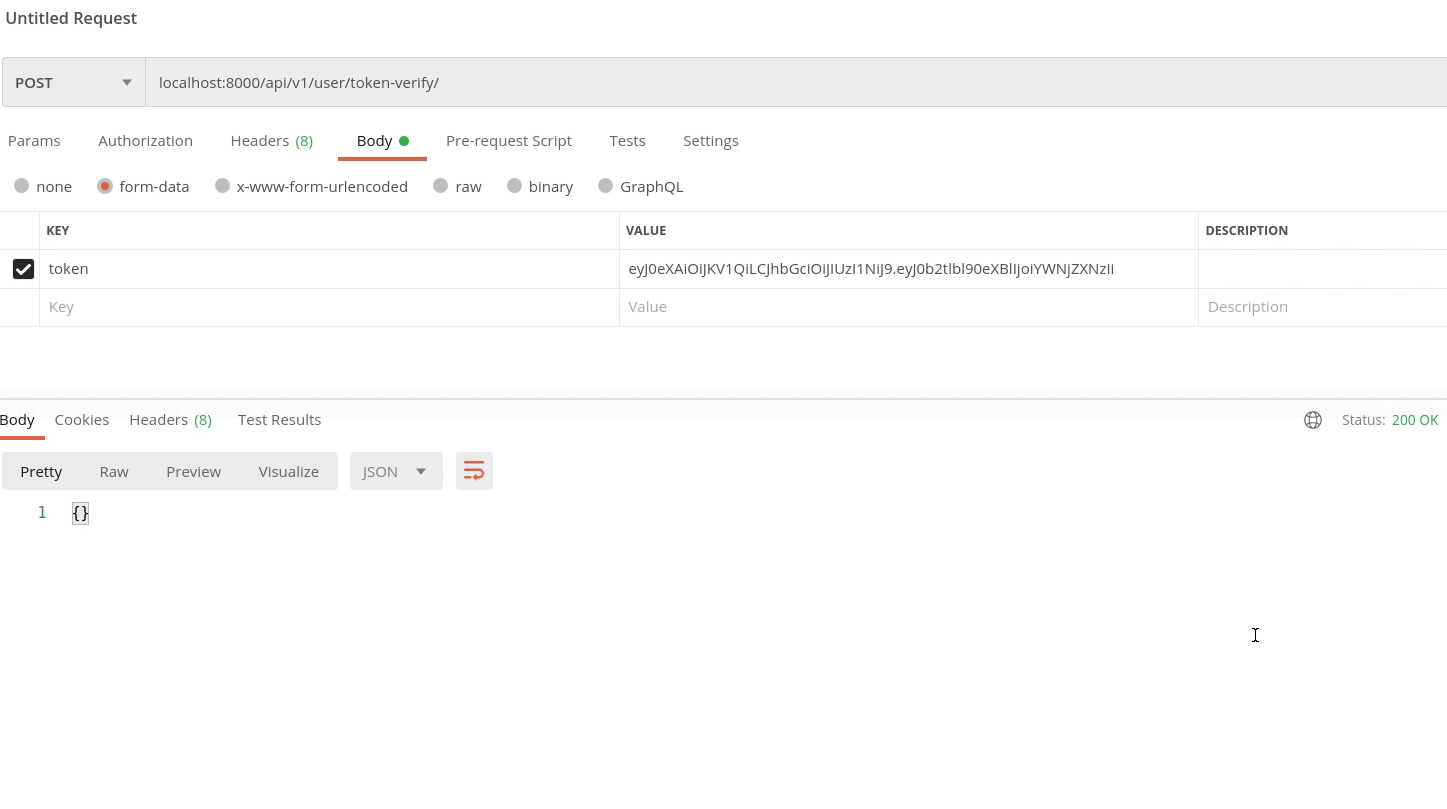
Let me verify the token is valid or not by calling our token verify api and passing the access token in the payload.
You can see the below image, we receive 200 HTTP response that means our token is valid.
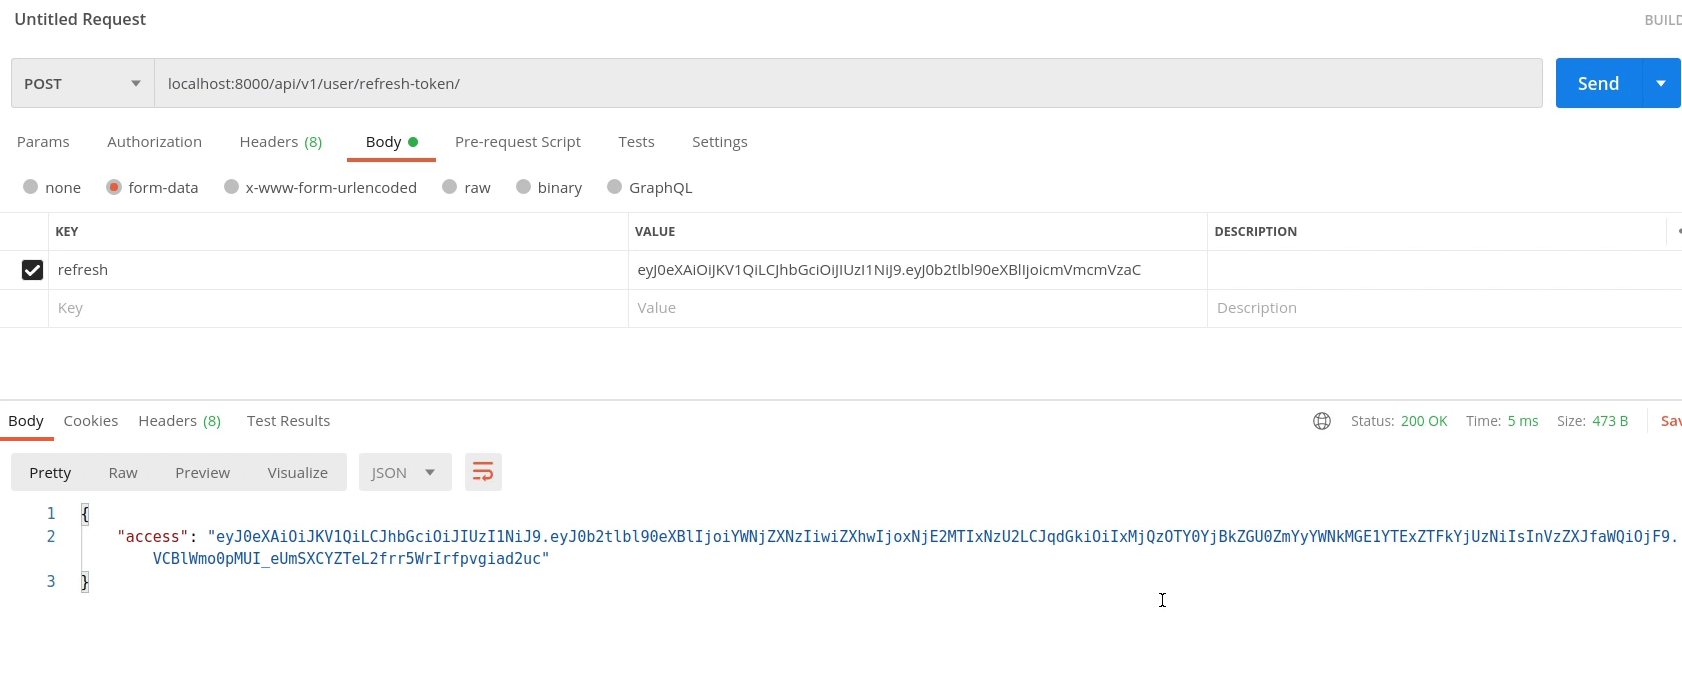
Now, I will test out the refresh token. Make sure to pass the refresh token which you received in your login api.
So, finally we received the access token which is valid for the next 5minutes. When it comes to security, make sure the lifetime of your token is comparatively less.
Next, I will move to views.py in our api/v1/organization directory.
I will remove the permission AllowAny. Instead of AllowAny you can pass IsAuthenticated.
from rest_framework import status
from rest_framework.generics import (ListCreateAPIView, RetrieveUpdateDestroyAPIView)
from rest_framework.response import Response
from rest_framework.permissions import IsAuthenticated

from organization.models import Organization
from . import serializer


class OrganizationAPI(ListCreateAPIView):
    queryset = Organization.objects.all()
    serializer_class = serializer.OrganizationSerializer
    permission_classes = (IsAuthenticated,)

    def create(self, request, *args, **kwargs):
        serializer = self.get_serializer(data=request.data)
        serializer.is_valid(raise_exception=True)
        self.perform_create(serializer)
        headers = self.get_success_headers(serializer.data)
        return Response({"status": True,
                         "message": "Organization Added !",
                         "data": serializer.data},
                        status=status.HTTP_201_CREATED, headers=headers)
It's much better to directly mention in your APIs instead of relying on the defaults.
If you don't want to mention permission for every api, then you can mention directly in your settings.py file. Make sure to add it at the top, because order matters.
Let’s now move back again to Postman and test our APIs.
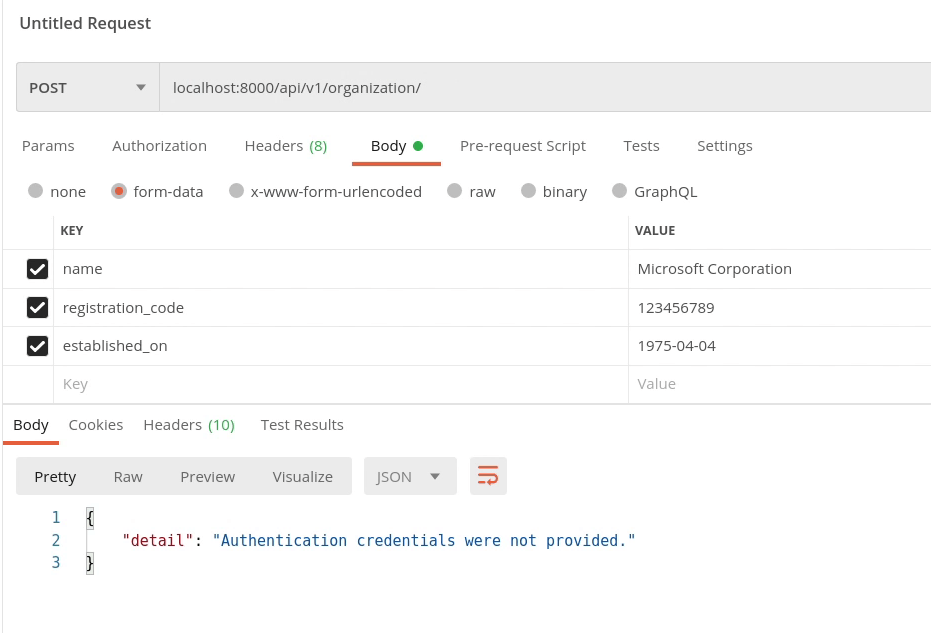
You can see the below image, our routes are now protected.
The API raised an unauthorized response : authentication credentials were not provided.
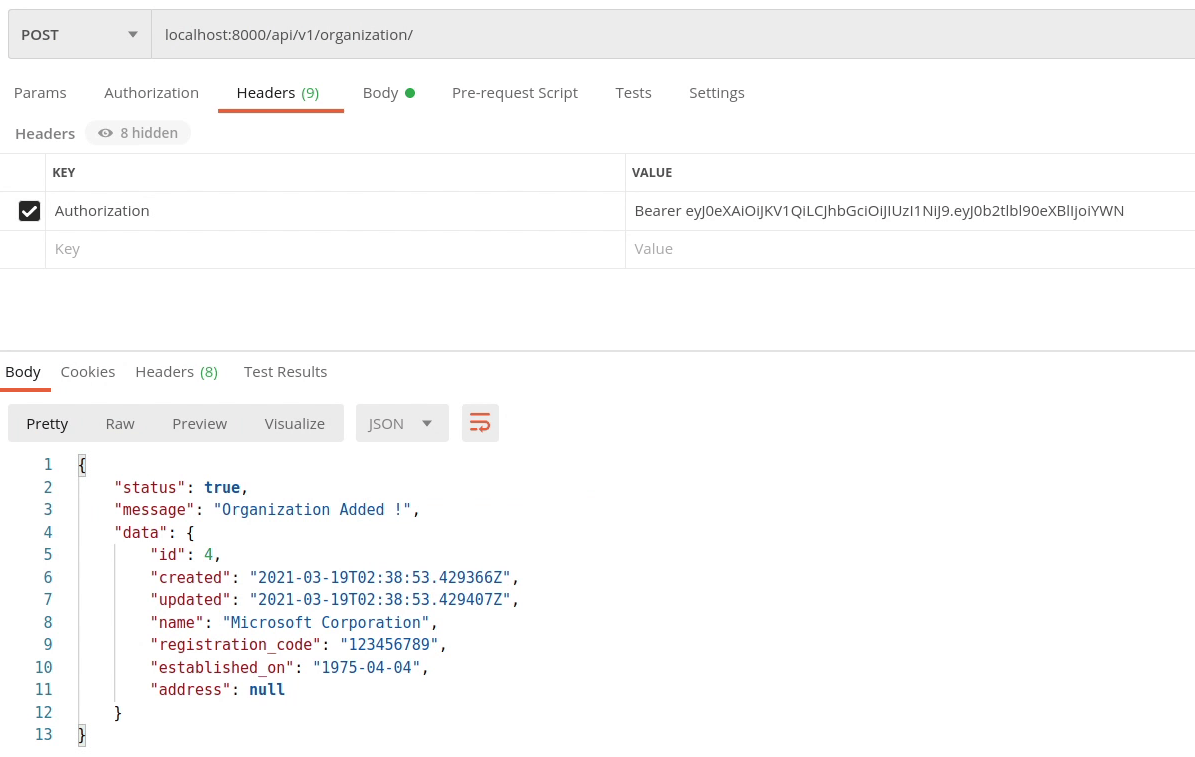
Now I am going to pass the access token in the Authorization header.
The value should be Bearer followed by the access token.
Authorization: Bearer <access_token>
Yes, finally our API routes are now protected, and they are not going to work until you provide a valid token. Try playing around it.
In the upcoming video I will show you how to integrate monitoring tools into the project, which is required when your application is running in test, staging or production server to receive real time errors.