
Setting up VPC and RDS in AWS
Setup VPC, Subnets, Route Tables, Internet Gateway and Relational Database.
Hello everyone, welcome to the Django tutorial series. In this tutorial step, we are going to set up a VPC in AWS and securely launch an RDS instance in a private subnet.
Background
Before stepping forward let me give you brief background on what is AWS VPC and RDS.
Amazon Virtual Private Cloud (Amazon VPC) is a service that lets you launch AWS resources in a logically-isolated virtual network that you define. You have complete control over your virtual networking environment, including selection of your own IP address range, creation of subnets, and configuration of route tables and network gateways.
To work with AWS VPC you need to have basic networking knowledge. For reference, you can watch this video : AWS Networking fundamentals
Amazon RDS also known as Relational Database Service is a distributed relational database service provided by Amazon Web Services. It is a web service running "in the cloud" designed to simplify the setup, operation, and scaling of a relational database for use in applications. It provides cost-efficient and resizable capacity while automating time-consuming administration tasks such as: hardware provisioning, database setup, patching and backups. As of today the currently supported database engines are : MySQL, Oracle, Postgres, SQLServer, MariaDB and Amazon Aurora.
For reference, follow this link : aws.amazon.com/rds
Setup VPC, Subnets, Route Tables & Internet Gateway
Let’s get our hands dirty, as you can see on my screen I am already logged in into my AWS Management Console.
I am going to search for VPC and navigate towards the VPC Management Console where I will be creating a new VPC and naming it as DjangoVPC, and the CIDR block will be 10.0.0.0/26. This will create 64 IP addresses.
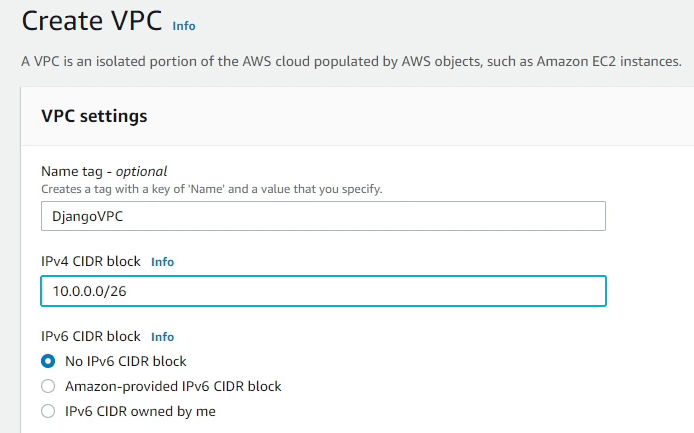
To know how we got 64 IP addresses, I would suggest to research about CIDR (Classless inter-domain routing).
Reference:
After the VPC has been successfully created, next we need to create Subnets.
According to Wikipedia: A subnetwork or subnet is a logical subdivision of an IP network. The practice of dividing a network into two or more networks is called subnetting.
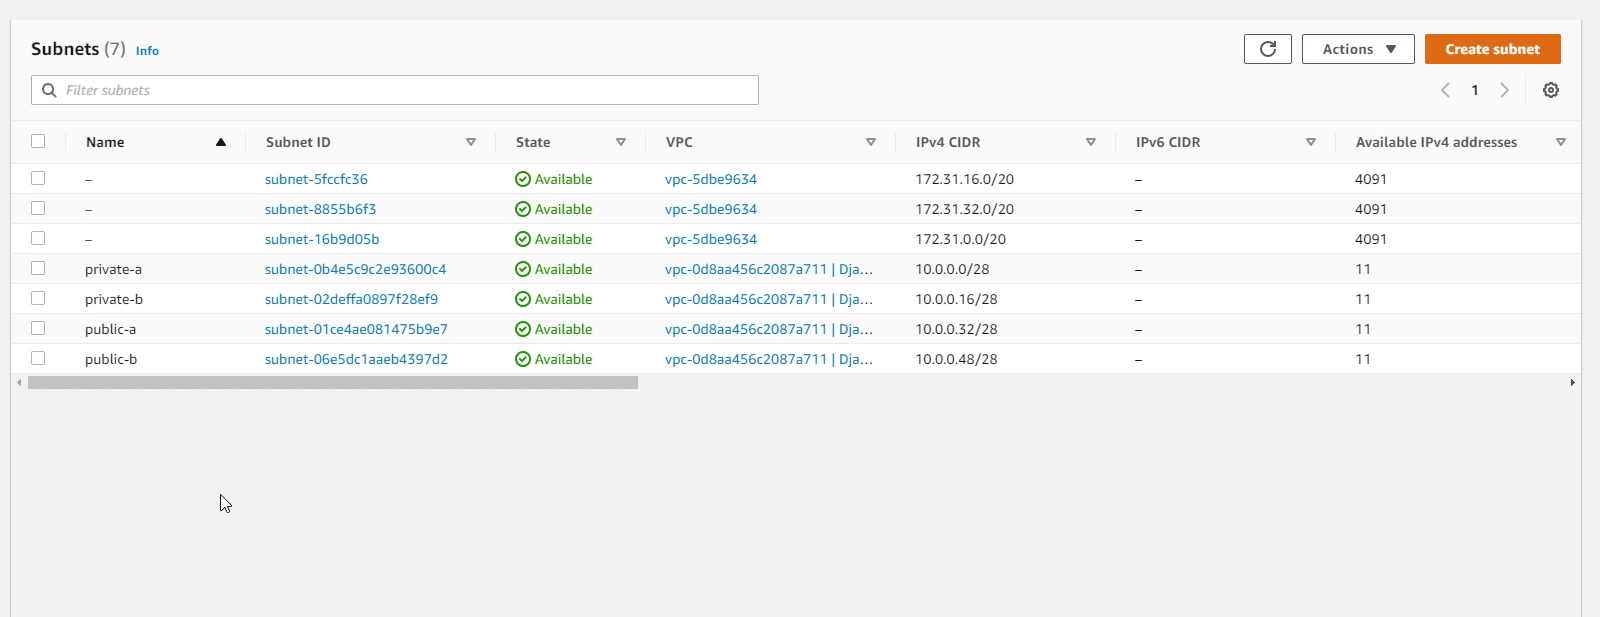
Under DjangoVPC, I am going to create 4 subnets with two private and two public subnets. I will divide the subnet into 4 blocks with 16 IP addresses each. Make sure to create two private subnets in different availability zones. I will follow the same approach for the public subnets.
We have successfully created the subnets. As you can see in the image below, the available IPv4 addresses is only 11, but what about the remaining 5? The remaining 5 are reserved by AWS. Amazon reserves the first four (4) IP addresses and the last one (1) IP address of every subnet for IP networking purposes.
To know more about subnets, please visit VPCs and subnets - Amazon Virtual Private Cloud.
Next, we are going to create a route table. A route table contains a set of rules, called routes, that are used to determine where network traffic from your subnet or gateway is directed.
There will be two route tables -- one private and one public -- under our DjangoVPC, and we will be associating our subnets into the route tables.
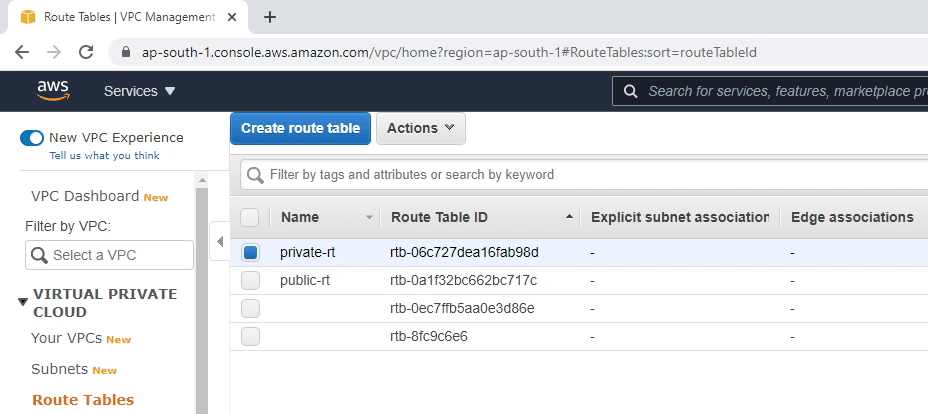
As you can see the image below, I am associating two private subnets in our private-rt route table. I will be performing the same with public subnets.

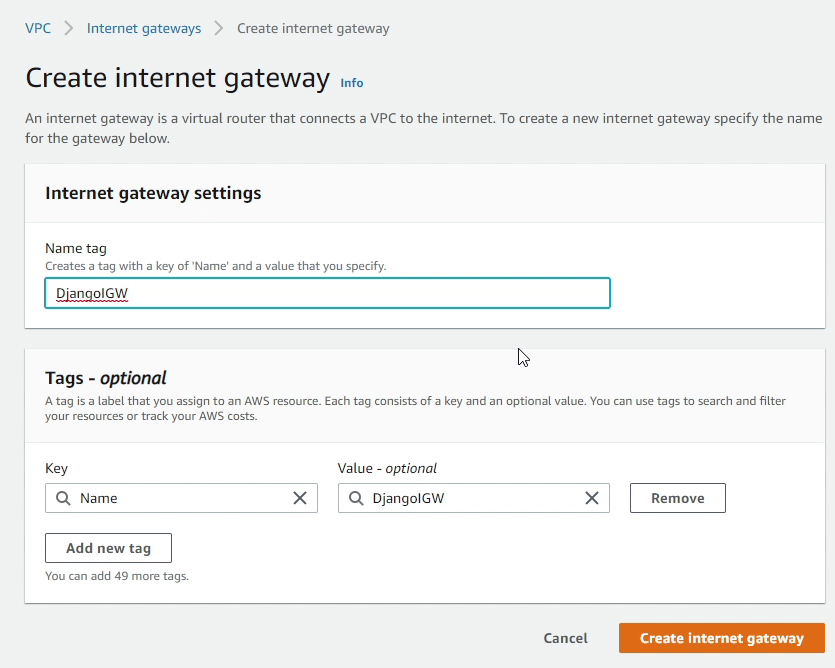
Next, we are going to route internet-bound traffic to our public subnet, for that we need to create an Internet Gateway. I am going to create an Internet Gateway and name it as DjangoIGW.
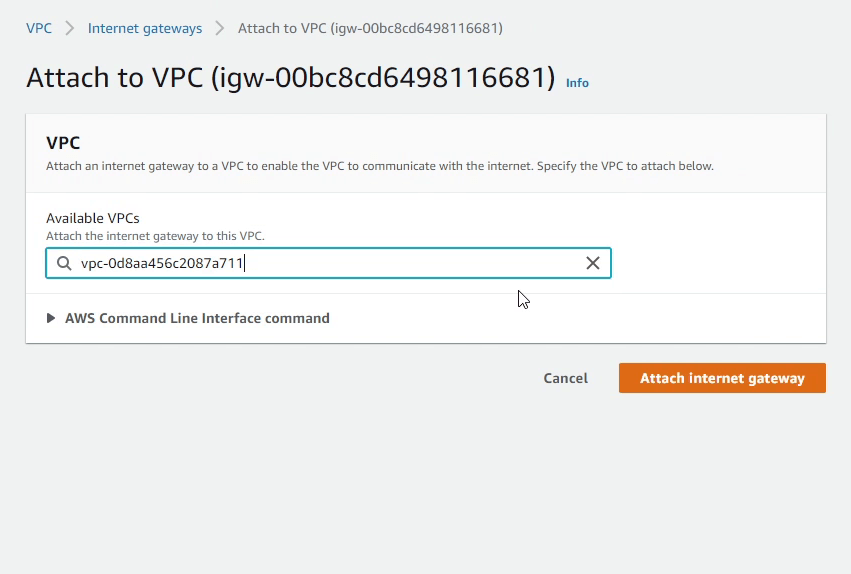
Next, I will attach the Internet Gateway to our DjangoVPC.
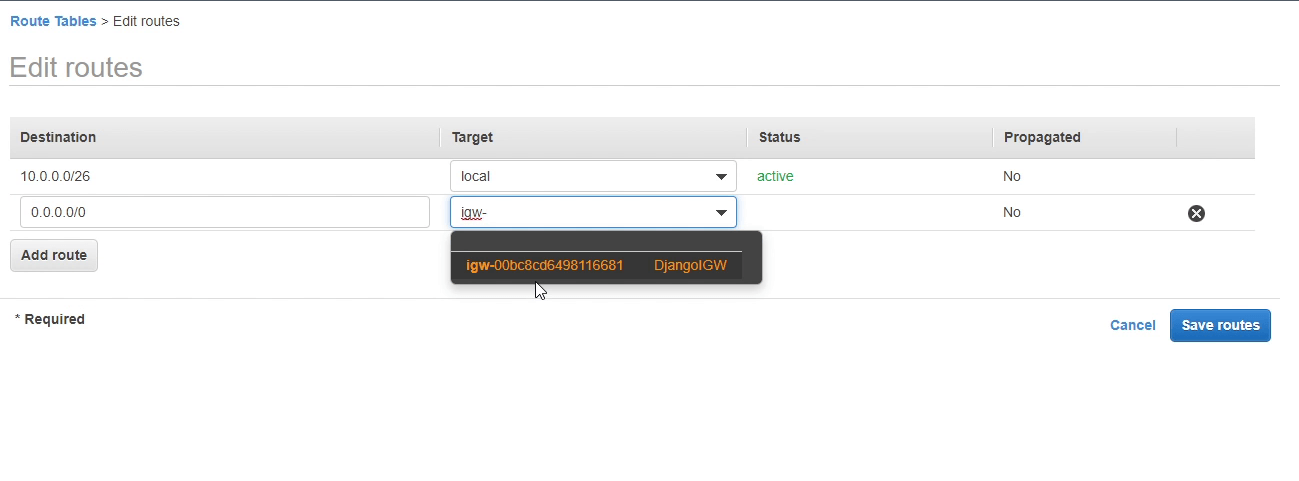
I will now add a route in our public route table (public-rt) which directs internet-bound traffic to the internet gateway.
Maybe your application is running under a private subnet, and you want to update or patch your application. You might need the internet, but you don't want your application to be exposed to the outside. For this you can create a NAT Gateway. NAT gateways let instances in a private subnet connect to the internet or other AWS services, but prevent the internet from initiating a connection with those instances.
Amazon Relational Database Service (RDS)
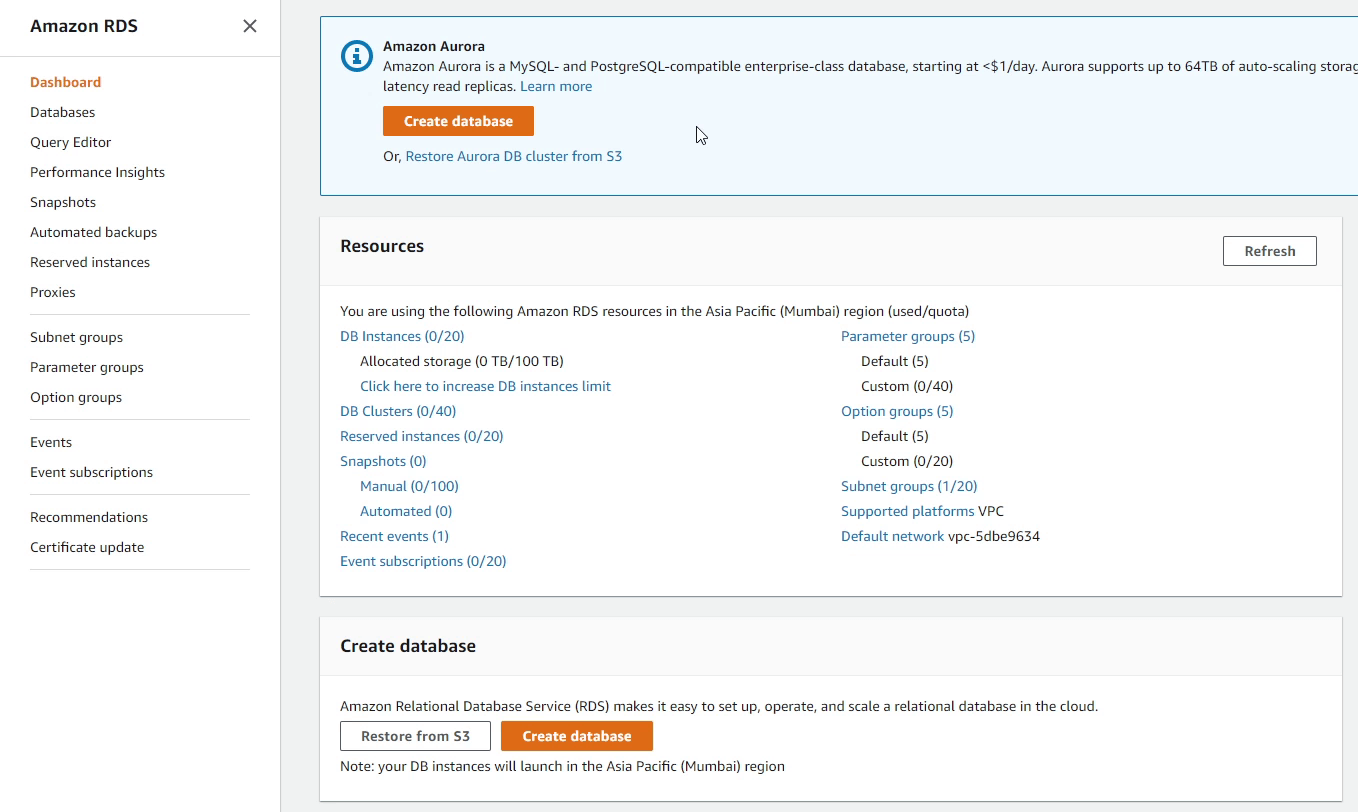
Let’s now move to RDS Management Console and spin up our first RDS instance.
Before creating a DB instance, first we need to create a DB Subnet Group.
An RDS Subnet Group is a collection of subnets that you can use to designate for your RDS database instance in a VPC. Your VPC must have at least two subnets. These subnets must be in two different Availability Zones in the AWS Region where you want to deploy your DB instance.
I click Create DB Subnet Group, and provide the name Postgres-Django-Private-Subnet-Group.
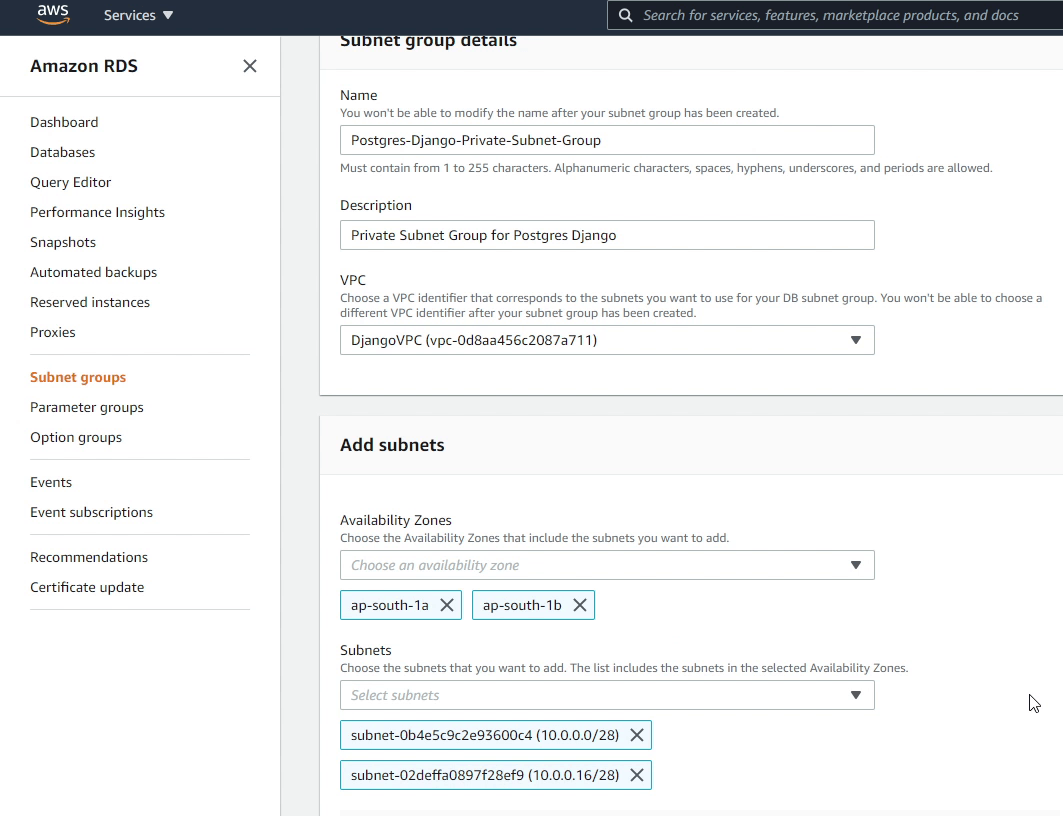
I will be choosing DjangoVPC as my VPC identifier, along with two different availability zones under which I will be selecting my private subnets.
Finally, I will click Create.
Now, I will move forward creating our new database instance. I will choose the database creation method as Standard create.
AWS provides a lot of DB engines. For this tutorial I will be using PostgreSQL.
You can also use Amazon Aurora which has been developed in-house by Amazon. Aurora is a MySQL and PostgreSQL-compatible relational database which provides high performance throughput 5x faster to standard MySQL and 3x faster to standard PostgreSQL.
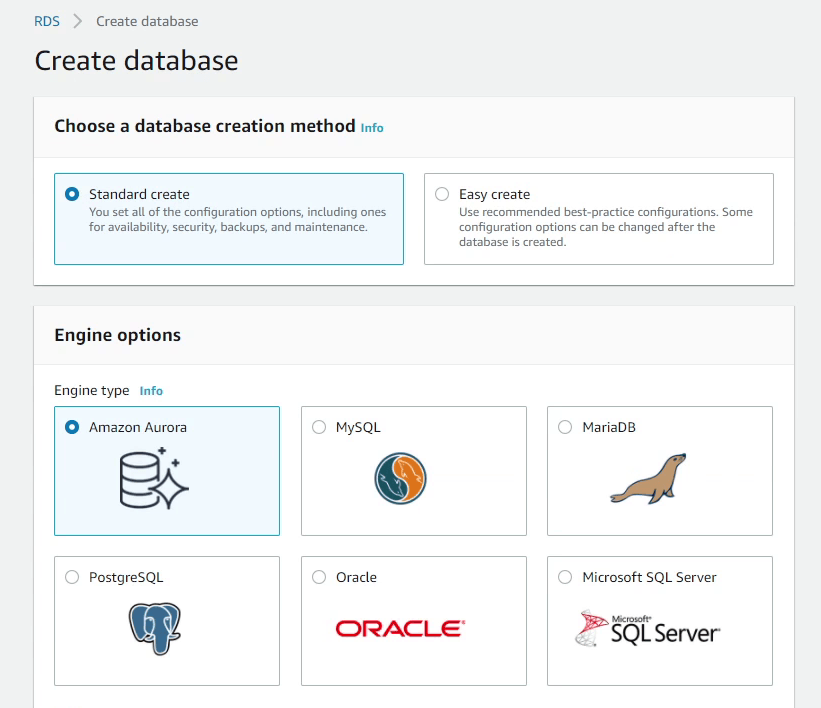
I will choose PostgreSQL 10.5. I would recommend choosing a version which is compatible with your application.
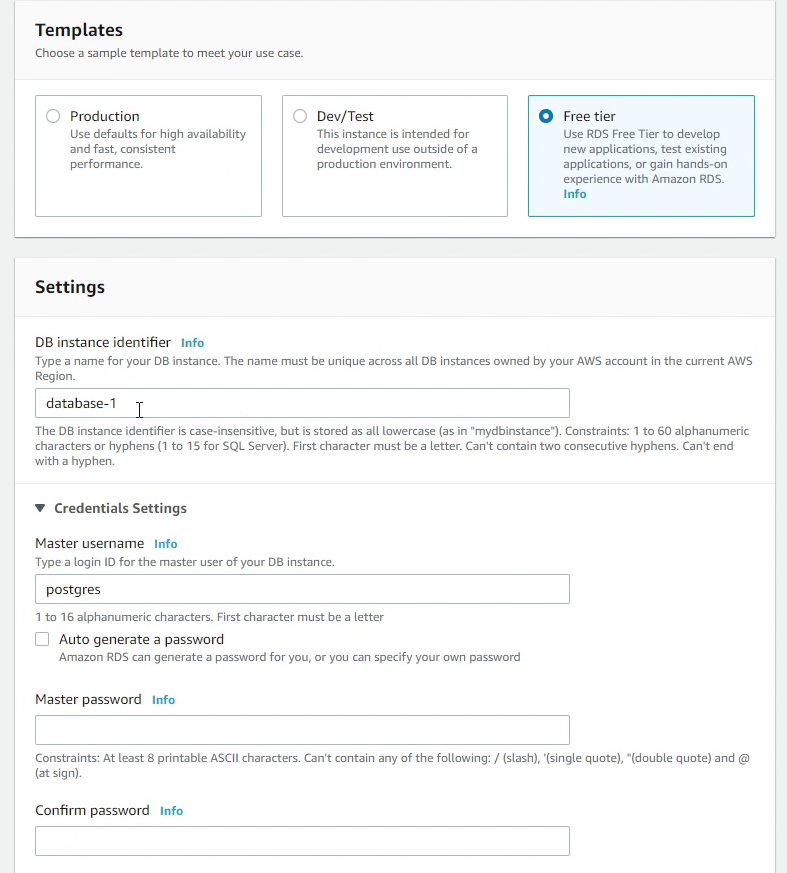
Under Templates make sure you choose Free Tier, if you are interested in saving some money while experimenting with RDS.
I will be providing generic settings like db identifier, username and password.
I will be choosing t2.micro instance class. This provides 1 gigabyte RAM which is quite okay for our application. I will also disable storage autoscaling as we don’t require it. Based on your needs you can use it for your production workloads.
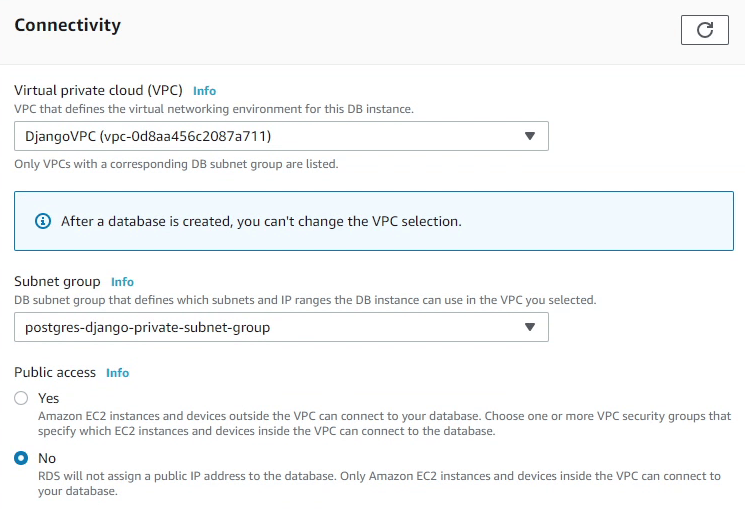
Make sure to choose DjangoVPC in the Connectivity section. You can see it automatically populated the db subnet group which we created earlier. The Public access should be disabled because we don’t want to assign any public IP to our db instance, only the EC2 instance can connect with the RDS.
I am going to create a security group called Postgres-Django-SG.
Security group is a virtual firewall which works at an instance level. We also have "network acl" which stands for network access control list (ACL) is an optional layer of security for your VPC that acts as a firewall at subnet level.
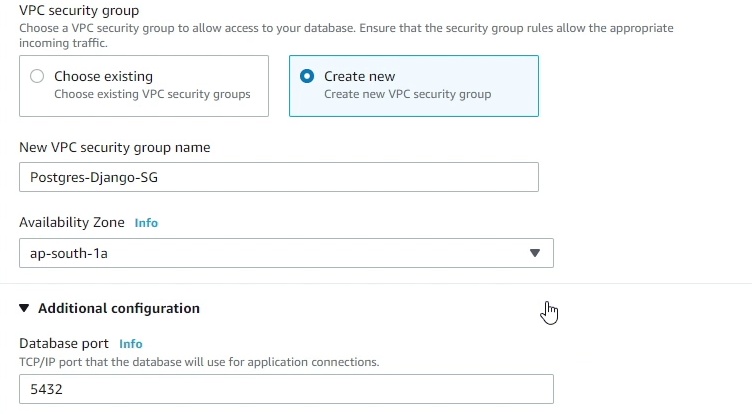
The Security Group will be created in the ap-south-1a availability zone. We will be also creating our EC2 instance in the same availability zone.
The database port 5432 will be the default, and we are not going to change that. Make sure under database authentication you select Password authentication. For more stringent security you can also use IAM authentication or Kerberos.
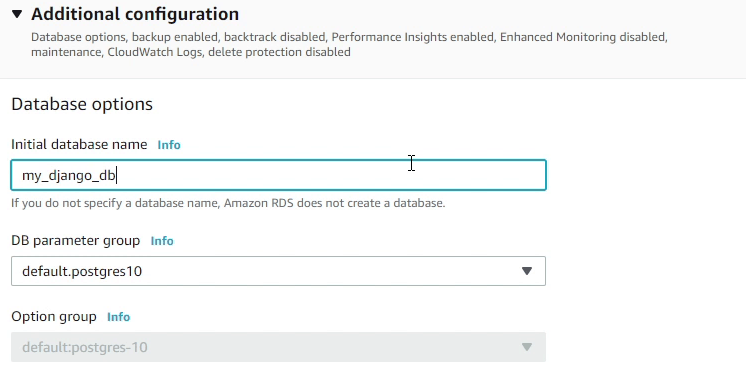
Under Additional Configuration, I will provide the database name as my_django_db.
We will be using the default DB parameter group, there are no changes in that. A DB parameter group stores db engine configuration values that are applied to one or more DB instances.
Finally, I will click Create database. It will take a few minutes to launch the db instance.
I would like to highlight a few things which I did not cover in Additional Configuration like Backups, Monitoring and Maintenance Window. It depends upon the use case of what you are trying to build. These tools are essential when you are working with a production database. But if you are using RDS for the first time, just like trying it out, then it’s not necessary to use these features.
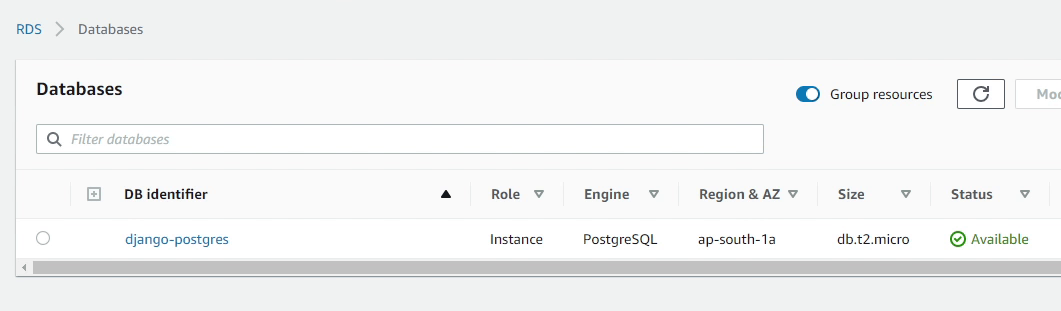
After a few minutes you will observe in the RDS console that our db instance is up and running. As you can see in the below image, the status showing as Available.
Let’s move to the next tutorial where I will be setting up an Ubuntu Desktop in Amazon EC2.