
Setup Ubuntu Desktop in AWS using NICE DCV
Configure security group and launch a new instance.
Hello everyone, welcome to the Django tutorial series. In this tutorial, we are going to set up an Ubuntu Desktop 20.04 LTS in Amazon Elastic Compute Cloud, also known as EC2.
Security Groups
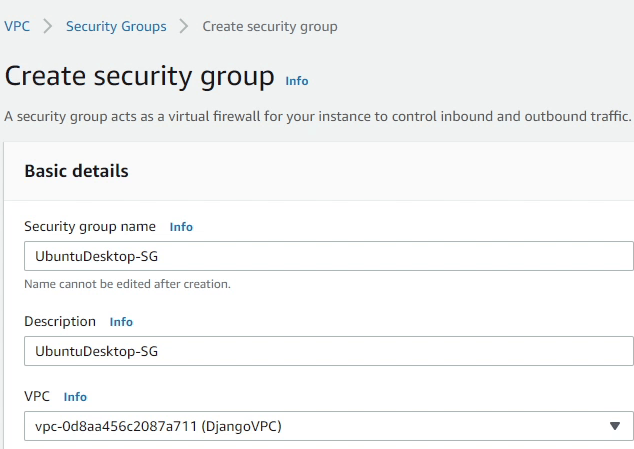
Let’s first move to Security Groups under the VPC Management Console, where I will be creating a new security group for our EC2 instance.
I am going to name it UbuntuDesktop-SG.
Under inbound rules make sure you are able to connect to the instance through SSH. It’s a secure shell protocol to connect securely to our remote servers. I have made sure that it accepts connections from my IP address.
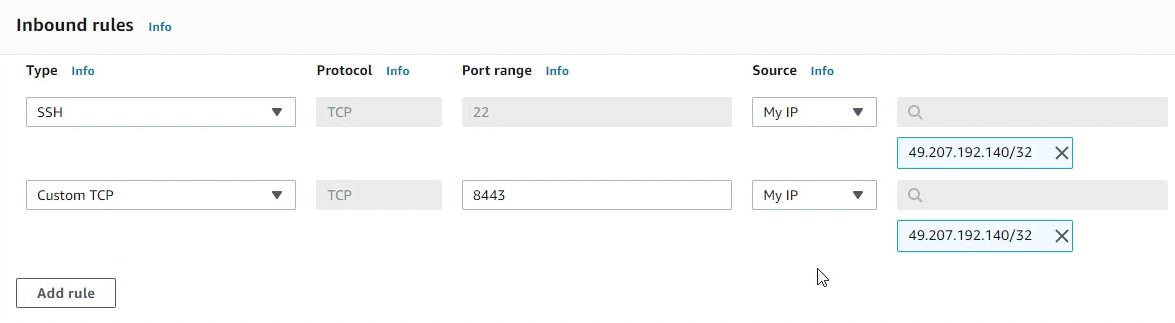
I will be adding one more rule accepting connections from my IP address in port 8443.
After adding the information, I will click Create security group.
There are many ways to securely connect to your instances, for example a bastion host, which is a special-purpose computer on a network specifically designed and configured to withstand attacks.
Security is a big topic, and it's an endless debate. I would recommend following the principle of least-privilege. If you are interested to know more about AWS Security & Compliance, please follow the below reference.
Reference:
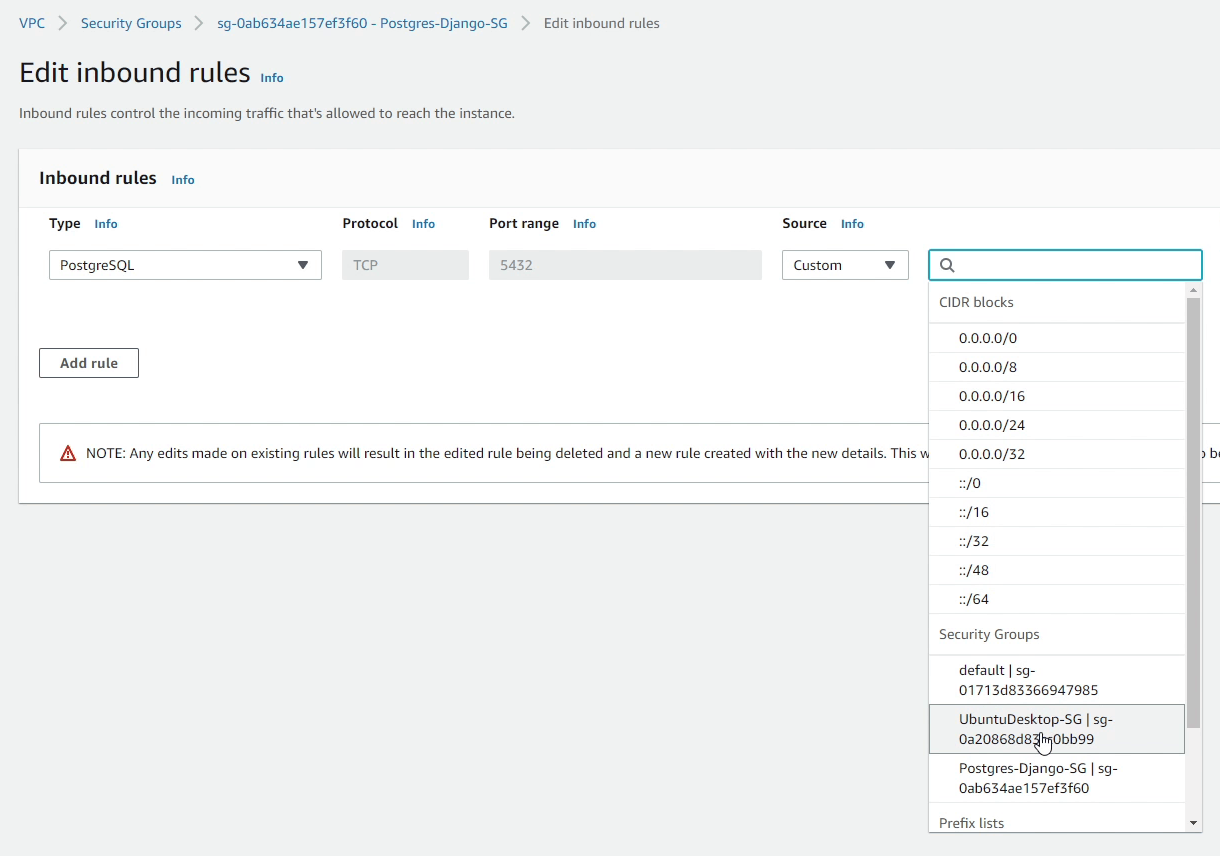
Our security group has been successfully created. Now, I will move forward to edit the inbound rules for "Postgres-Django-SG" security group.
I will make sure to add UbuntuDesktop-SG in the inbound rules to accept requests in the port 5432, and finally click Save rules.
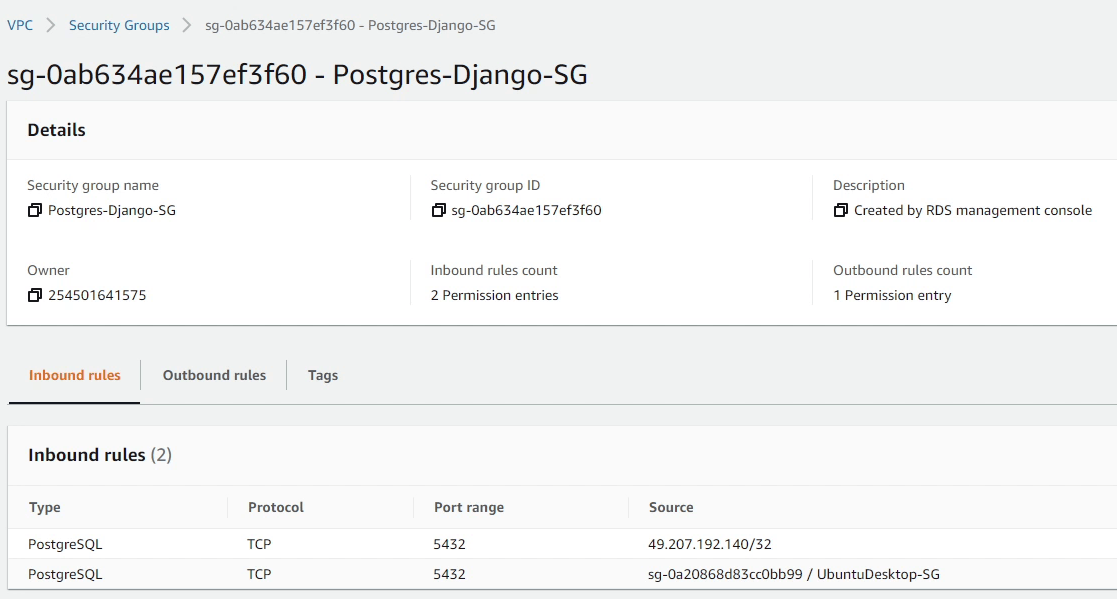
As you can see the below image, the security group has two rules attached: One accepting connections from the EC2 Instance, and second from an IP Address which is actually my public IP address. As you know, the db instance is running in a private subnet. Thus, you can’t connect directly from the public internet. If you want, you can remove the IP address because it’s not going to work.
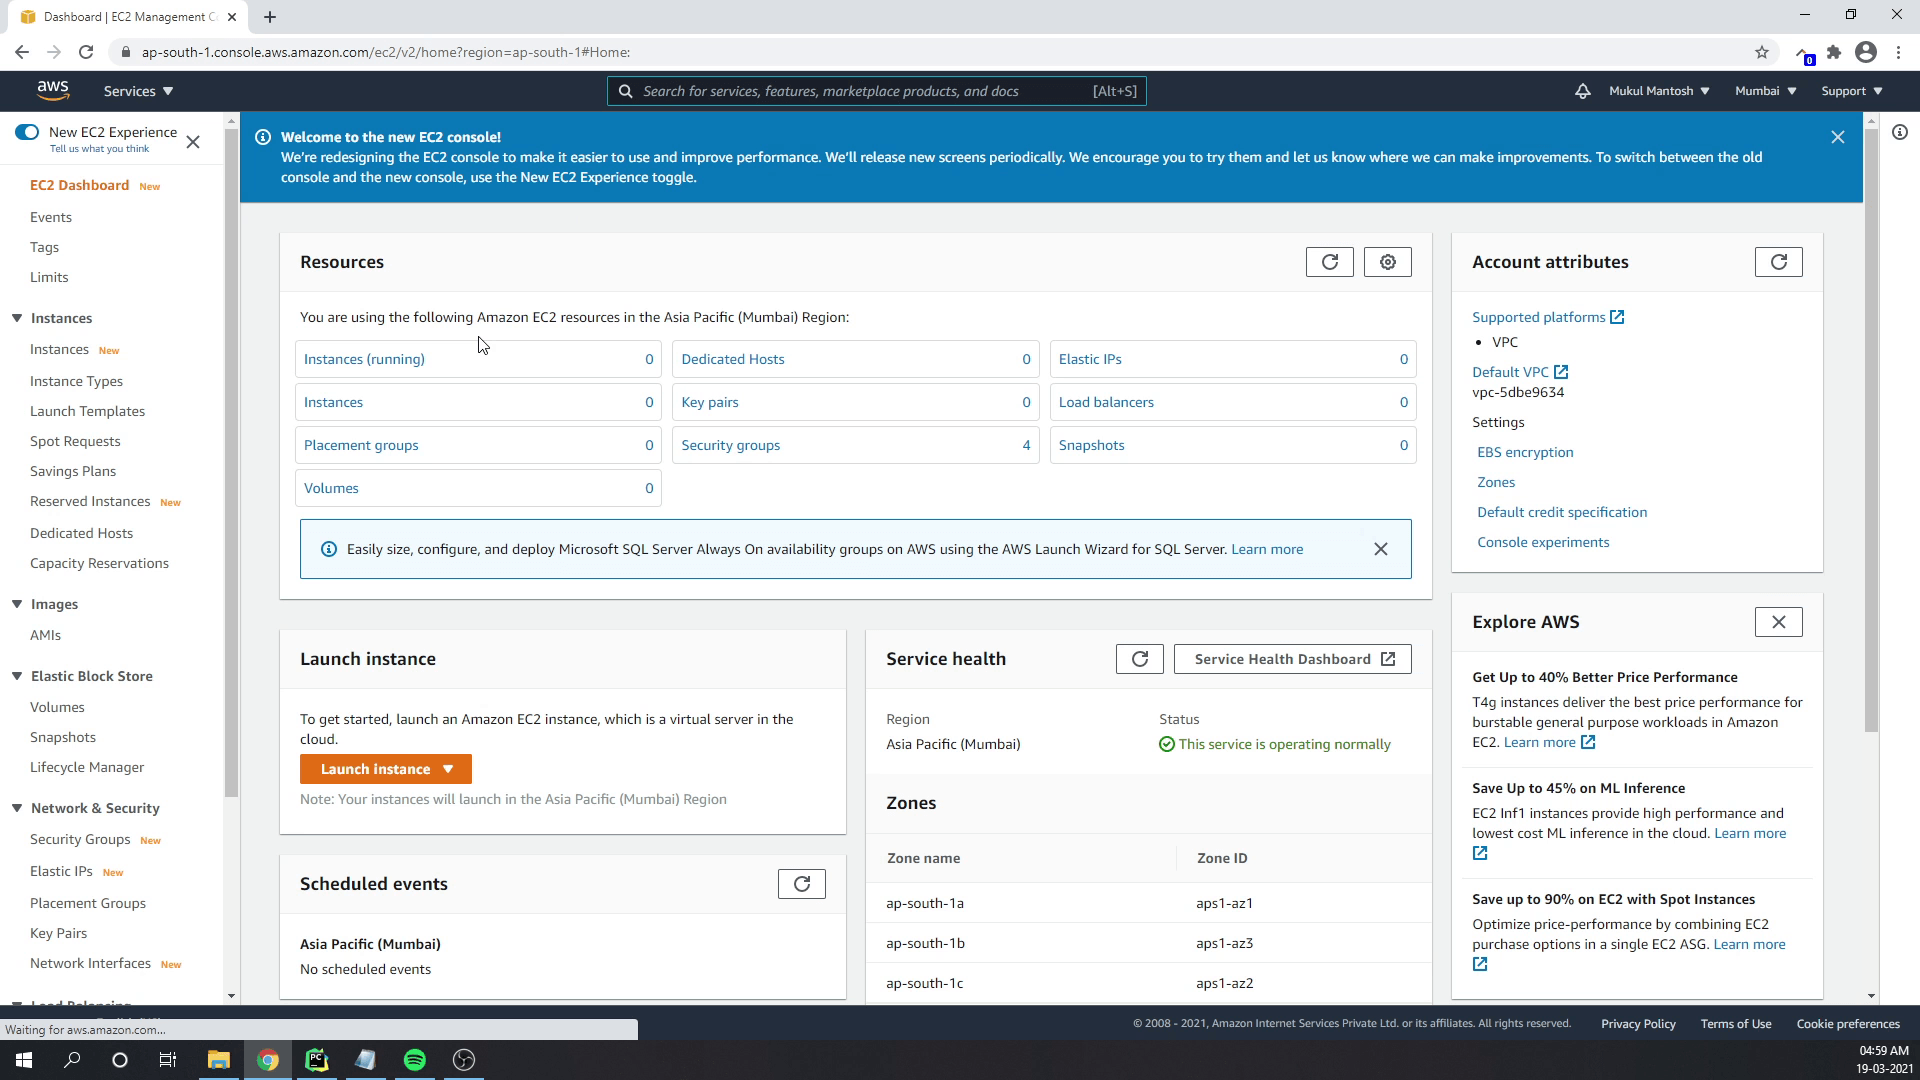
We are now done with the security groups. Now, I will navigate to the EC2 console where I am going to spin up our new server.
I will click on Launch instance.
NICE DCV
According to Amazon - NICE Desktop Cloud Visualization (DCV) is a high-performance remote display protocol that provides customers with a secure way to deliver remote desktops and application streaming from any cloud or data center to any device, over varying network conditions. With NICE DCV and Amazon EC2, customers can run graphics-intensive applications remotely on EC2 instances, and stream their user interface to simpler client machines, eliminating the need for expensive dedicated workstations.
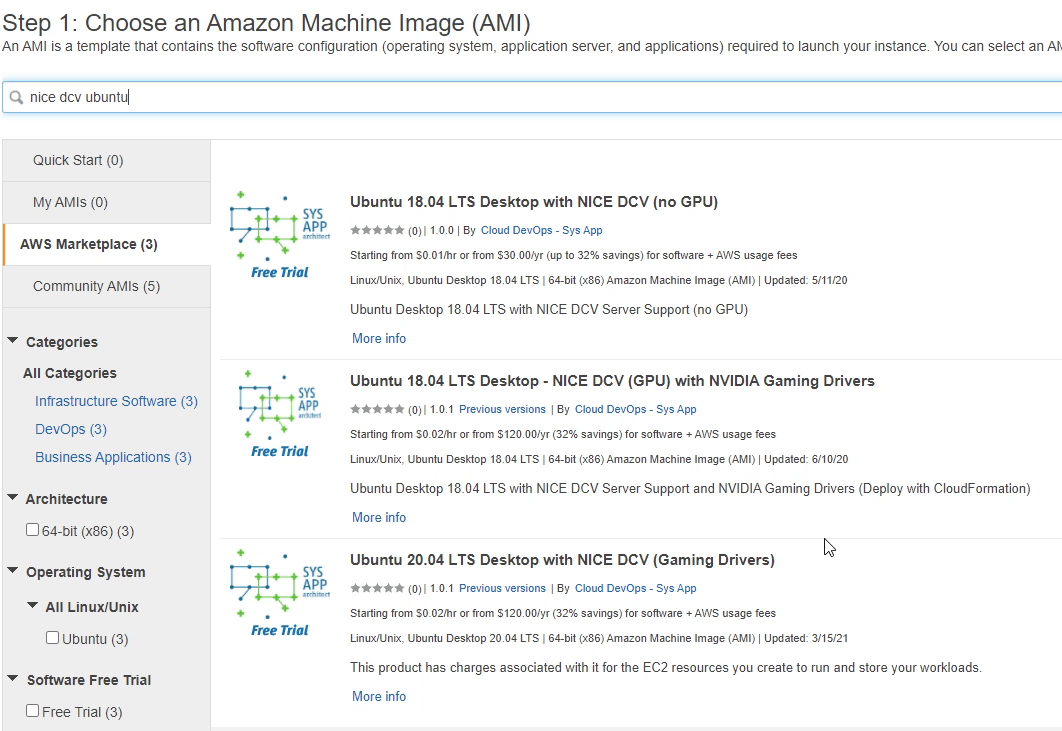
I will search for Ubuntu Desktop in AWS Marketplace. For this tutorial I will be using Ubuntu Desktop 20.04 LTS Desktop with NICE DCV (Gaming Drivers).
NICE DCV supports both Windows and Linux remote environments. Native clients can support up to four monitors at 4K resolution each.
There is no additional charge to use NICE DCV on Amazon EC2. You pay only for the EC2 resources.
To know more about NICE DCV, please follow the link: aws.amazon.com/hpc/dcv
The software provides a free trial for 5 days but still you will pay for the underlying instance. As we are going to use gaming drivers, we need to use the GPU instance provided by AWS. GPU instances are not provided to every user, so you might need to create a support request to AWS to provision a GPU instance.
For this tutorial, I will be using a g4dn.xlarge instance which provides 4vCPUs and 16GB of RAM.

I will click Configure Instance Details.
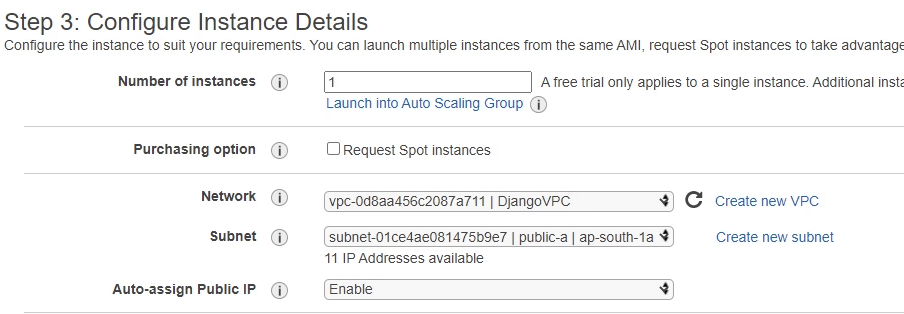
Make sure to choose DjangoVPC in network dropdown. I will choose the public subnet ap-south-1a where our server will be launched.
Make sure to enable Auto-assign Public IP.
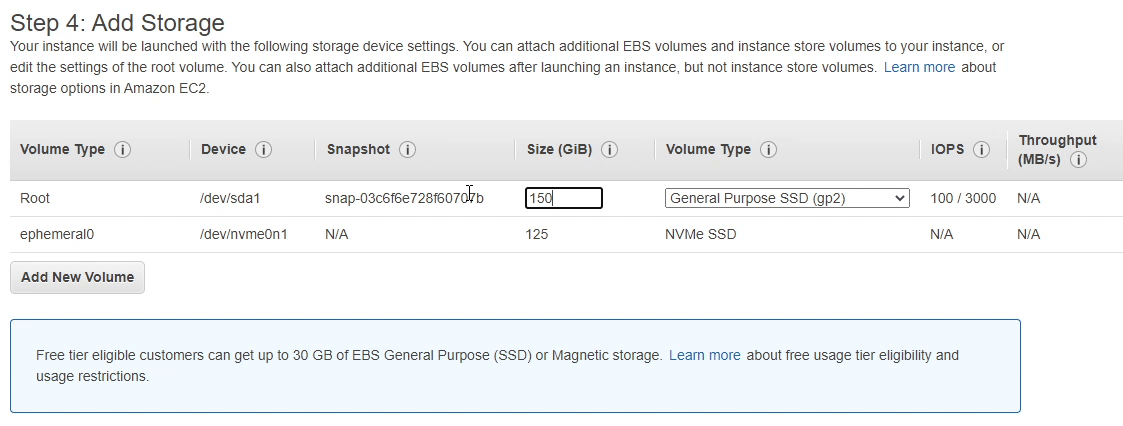
Next, I will click Add Storage. I will provide 150GB for my instance store volume as an arbitrary disk space. I would recommend creating a separate block storage where you can store your critical data and perform backups. Instance storage is also called “ephemeral drives” which provide temporary block-level storage. Thus, there is a higher risk of losing data.
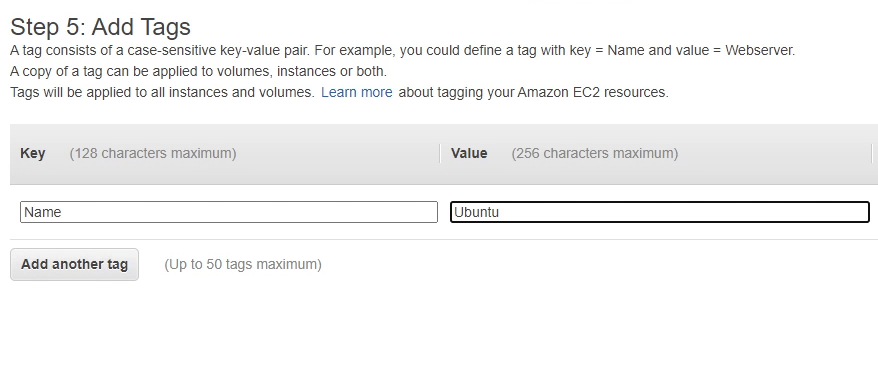
Next, I will click Add Tags. Tags enable you to categorize your AWS resources, you can skip it if you don’t require it.
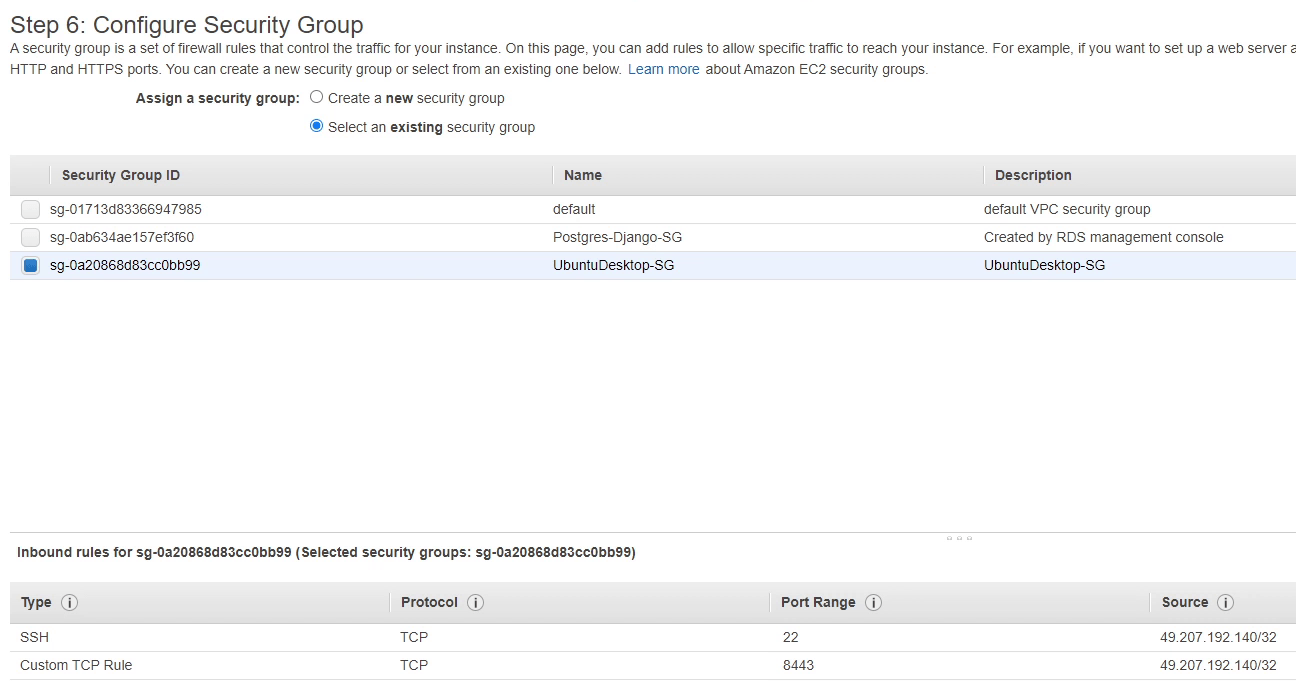
I then click on Configure Security Group and choose an existing security group UbuntuDesktop-SG which I have already created. You can see the port 8443 will be used to connect to our desktop through NICE DCV Client.
Next, I will click Launch, select an existing or create a new private key and finally click Launch Instances. It will take a few minutes to create our new instance.
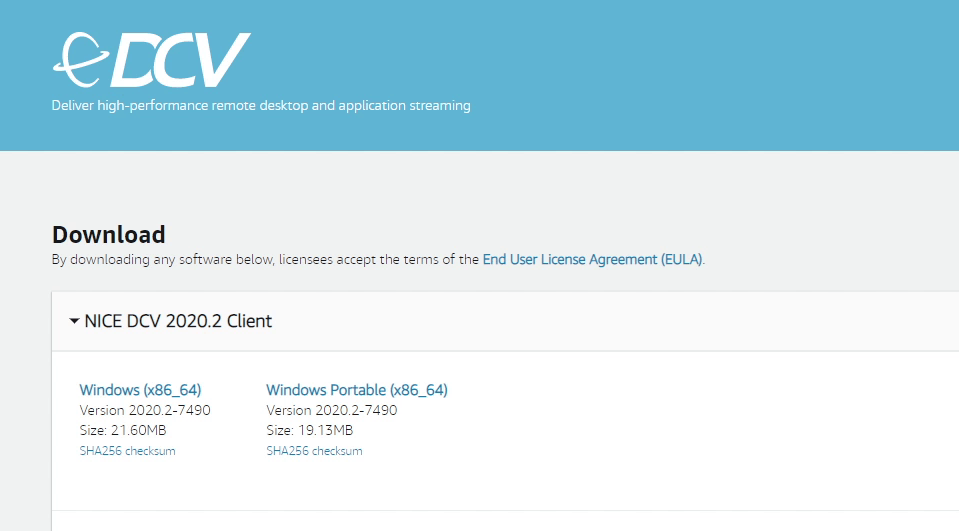
I will go to nice-dcv.com from where I will be downloading & installing NICE DCV Client for Windows. They also have clients for Linux and macOS.
After successfully installing the NICE DCV Client in your machine, I will connect to my ec2 instance and set the password which is required to connect to the instance through the NICE DCV Client.
As you can see, I have connected to my ec2 instance through Putty. There are multiple ways to connect to your ec2 instance, which you might already be aware of. If not, please refer below the reference link.
Reference:
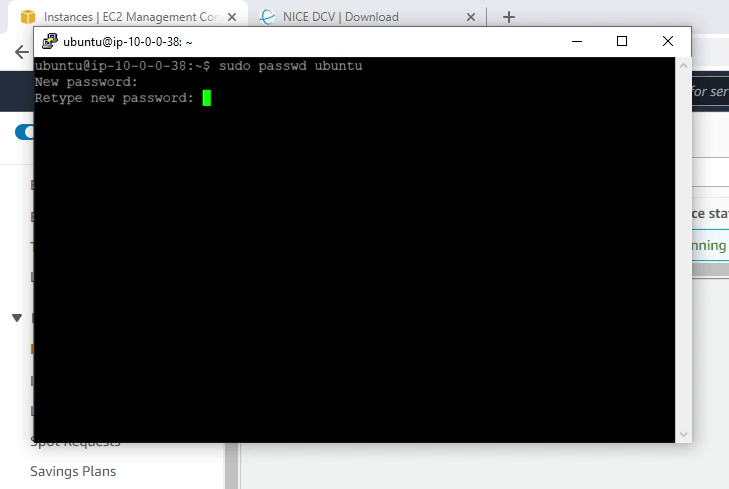
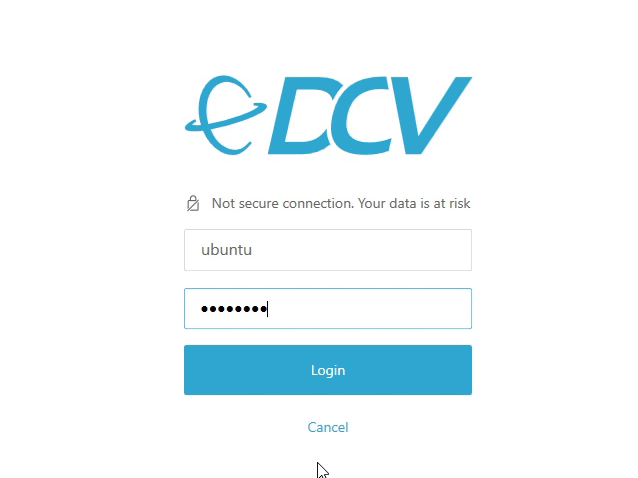
The username of my ec2 instance is ubuntu, I will move forward setting up my new password by writing the command sudo passwd ubuntu
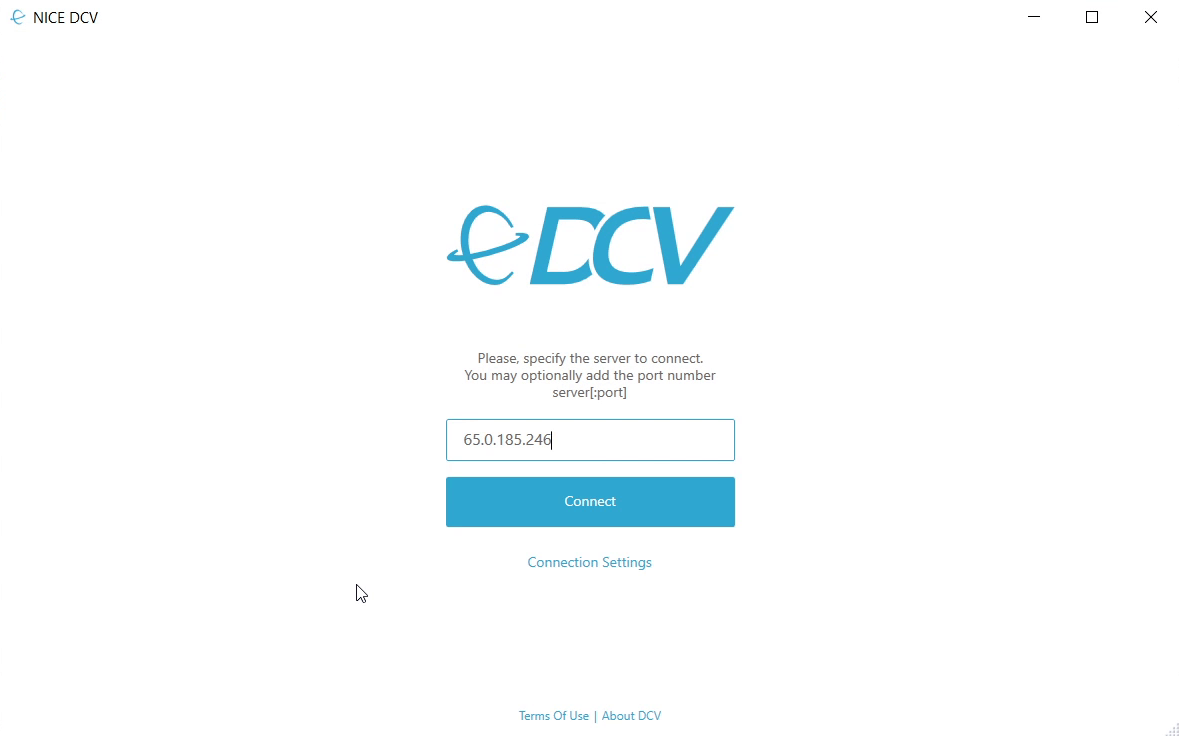
After you have set the password successfully, I will copy the public ipv4 address of my instance and paste it in the NICE DCV Client. The port number is optional but make sure the port 8443 is open to accept connection, as you have already seen before in our security group.
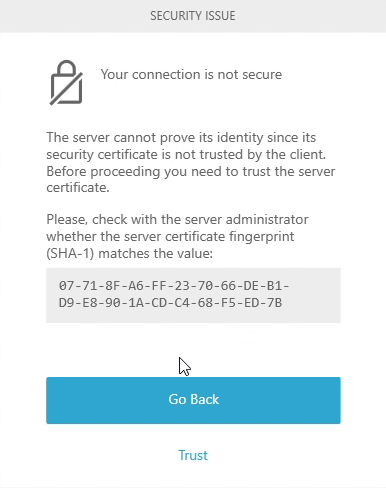
I will click Trust for agreeing to the security exceptions. I would recommend following the NICE DCV documentation for hardening the server.
Now, I am going to provide the username and password and will click on Login.
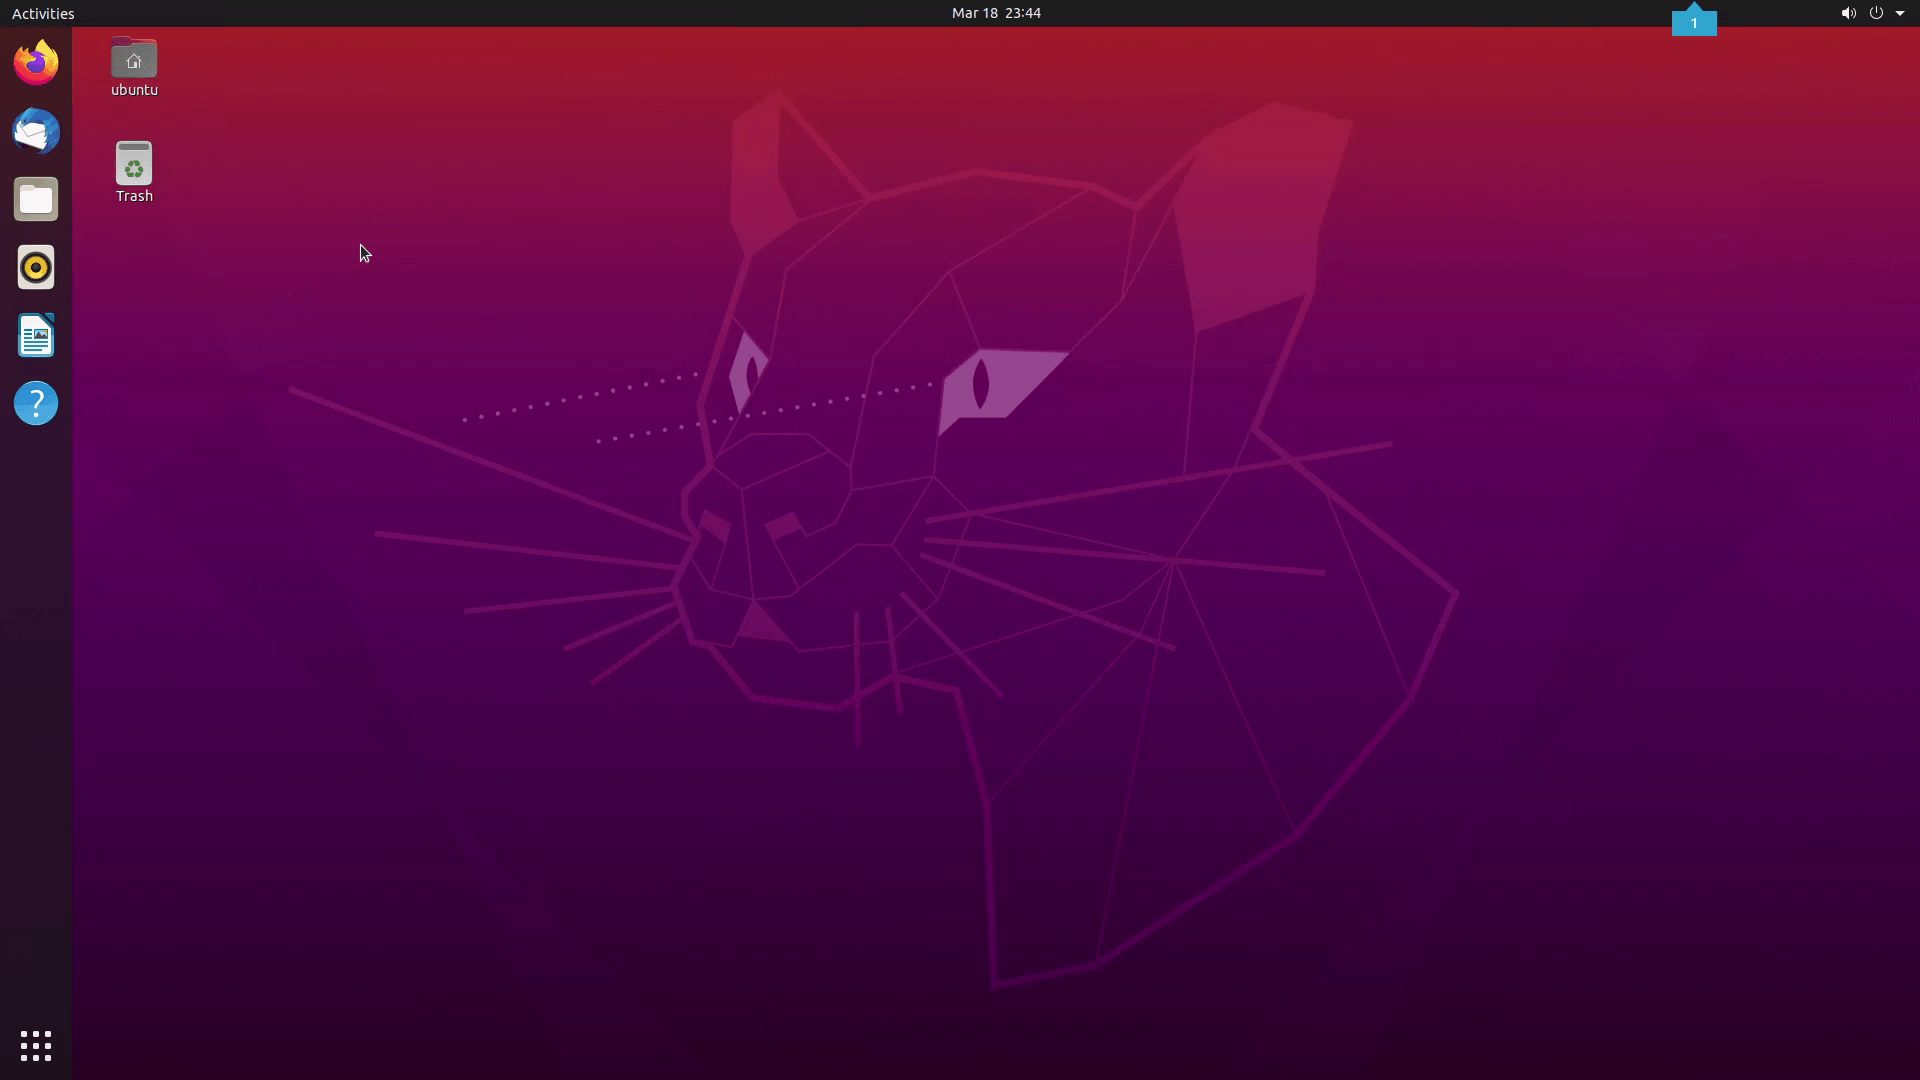
Okay, we have successfully connected to our Ubuntu Desktop and this looks amazing.
I would recommend checking out the video uploaded by AWS re:Invent 2019 - Remote desktop and application streaming with NICE DCV.
In the upcoming tutorial step, I will show how to set up Django and Create our new PyCharm Project inside our Ubuntu Desktop.