
Deploying Functions
Use PyCharm to deploy your Lambda APIs.
In this tutorial, we are going to deploy our functions in AWS and test it through Postman.
Beginning Launch in AWS
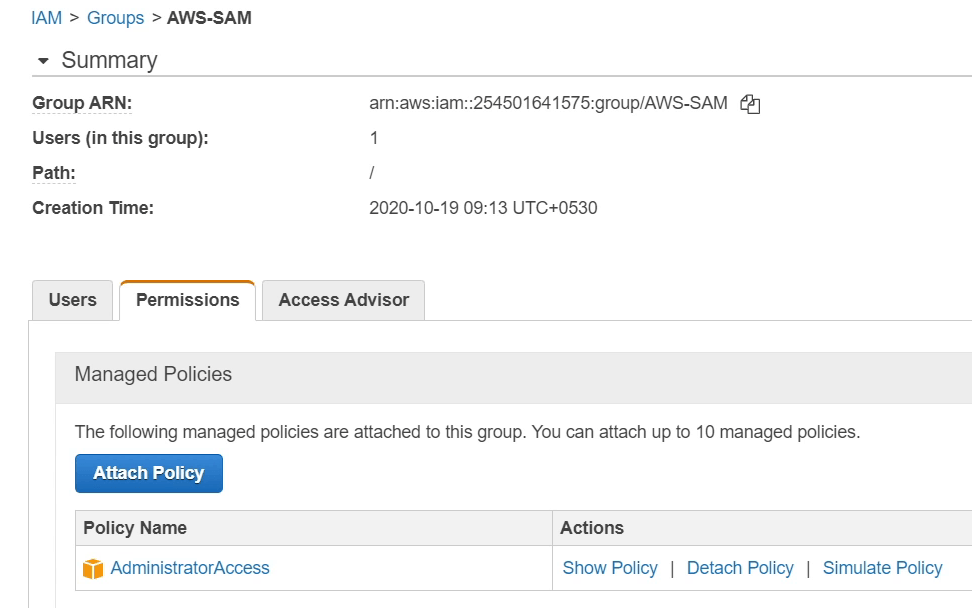
Before we start, I want to give some information, as you can see in the above image, I have chosen "AdministratorAccess," which provides complete access to all the AWS Resources. In my previous video, I used different policies, there is no problem in that, but recently there was information shared by AWS that AWS Lambda will deprecate two managed policies called "AWSLambdaFullAccess" and "AWSLambdaReadOnlyAccess" on January 25, 2021.
For this tutorial, I have used "AdministratorAccess," but to be honest, it's not the recommended approach from point of security and access controls.
- Please follow the Security best practices in IAM (Identity & Access Management).
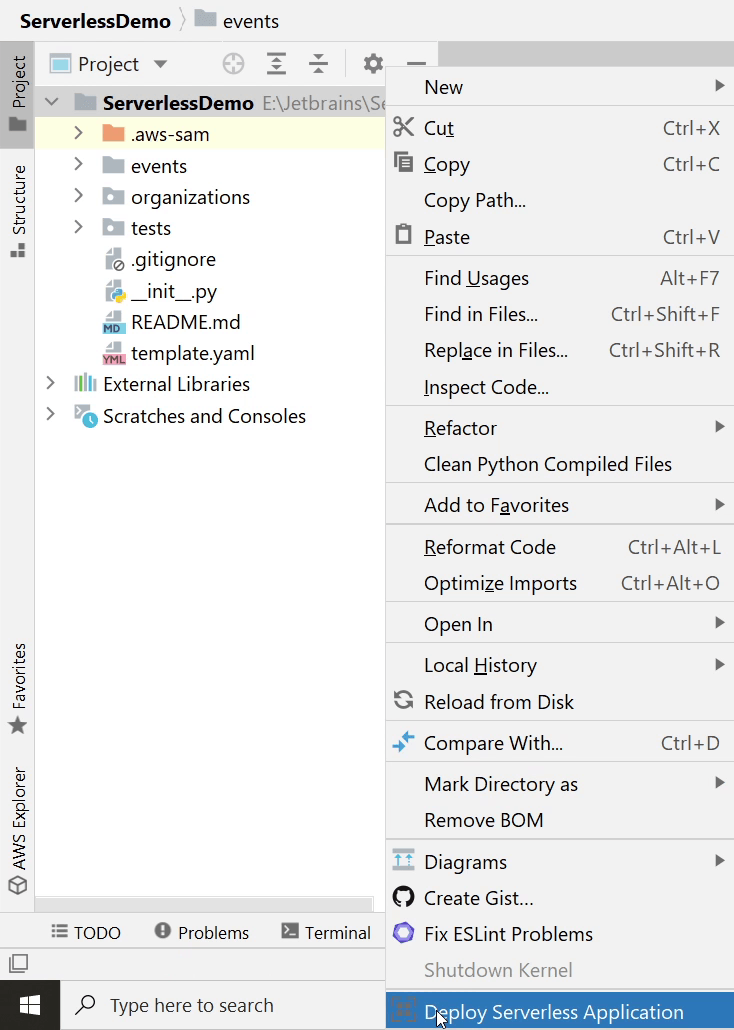
PyCharm is already open, I will right-click on the project ServerlessDemo, then at the bottom I click Deploy Serverless Application.
I will provide the stack name as ServerlessDemoStack. This is required for the CloudFormation.
Next, I will create an S3 bucket "serverless-pycharm-demo," it will be created in the "ap-south-1" region.
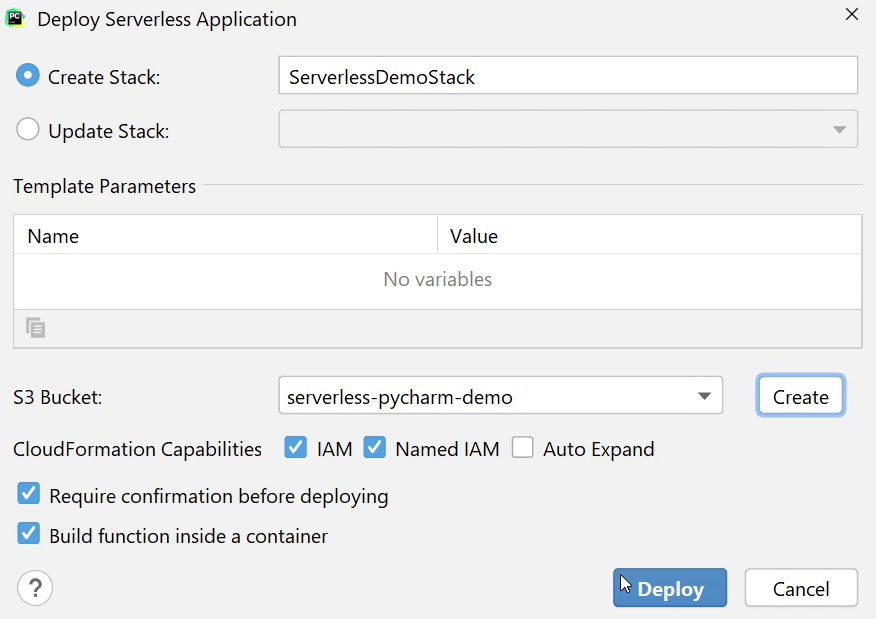
Make sure “Require confirmation before deploying” and “build function inside a container” are both checked.
Then finally, I will click Deploy. It will take some time to build and package the application.
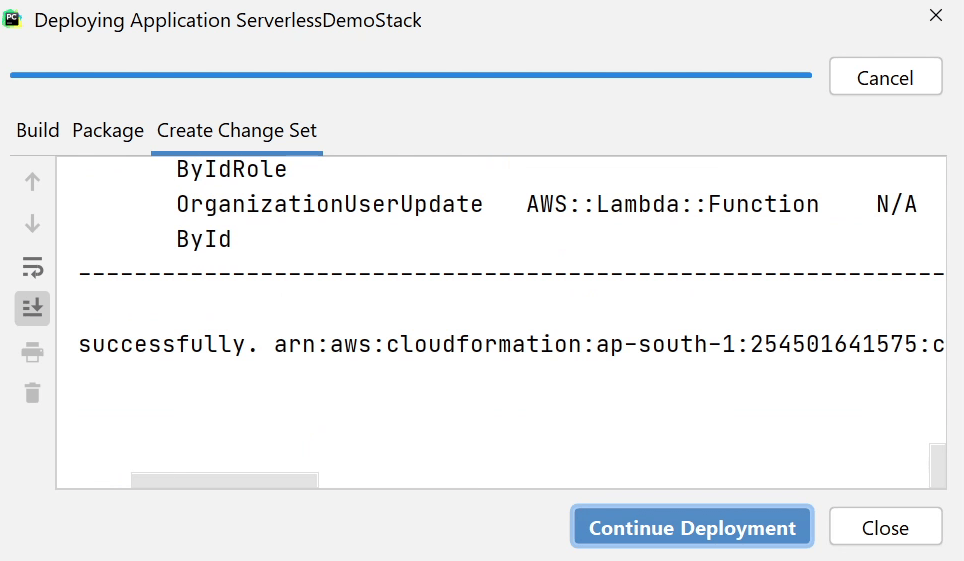
Once the build & packaging process is complete, then I am going to click Continue Deployment.

You can see on the CloudFormation Console that the stack is getting created. It will take a few minutes to complete.
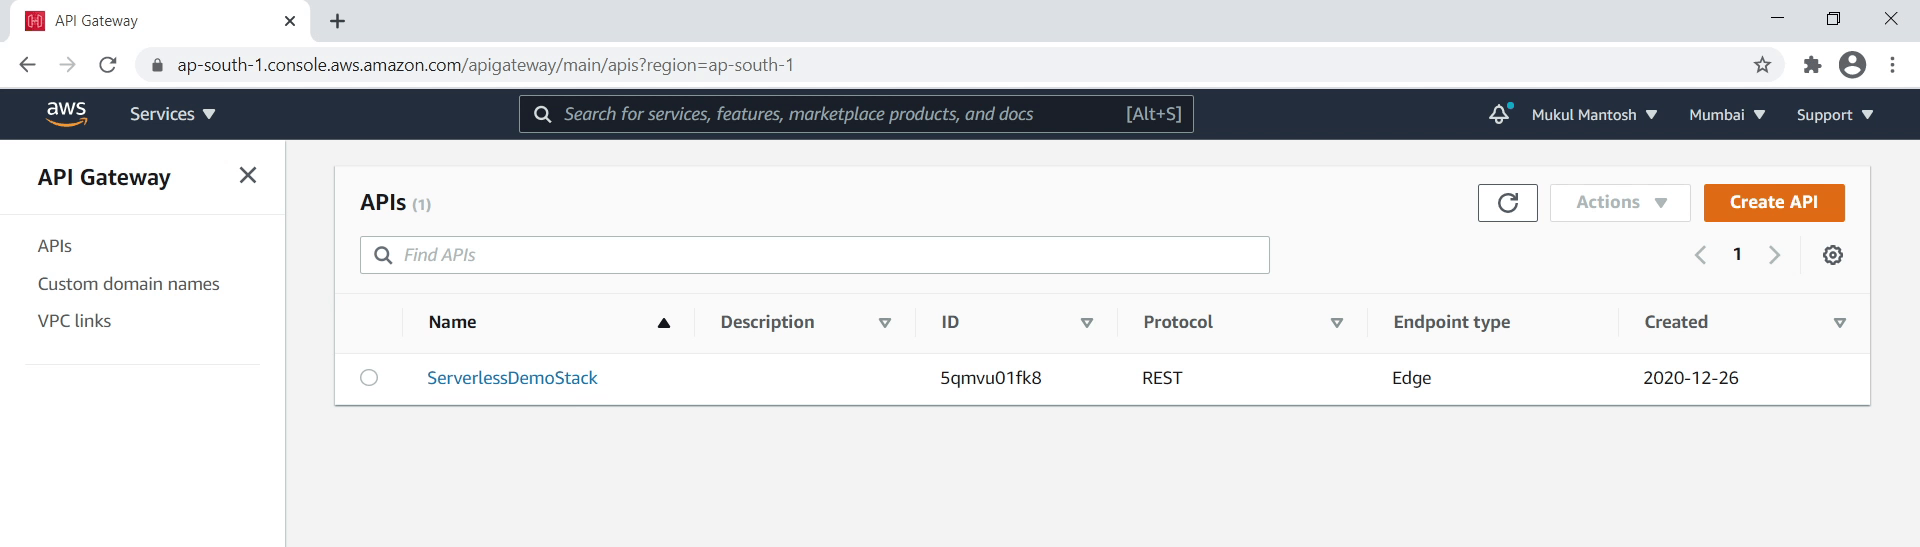
Okay, the stack has been successfully deployed. I will open the AWS Management Console and search for "API Gateway."
Let me give you a brief idea what is API Gateway. Amazon API Gateway is a fully managed service that makes it easy for developers to create, publish, maintain, monitor, and secure APIs at any scale.
As you can see, I am in the API Gateway Console, and it is displaying the "ServerlessDemoStack" which we created.
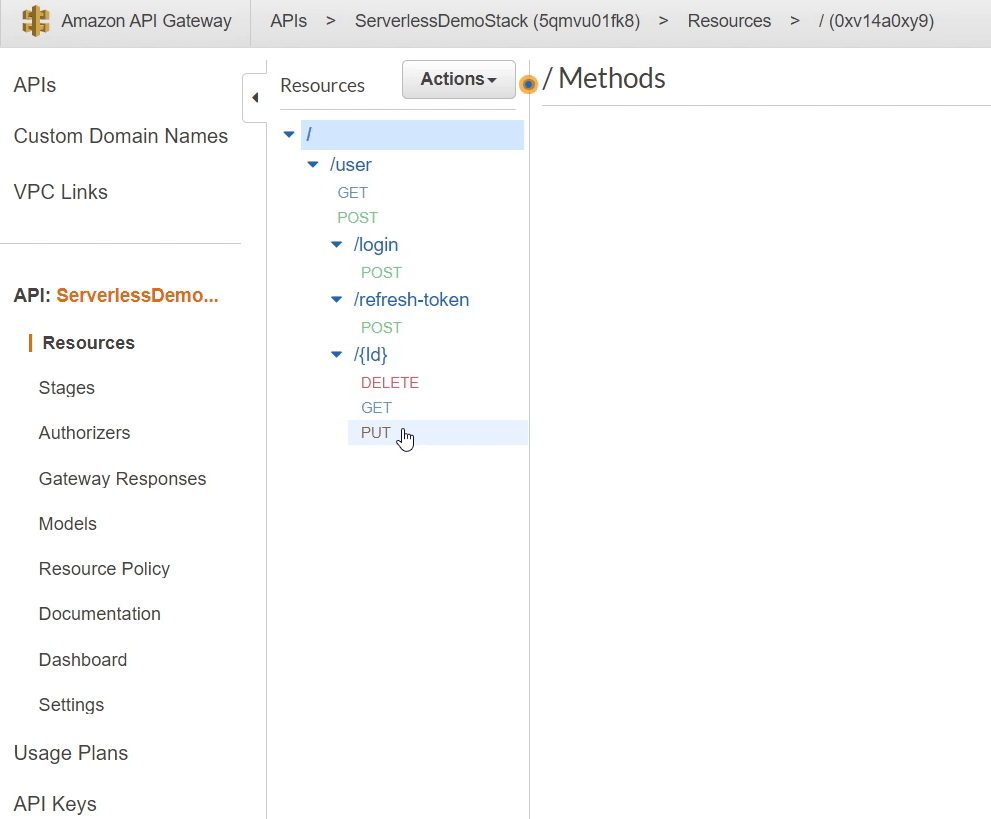
You can see the list of APIs along with their request Methods like GET, POST, PUT and DELETE.
Next, I will click Stages which you can see in the left sidebar.
You remember we created the stage name as "Prod" in the template.yaml file.
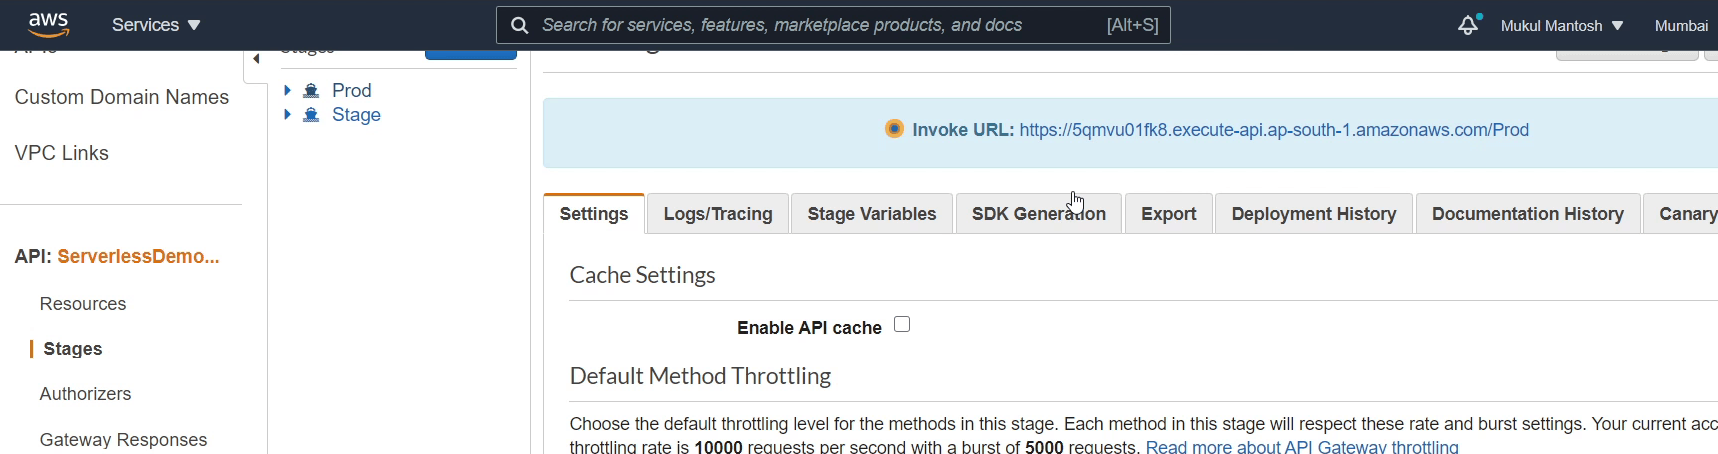
You can see the "Invoke URL" in the above image, this is the URL from which we are going to access our API, I am going to copy the URL and paste it in Postman.
Okay, let’s begin by testing the "Login API". I am going to provide email and password. If the credentials are authenticated successfully, then I will receive a JWT token.

As you can see, I have been successfully authenticated, and also I received a token in response.
This token will be used subsequently in other operations to authorize the requests.
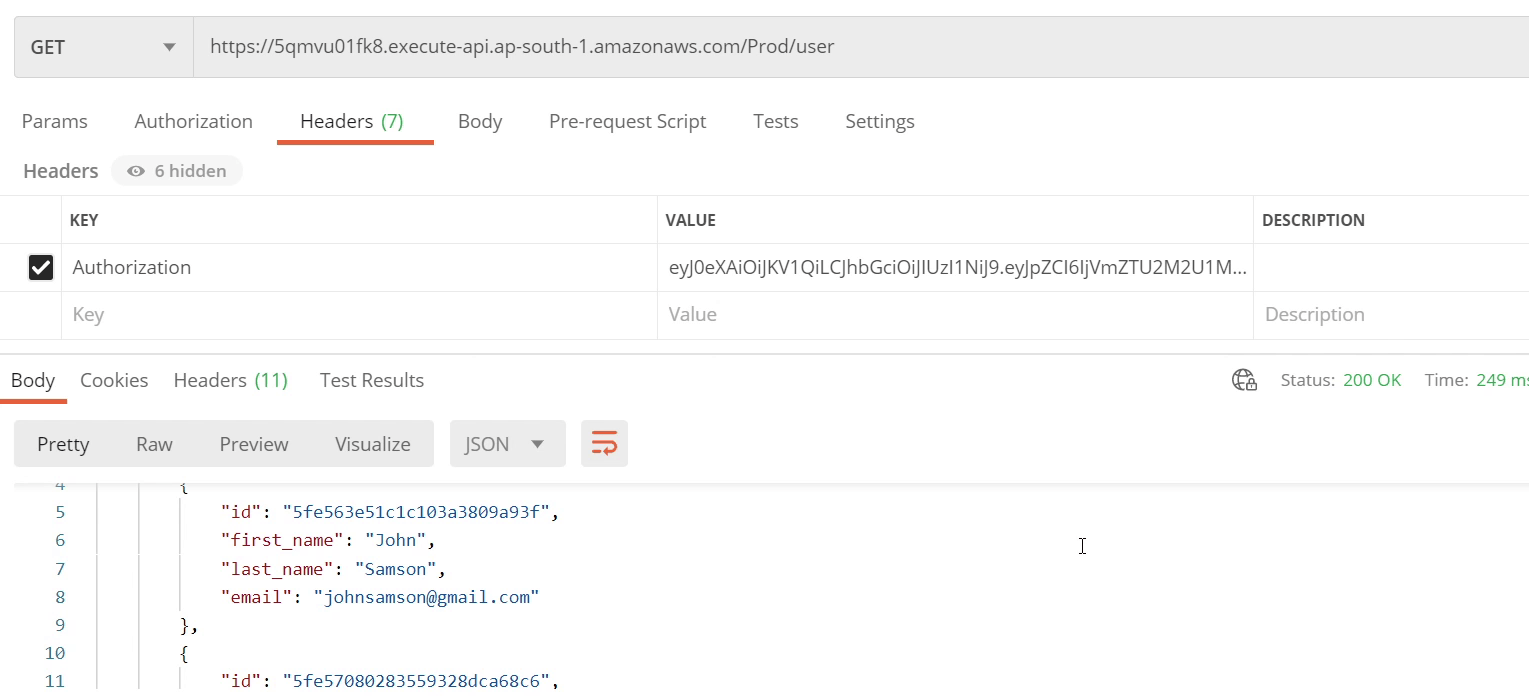
I am going to retrieve a list of users, for that I need to pass the token in the "Authorization" header, and the request method must be GET.
You can see I am able to retrieve all users.
Let me try to get information for a specific user. You can see that I am also receiving information for that particular user.

Now, I am going to create a new user, and the request method is going to be "POST." I will be providing all the necessary information, make sure to pass the token in the Authorization header.
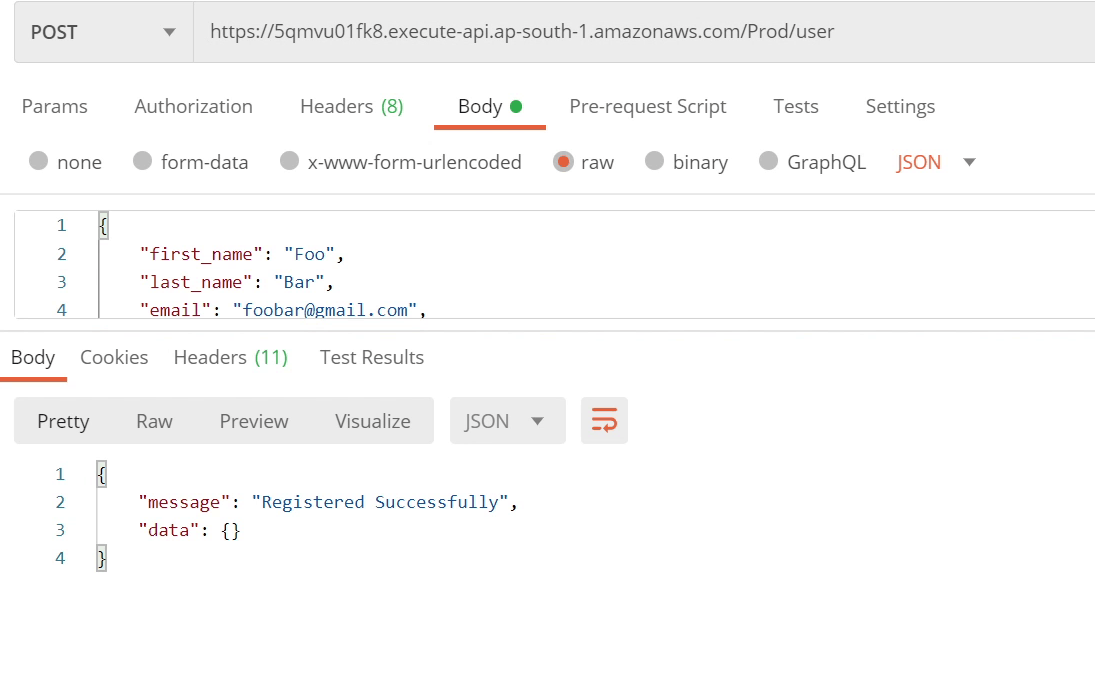
Okay, we have successfully created a new user. So, I am going to perform an update operation on the same record.
The method is going to be "PUT." I will modify the first name and last name into a lower case and change the email address from gmail to yahoo.
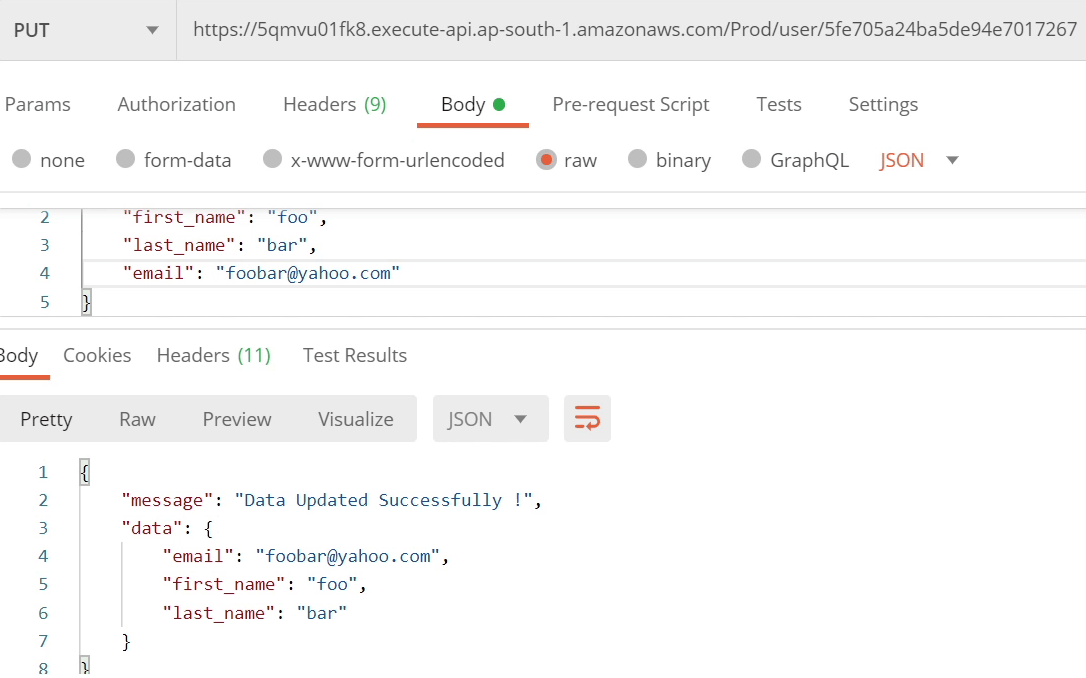
The data has been successfully updated as you can see on the above image.
Let’s move with the final API to delete records from the database.
The method is going to be "DELETE." I don’t need to pass anything in the body.
You can see I received "204 HTTP Response" that means the record has been successfully removed from the database.

Finally, we have successfully performed all the operations starting from development to deployment in AWS and all this happened smoothly through PyCharm.
This tutorial is a jump-start for those who want to get started with AWS Lambda and create serverless APIs. I suggest following the AWS documentation, to stay updated about their latest offerings, and the new improvements they are adding to their tech stack.