New User Quick Start Guide
Have you recently joined a Space organization? Follow these steps to quickly set up your personal Space environment and start collaborating with other team members to achieve your goals.
Space is an all-in-one platform that brings software teams together in a shared environment. It provides you with all the tools to cover the development pipeline and communicate effectively.
Step 1. Complete your profile
Your profile helps other team members get to know you and quickly find out what projects you’re working on. It contains your contact details, information about your team membership, as well as the projects you’re involved in.
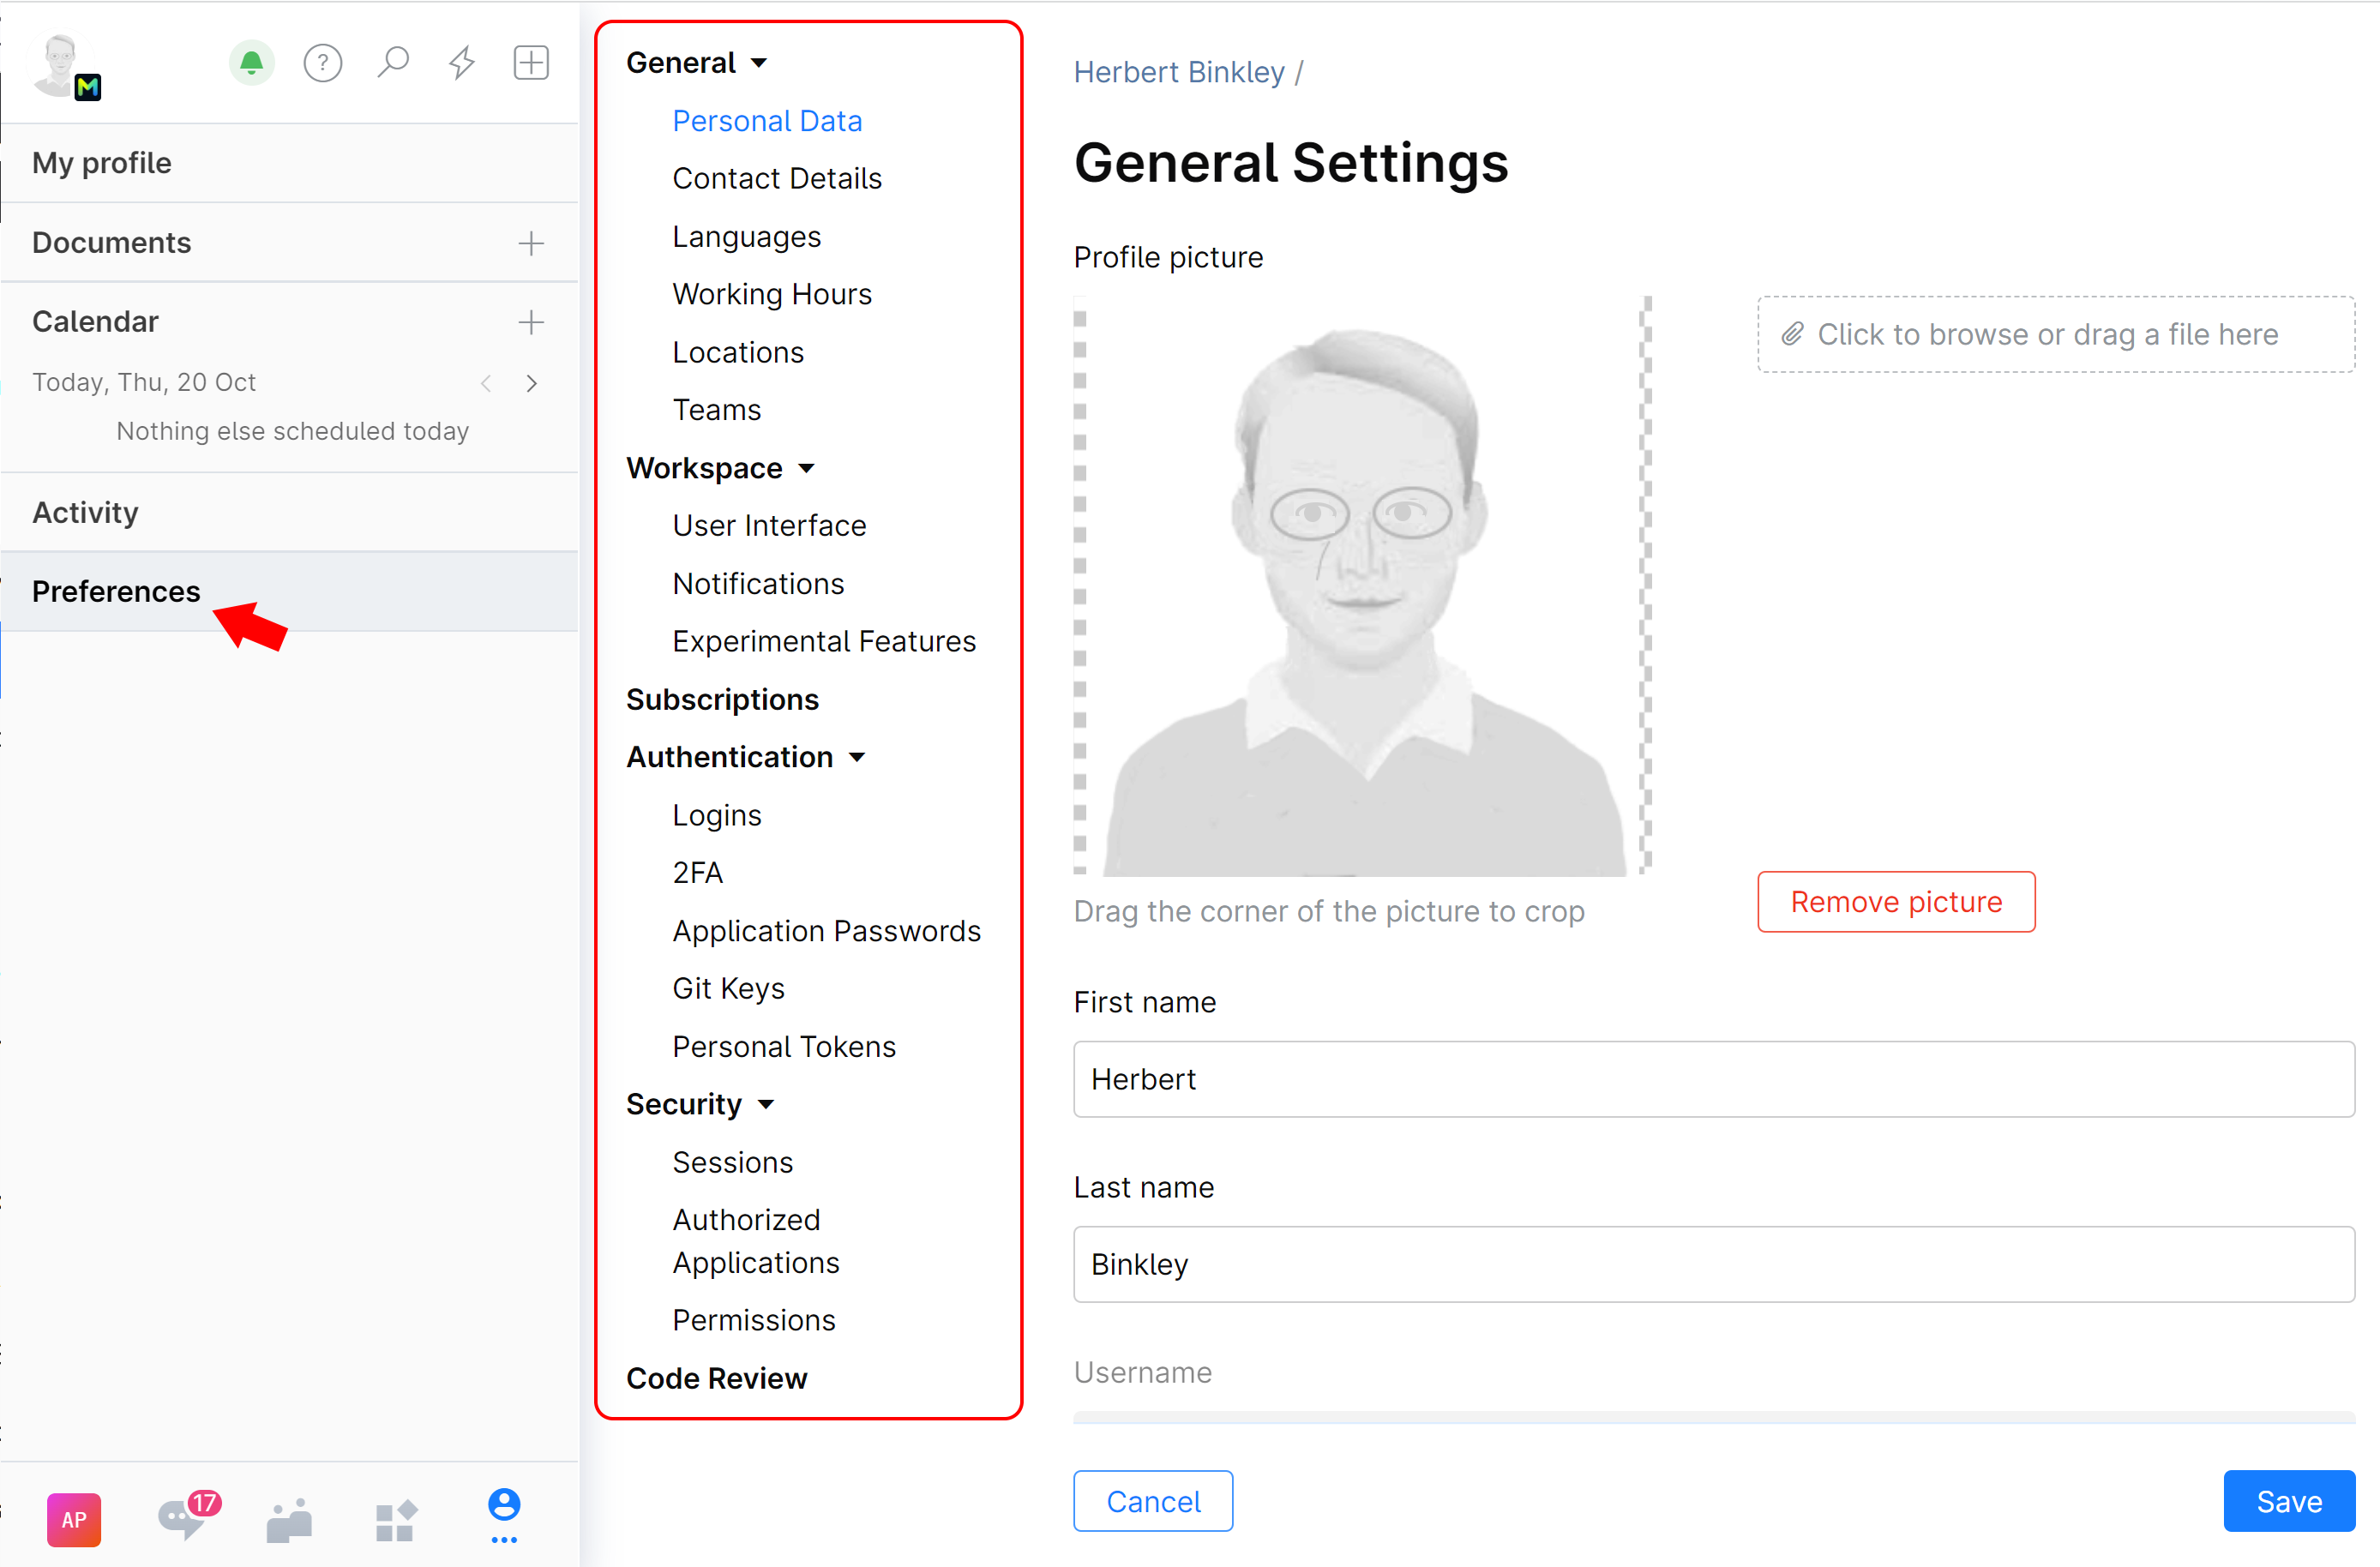
To edit your profile, click on your avatar to expand the personal navigation sidebar. On the sidebar, choose Preferences.
Check out this article to learn more about configuring your profile.
Step 2. Join your team
![]() Teams in Space represent the actual structure of your organization. They help you find all the information you need about the company, its subteams, members, and everybody’s roles.
Teams in Space represent the actual structure of your organization. They help you find all the information you need about the company, its subteams, members, and everybody’s roles.
Join your team to easily access all work-related resources, including the projects your team is working on, specific channels in Chats, issues, etc.
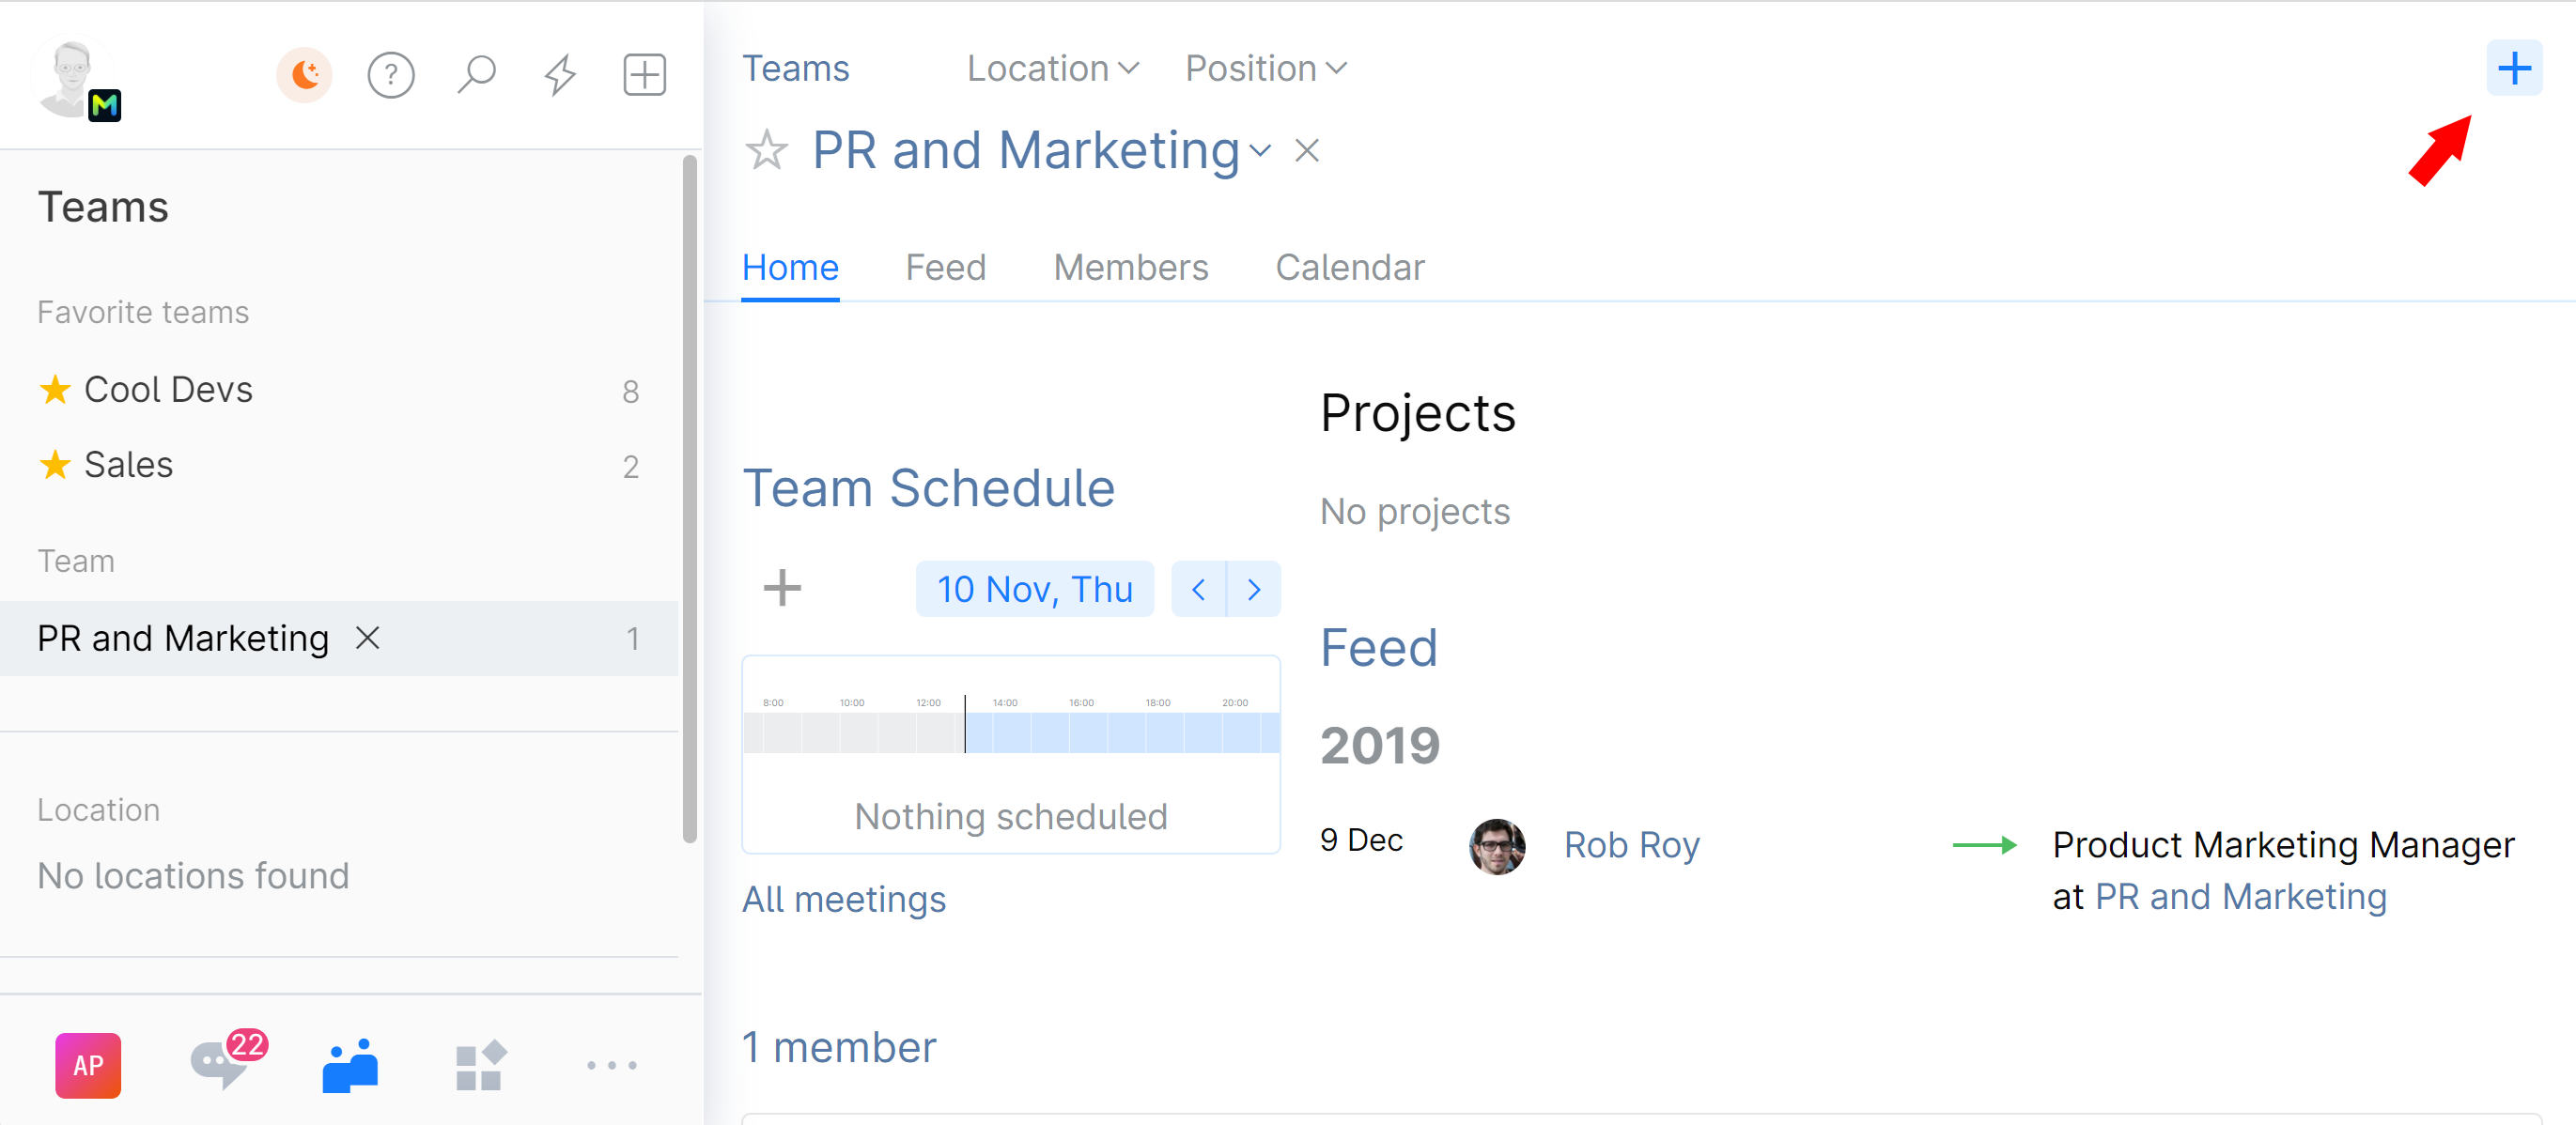
To join an existing team, browse the team directory by clicking ![]() on the main menu. When you find the team you want to join, ask your administrator for membership, or, if you have administrative rights, click
on the main menu. When you find the team you want to join, ask your administrator for membership, or, if you have administrative rights, click ![]() on the team’s page and choose Join.
on the team’s page and choose Join.
Step 3. Create or join a project
![]() Projects are where you store and manage all resources related to a specific piece of work that is part of a bigger goal. Each project is outfitted with many tools to help you and your teammates with various tasks: repositories, issues, boards, code review, packages, remote dev environments and more.
Projects are where you store and manage all resources related to a specific piece of work that is part of a bigger goal. Each project is outfitted with many tools to help you and your teammates with various tasks: repositories, issues, boards, code review, packages, remote dev environments and more.
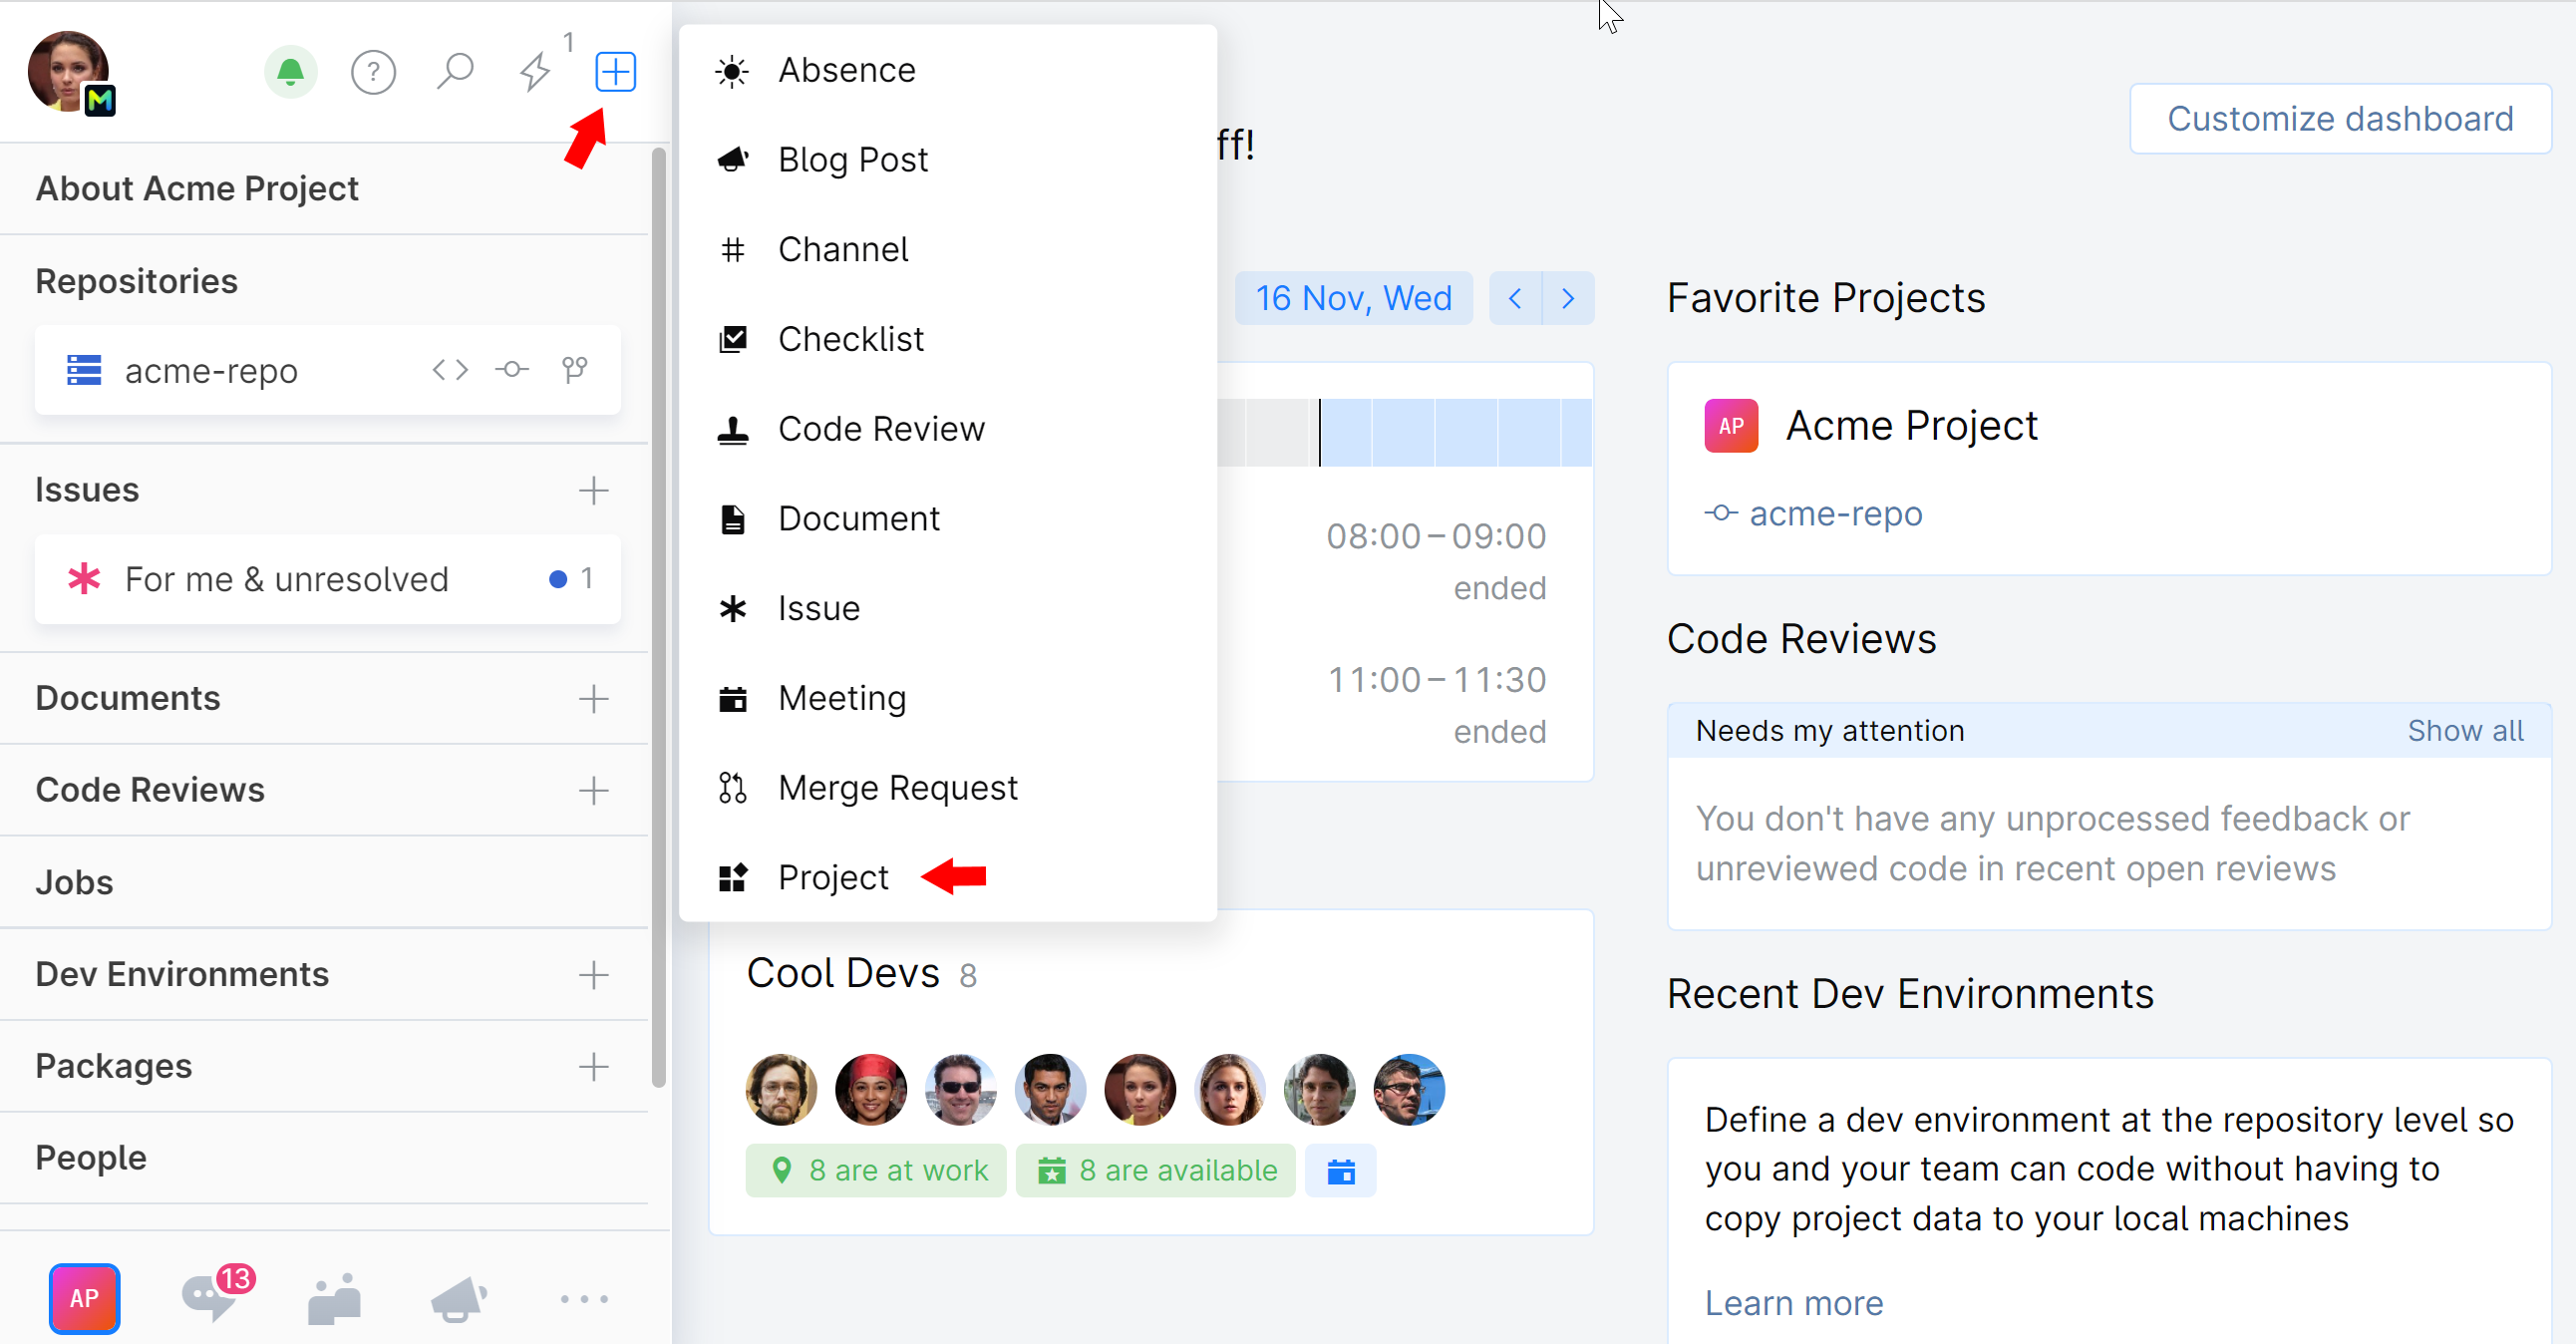
To create a new project, simply click ![]() on the top left and choose Project. You can make a project private to restrict access to it or keep it visible to everyone within your company. (Restricted projects are available starting with the Organization plan.)
on the top left and choose Project. You can make a project private to restrict access to it or keep it visible to everyone within your company. (Restricted projects are available starting with the Organization plan.)
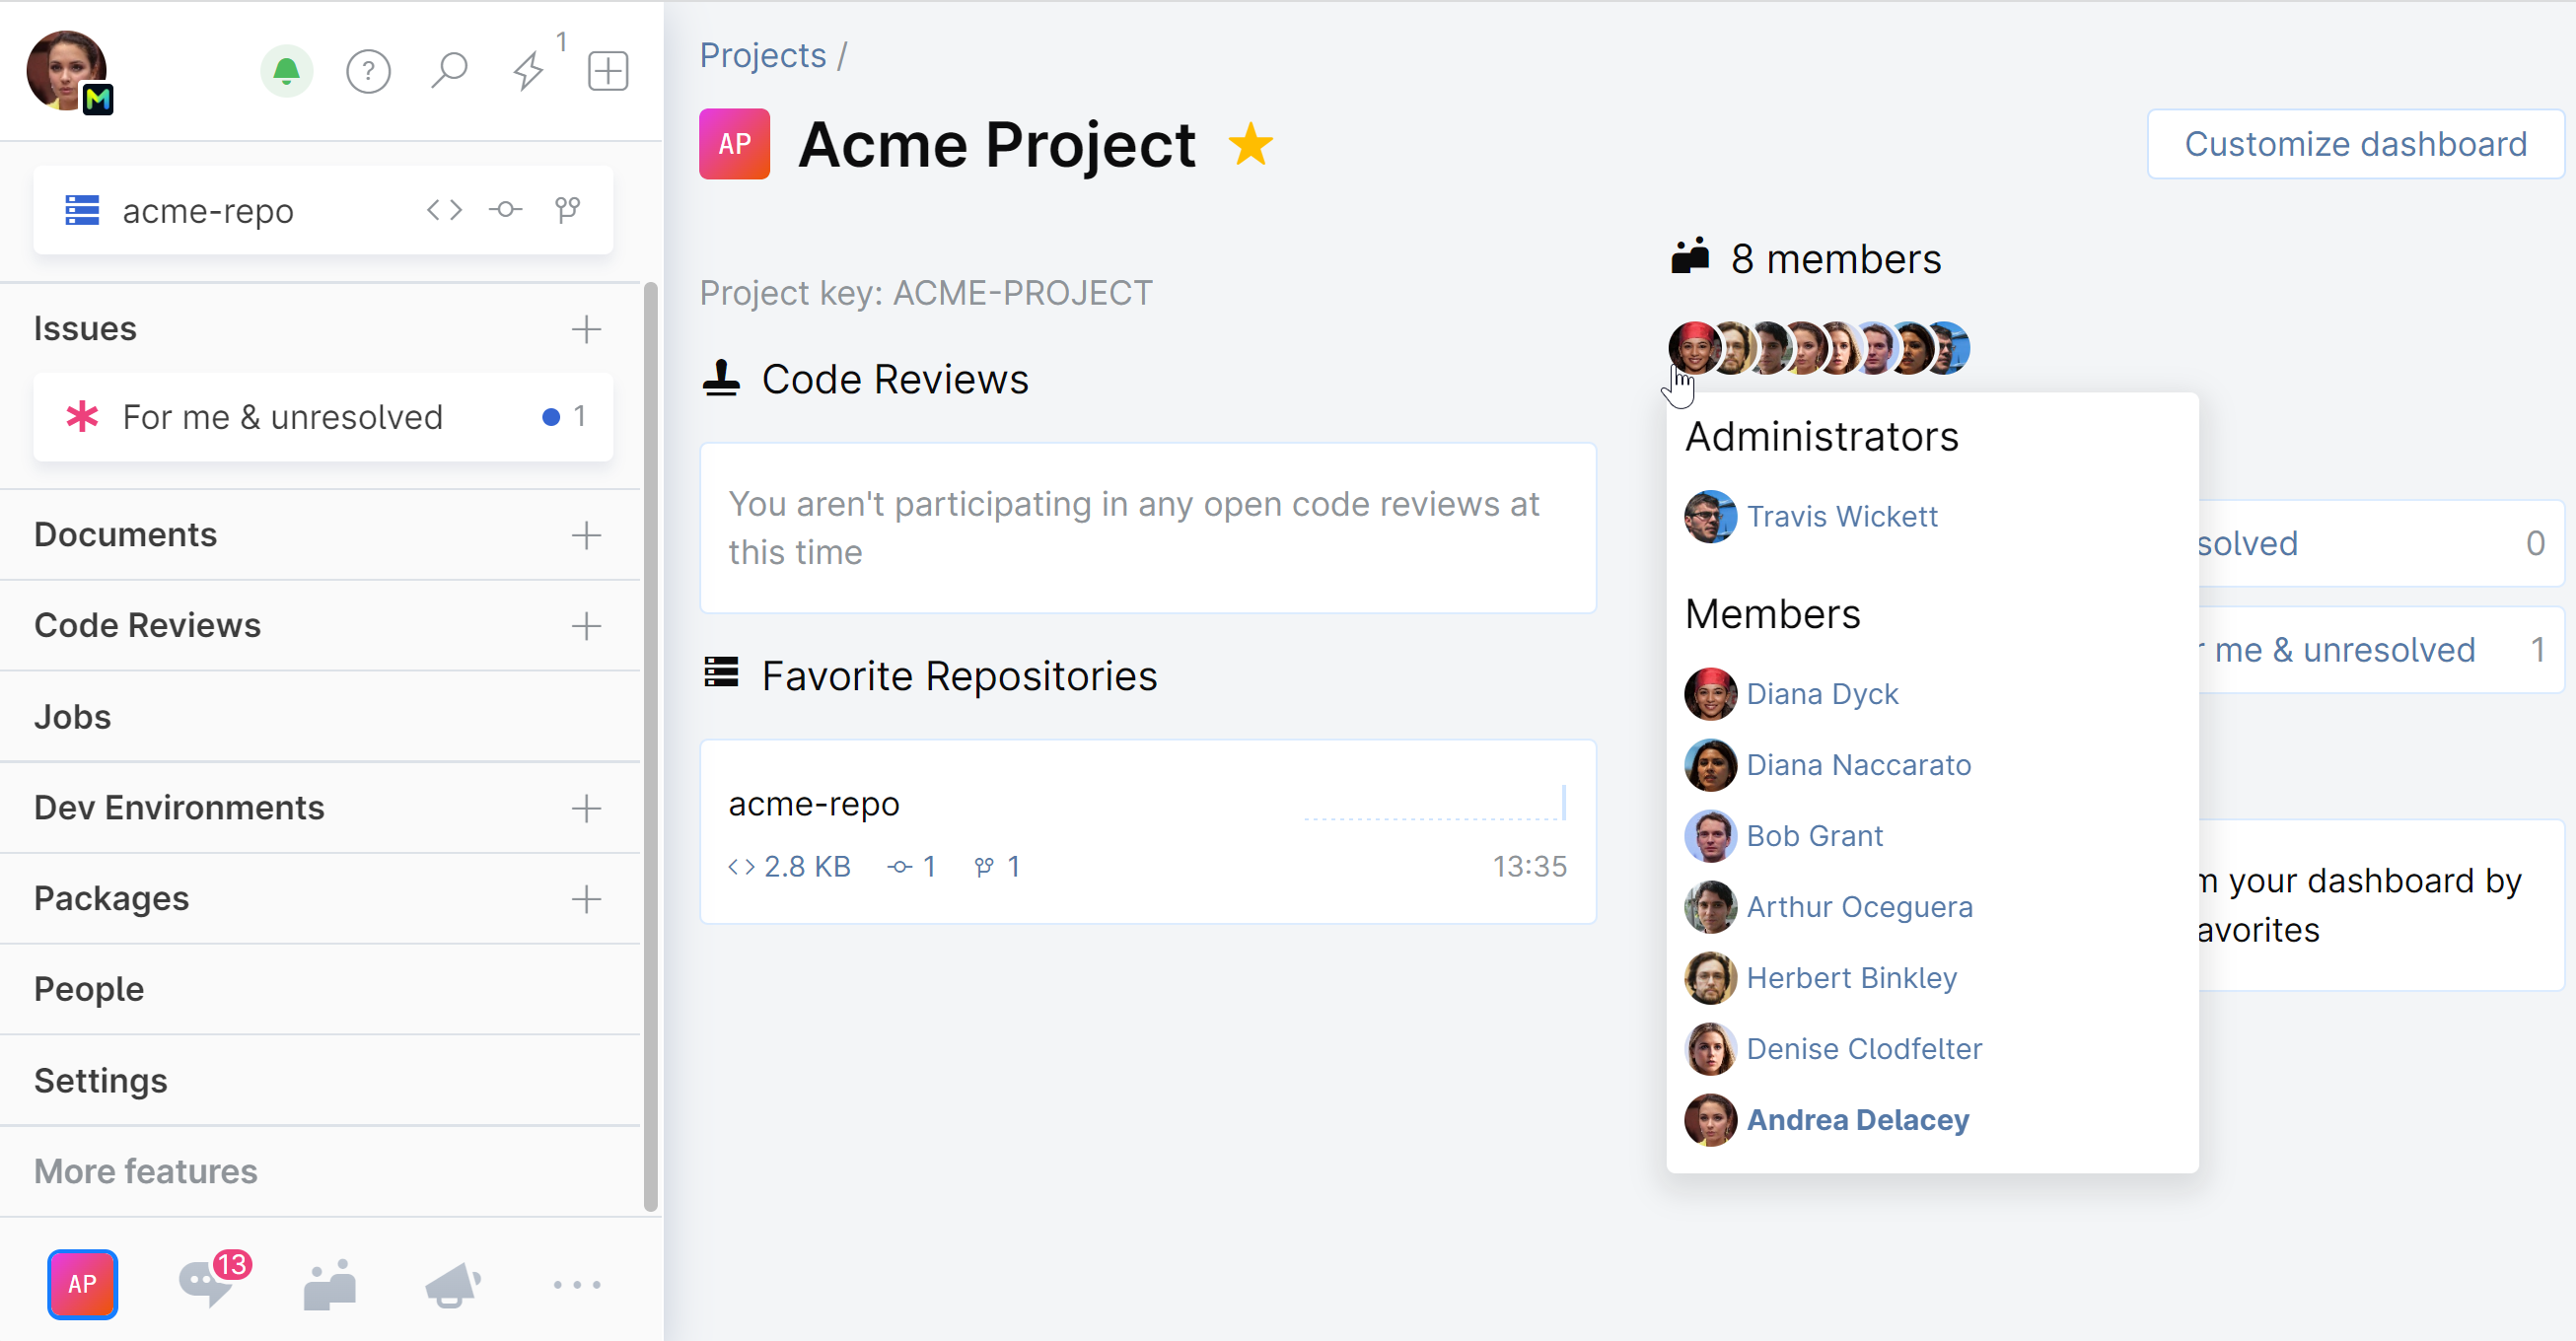
To join an existing project, you need to contact the project administrator and ask for membership. Find out who the project administrator is by clicking the Members widget on the project page:
Step 4. Commit, review, and track issues
Now that you've created or joined your first project, you can start working on your tasks.
Describe your project vision, mission, goals, and other relevant information in project documents, and plan your work using project checklists.
Store your source code in Space. Clone an existing repository or set up a new one from scratch.
Start collaborating on code: track commit history, search and examine code, create code reviews.
Create issues to keep track of your progress, report bugs, submit feature requests, handle design questions, and more.
Step 5. Send a message to Chats
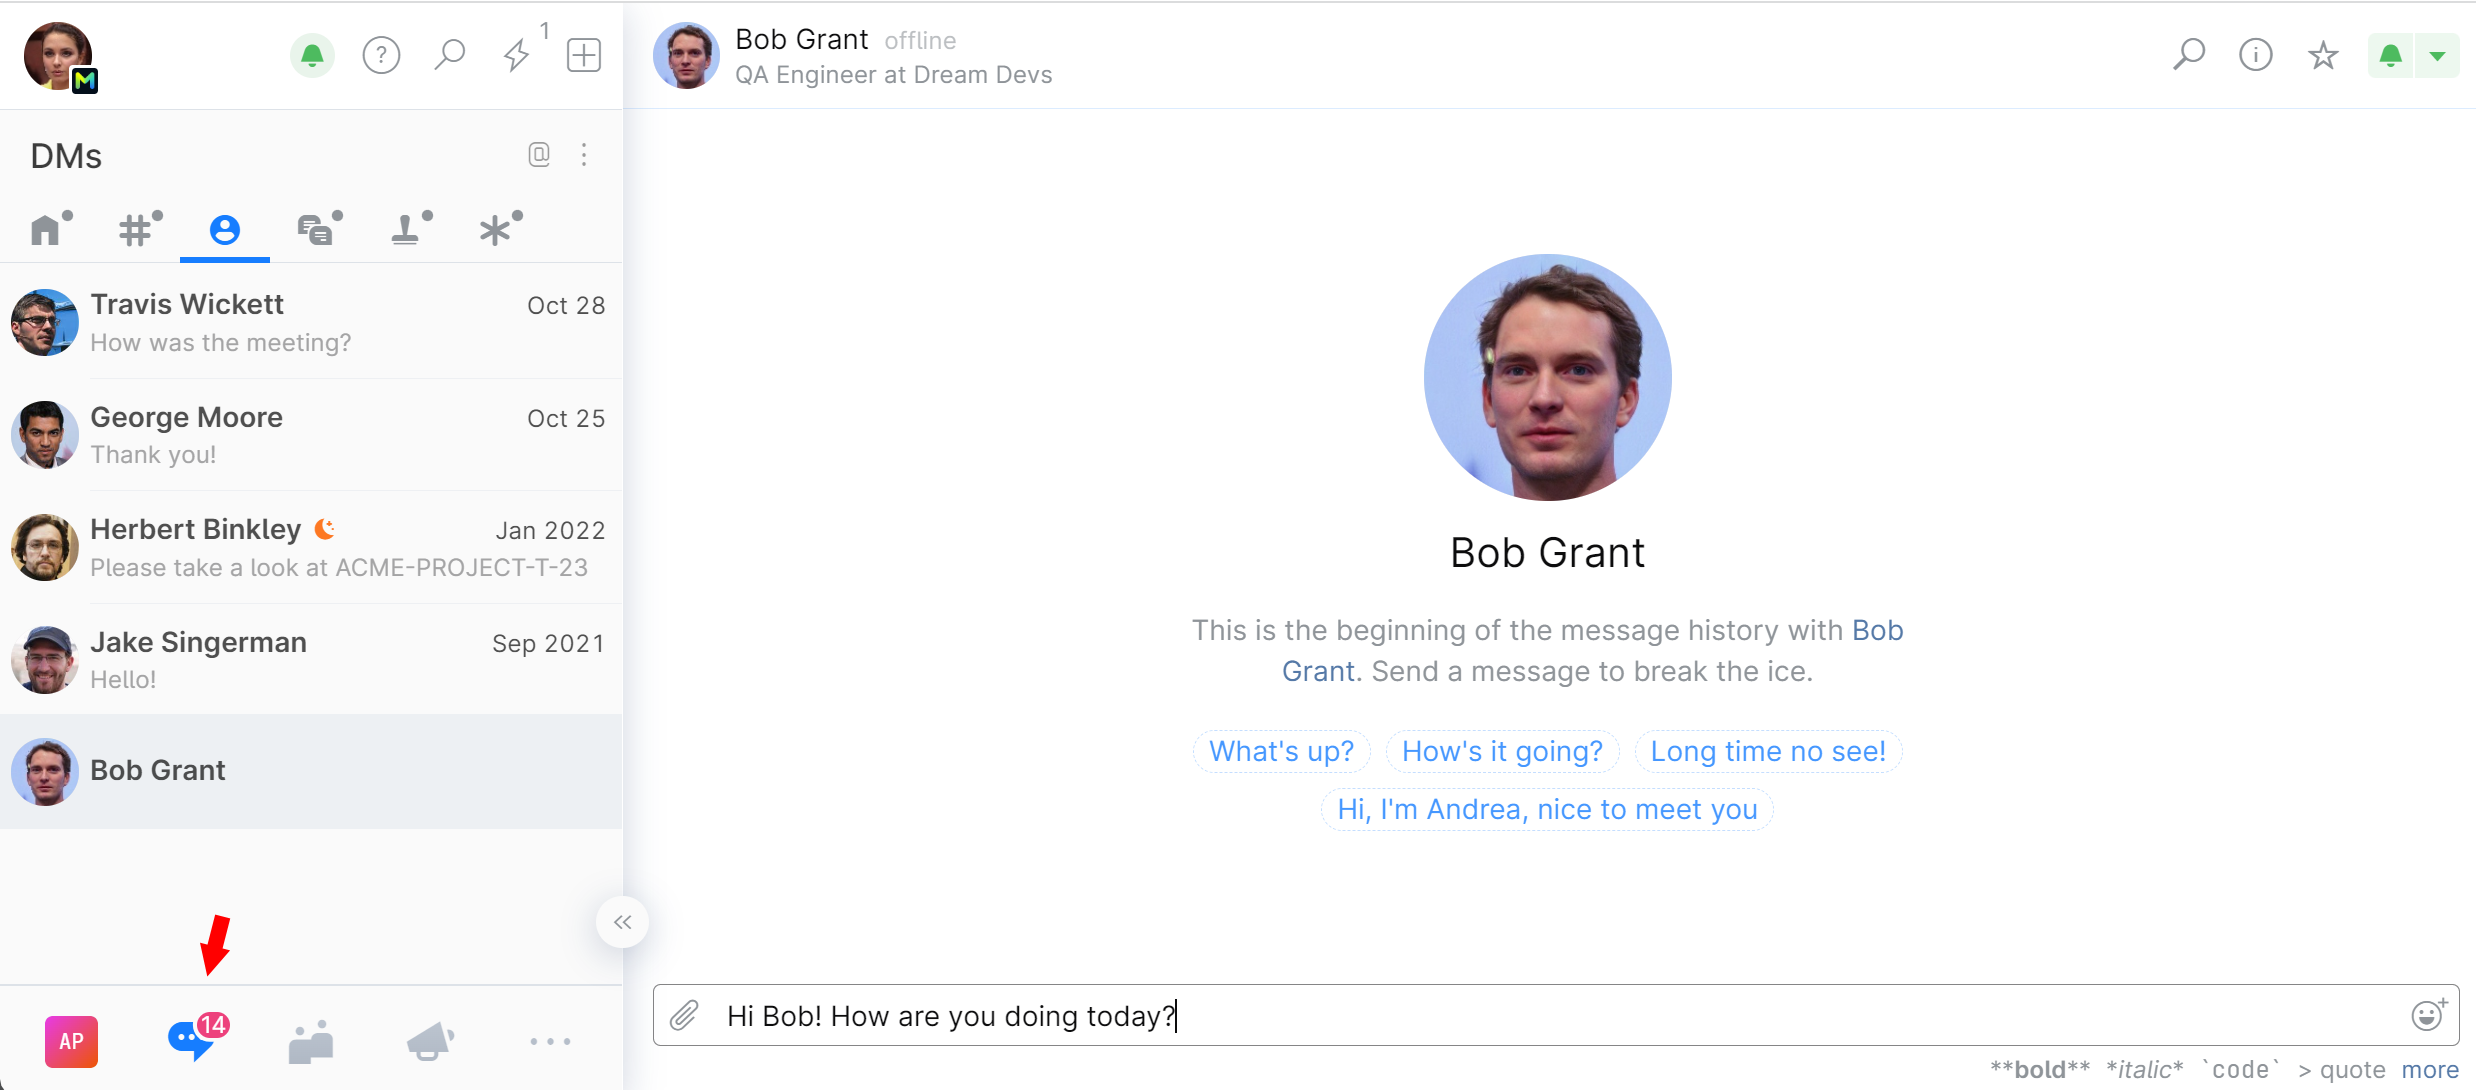
![]() Chats are your central hub for communication and real-time information sharing. You can use Chats to send messages to your colleagues, as well as to get personalized notifications, requests, and alerts about changes in your Space.
Chats are your central hub for communication and real-time information sharing. You can use Chats to send messages to your colleagues, as well as to get personalized notifications, requests, and alerts about changes in your Space.
Send a message to a channel if you want to communicate to a group of colleagues. Send a direct message if you want to speak to a specific person:
More resources to help you navigate Space
Once you go through these first steps, you can keep exploring Space and discover more functionality. There are all kinds of learning resources available, so you can learn how you like and at your own pace.
Read Space documentation and blog.
Watch quick tips and Space YouTube playlist.
Join the Space community forum.
Can't find an answer? Submit a request to our support team.