Organization Creator Quick Start Guide
Have you recently signed up for Space? Follow these steps to quickly set up your Space organization and onboard your team.
Step 1. Set up your organization
It’s important to prepare your Space environment before inviting your team members to join.
Specify your company name, and also add a slogan and a logo in
 Administration
Optional Features. Some of the features Space comes with are initially hidden. Check them out and activate them, if you decide that your organization needs these features.
Step 2. Invite people to join you in Space
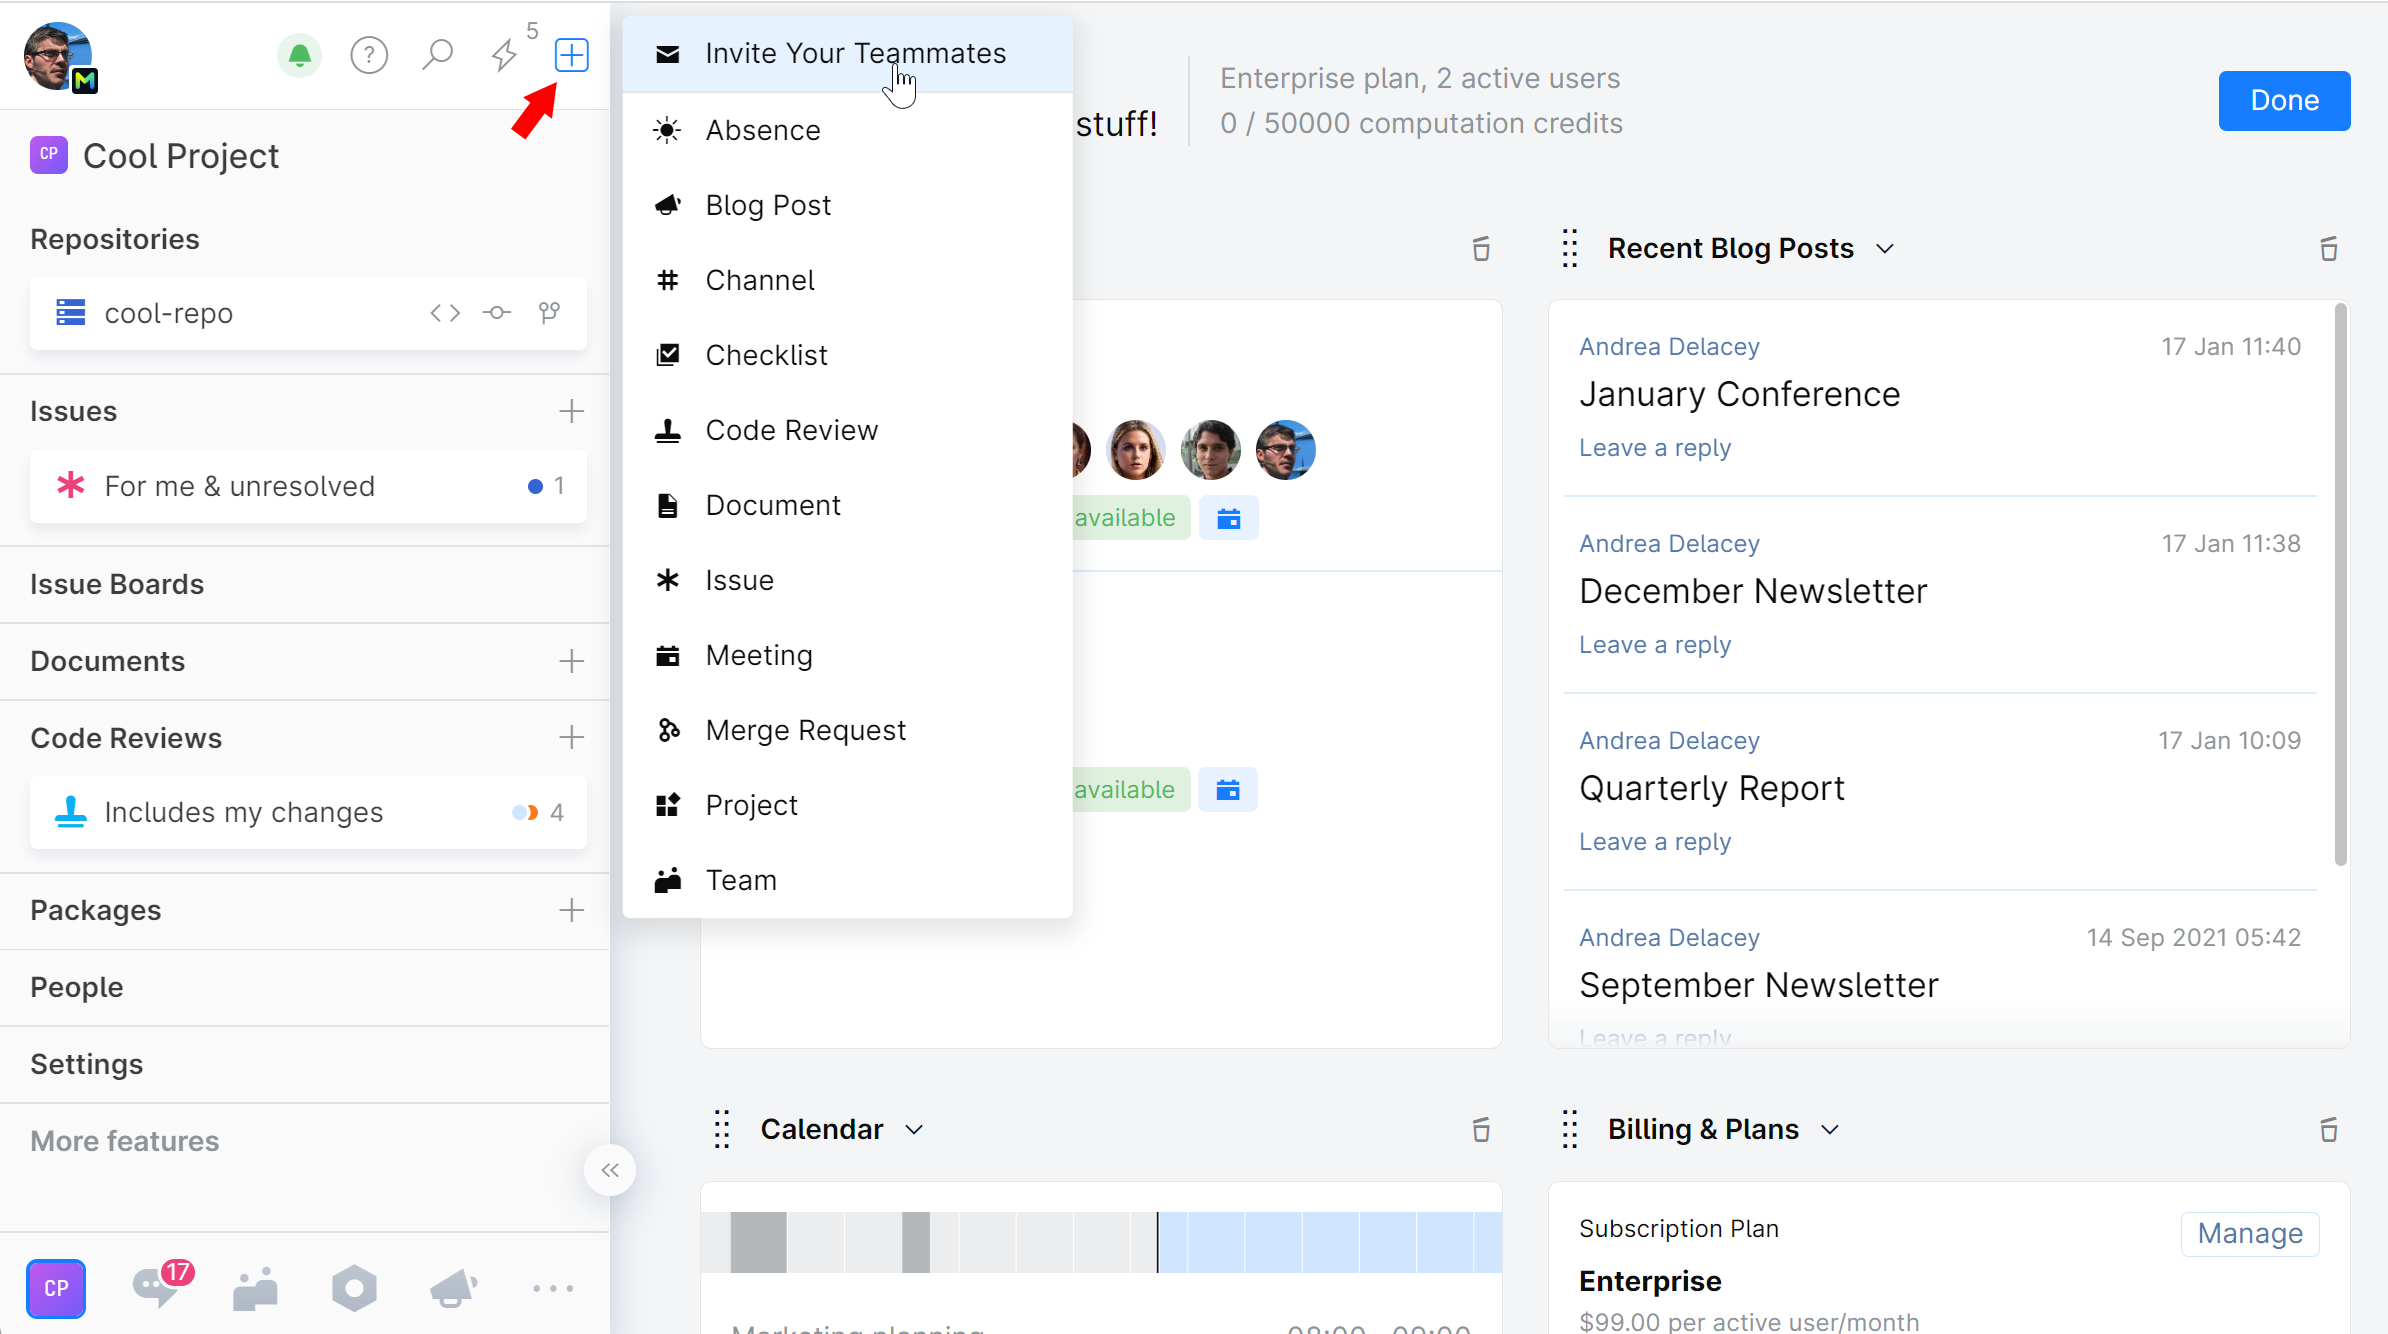
Now that you’ve added your brand assets and prepared your environment to represent your company’s structure and arrangements, it’s time to invite your team members on board. The easiest way is to send them email invitations or share a link to join. To do so, click ![]() on the top left and choose Invite Your Teammates.
on the top left and choose Invite Your Teammates.

You can also let users register with their emails or third-party credentials.
Step 3. Create Teams
Creating ![]() Teams in Space will help you ensure open work and transparent collaboration. Teams represent the actual structure of your organization and let employees find all they need to know about the company, its subteams, members, and everybody’s roles.
Teams in Space will help you ensure open work and transparent collaboration. Teams represent the actual structure of your organization and let employees find all they need to know about the company, its subteams, members, and everybody’s roles.
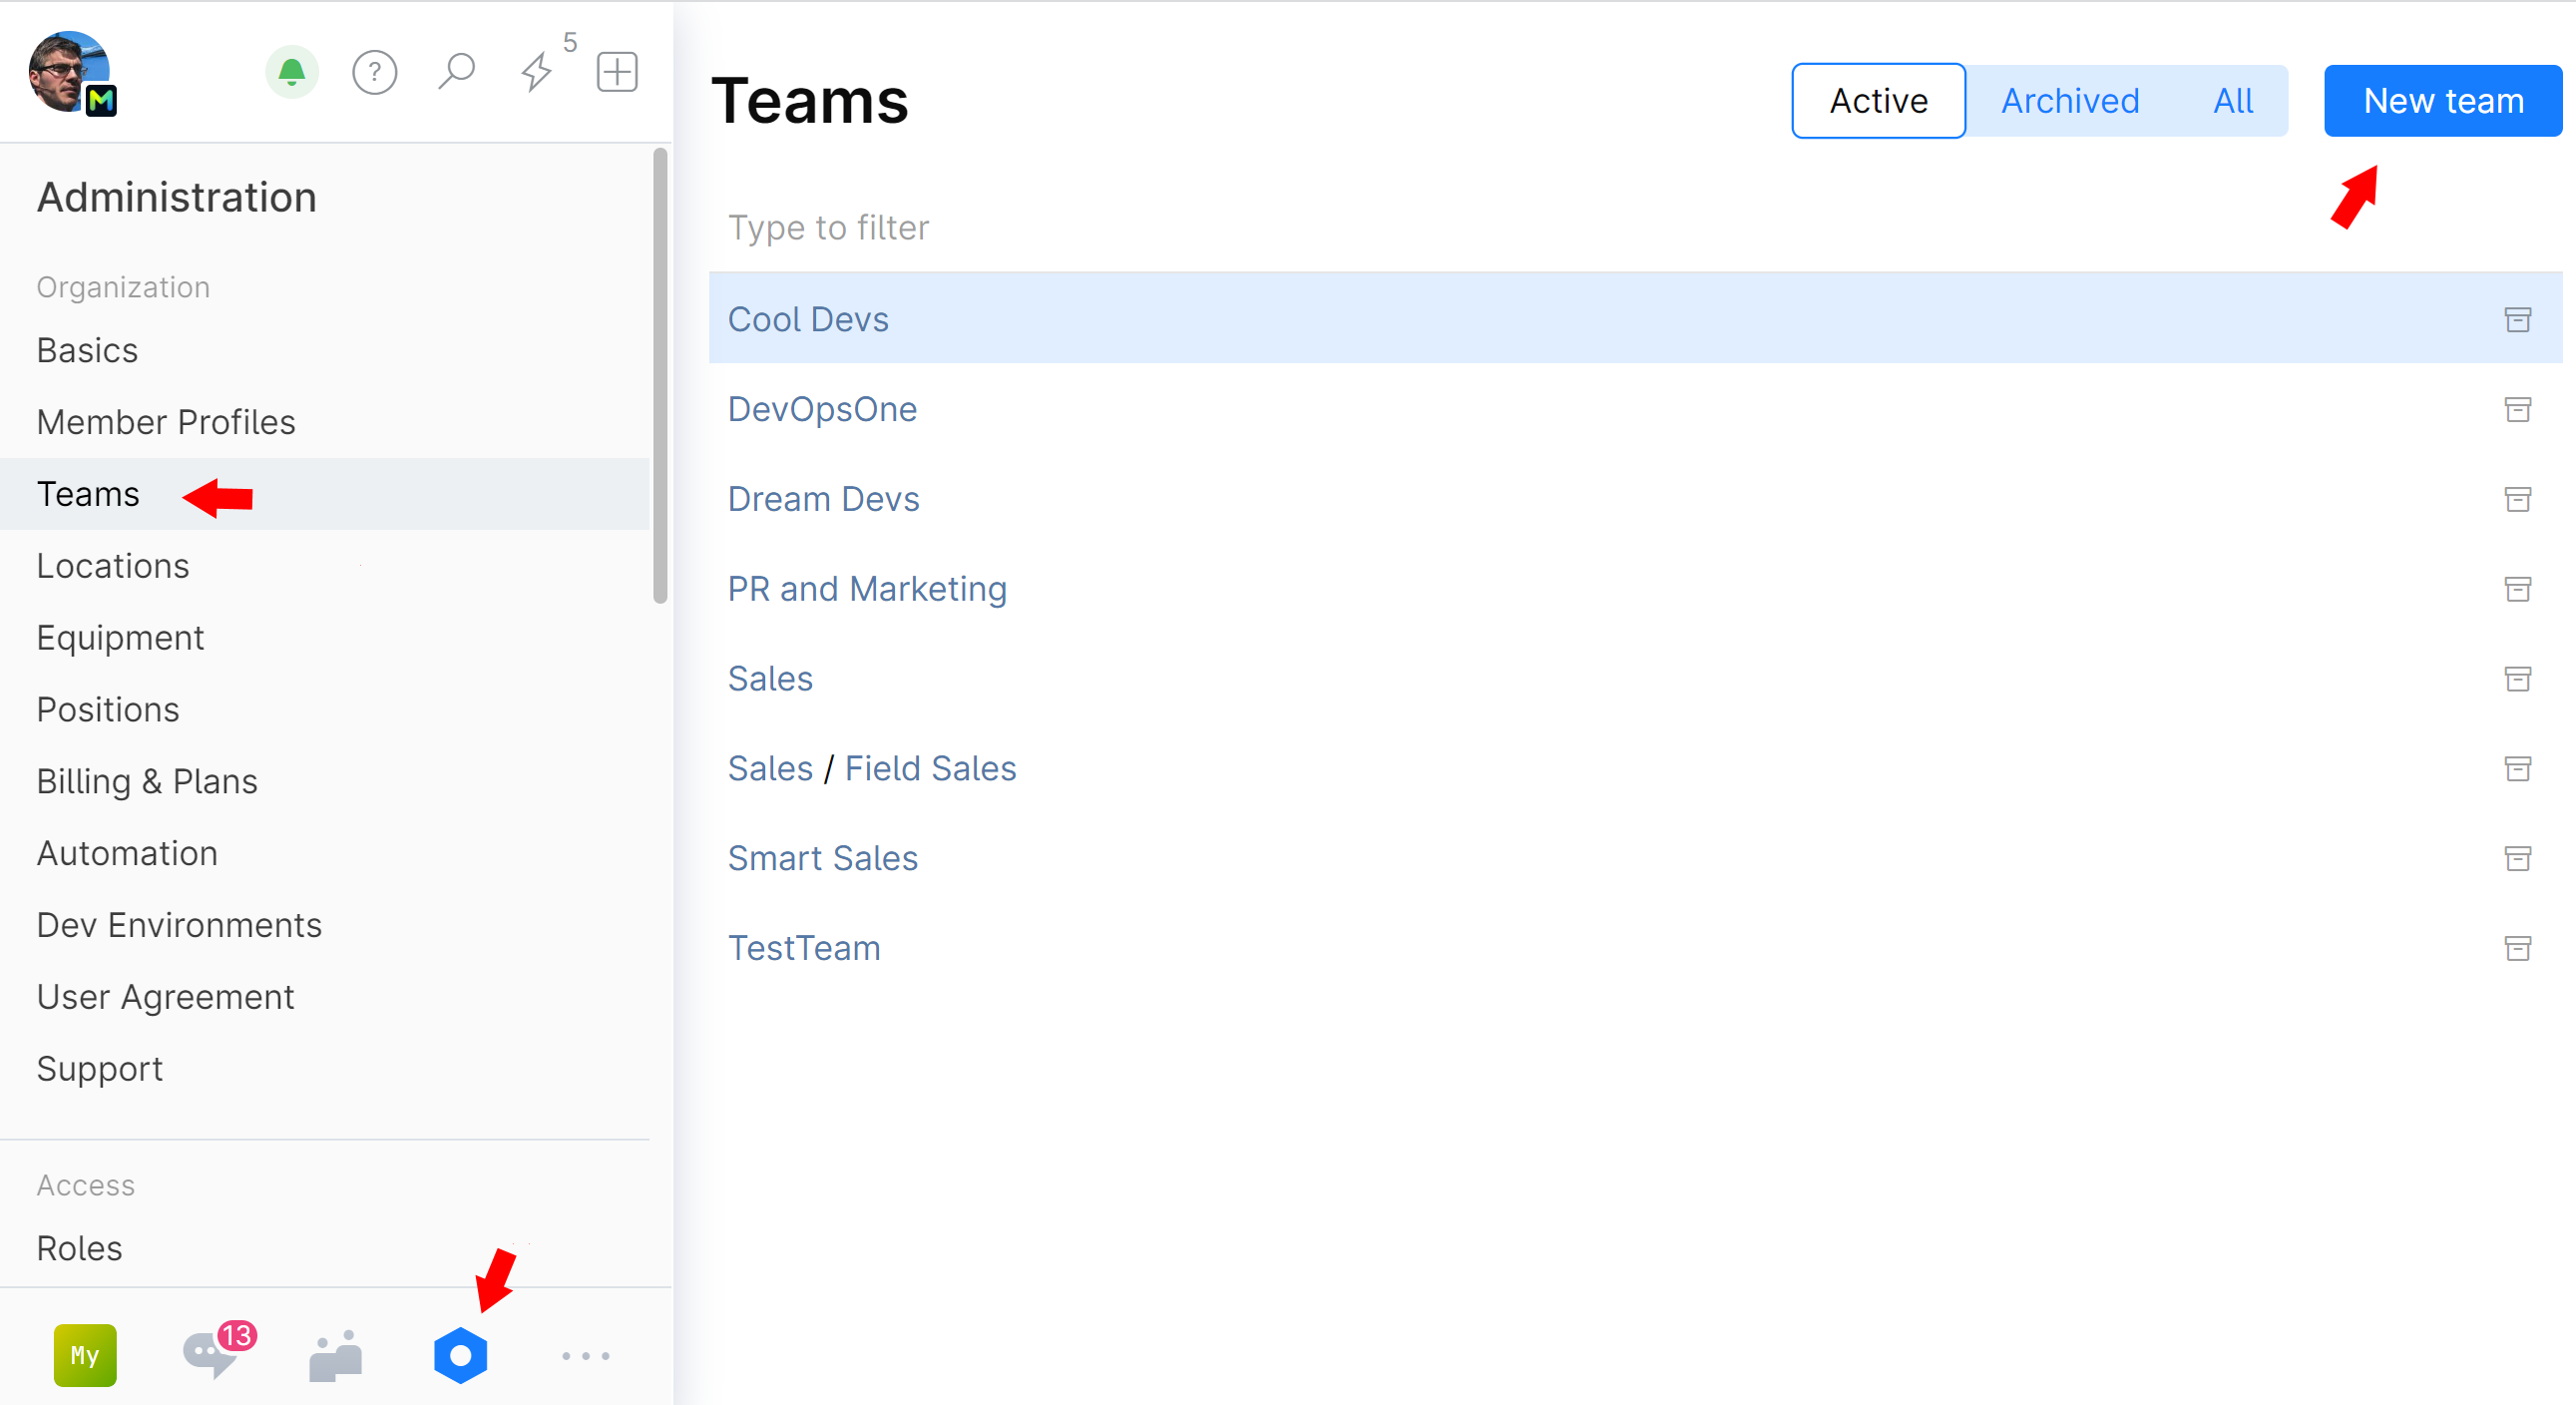
To create a team, click ![]() Administration on the main menu and choose Teams. Then, click New Team in the top-right corner.
Administration on the main menu and choose Teams. Then, click New Team in the top-right corner.

Don’t forget to assign a Team Admin, who will be responsible for adding members and defining subteams.
Step 4. Create your first project
![]() Projects are where you store and manage all resources related to a specific piece of work. Each project is outfitted with many tools to help you with various tasks: repositories, checklists, issues, boards, documents, packages, remote dev environments and more.
Projects are where you store and manage all resources related to a specific piece of work. Each project is outfitted with many tools to help you with various tasks: repositories, checklists, issues, boards, documents, packages, remote dev environments and more.
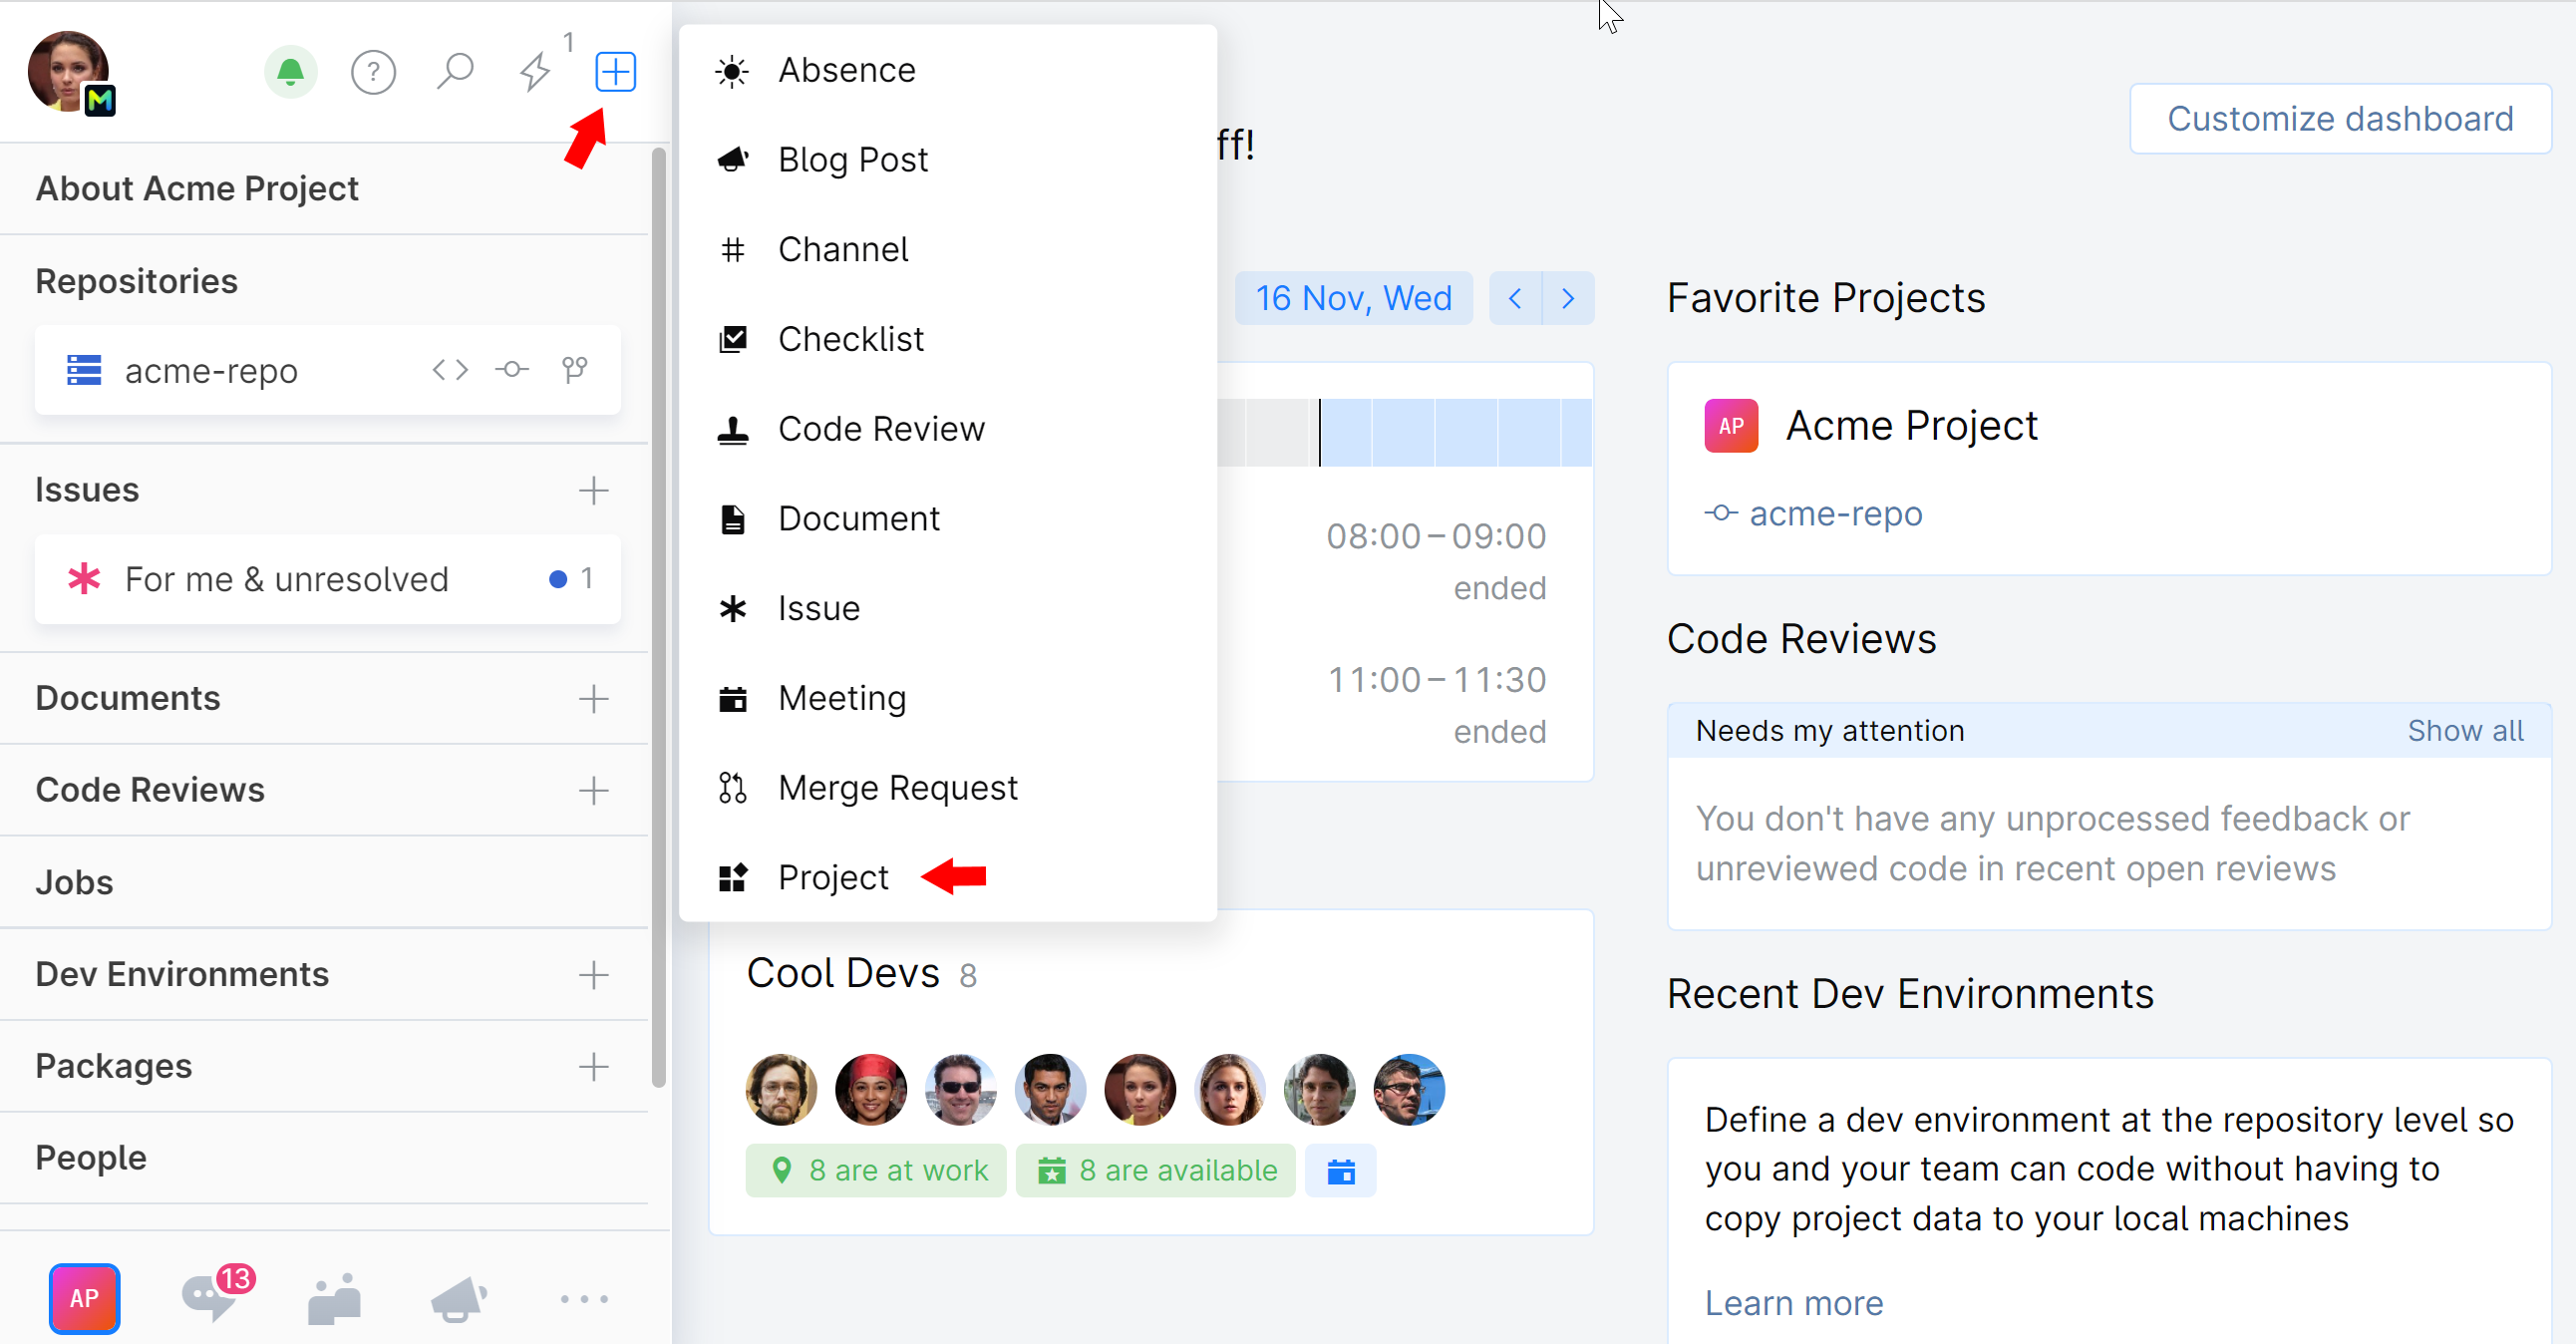
To create a new project, simply click ![]() on the top left and choose Project.
on the top left and choose Project.

Now you can start planning and working on your tasks.
Add other members or teams that will be working on the project with you.
Use project documents to describe your project vision, mission, goals and other relevant information, and plan your work using project checklists.
Set up a new Git repository from scratch or import or mirror your existing repo from another resource such as GitHub and start collaborating. Track commit history, search and examine code. Create code reviews.
Create issues to keep track of your progress. You can use issues to file bugs, submit feature requests, handle design questions, and more.
Step 5. Create channels in Chats
![]() Chats are your central hub for communication and real-time information sharing. You can use Chats to send messages to your colleagues and get personalized notifications, requests, and alerts about changes in your Space.
Chats are your central hub for communication and real-time information sharing. You can use Chats to send messages to your colleagues and get personalized notifications, requests, and alerts about changes in your Space.
We recommend you start by creating a few channels everyone in the organization can join, such as #general, #announcements, #happy-hour, etc. You can also create channels for different office locations (#Amsterdam, #Boston), teams (#design, #marketing) or projects (#user-onboarding, #website-redesign-2021).
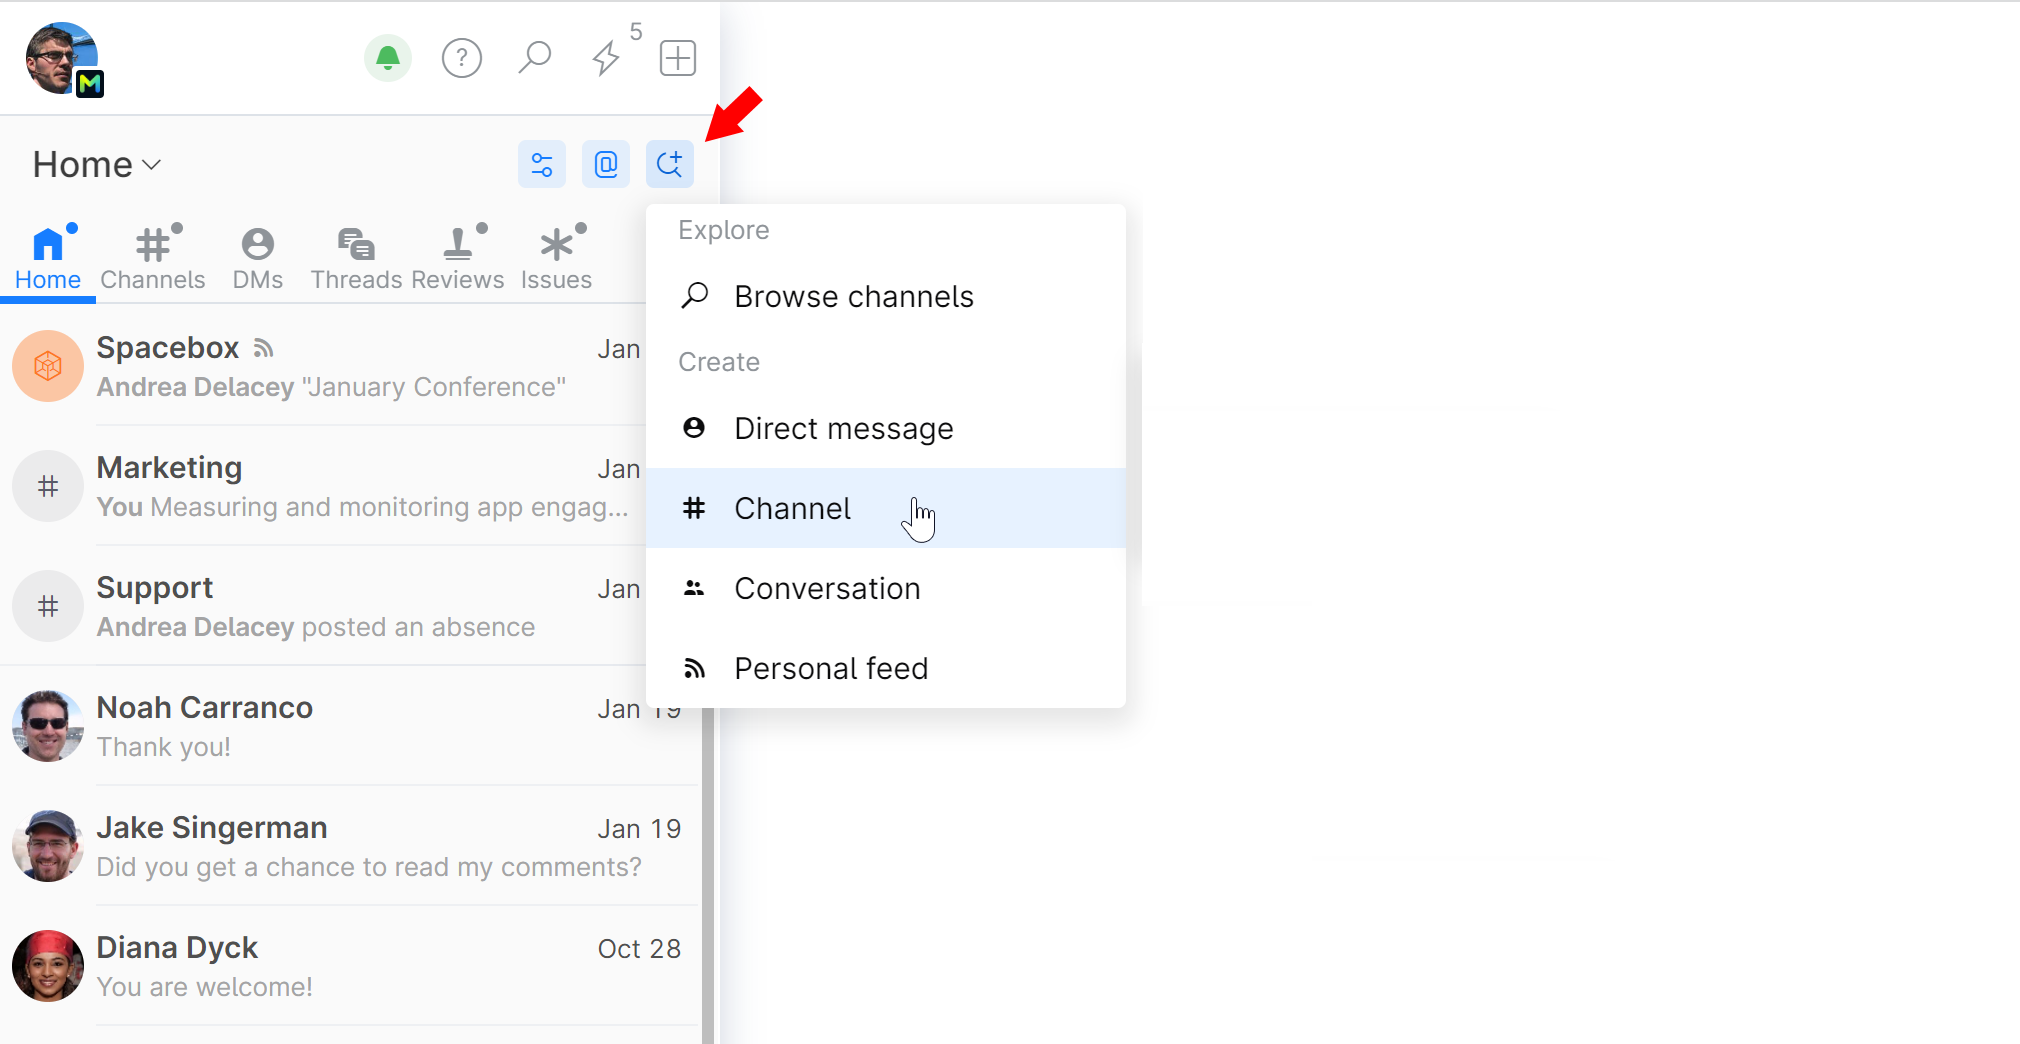
To create a channel, click ![]() on the top of the contact list in Chats and choose New channel.
on the top of the contact list in Chats and choose New channel.

Step 6. Set up a branching strategy for your project
A branching strategy is a concept that defines how branches are created for different purposes (e.g., development, testing, hotfixes) and how the changes should be merged between branches. The goal is to keep the main branch stable while allowing for flexible and concurrent development on other branches.
We recommend a strategy that is native to Space – Space Git flow. It includes many essential features that ensure merge safety: protected branches, merge requests, quality gates, and others.
Step 7. Extend and customize Space
Your Space — your rules. You can easily extend and customize Space to meet the unique needs of your company.
Use HTTP API to integrate Space with external tools.
Develop applications that work with various Space modules to manage users, track Git activity, send messages to Chats, and so on.
More resources to help you set up the perfect environment for your team
Read the Administrator’s Guide.
Check out Developer Resources.
Join our Space community forum.
Have a question or suggestion? Submit a request to our support team.